Learn more about the controls you have as a host in a breakout room session at Brella.
To be covered:
- Intro
- Settings
- Device Preferences
- Cam & mic
- Share screen and more
- Recording a breakout room
- Chat & People
Intro
Brella is focused on creating the best networking experience. The Breakout room is one feature that Brella has included to help attendees to create a small meeting room to discuss a particular topic. When testing breakout rooms, you will find that you have great control features to host a unique session.
This article will walk you through each element that the host can control.
Room Settings
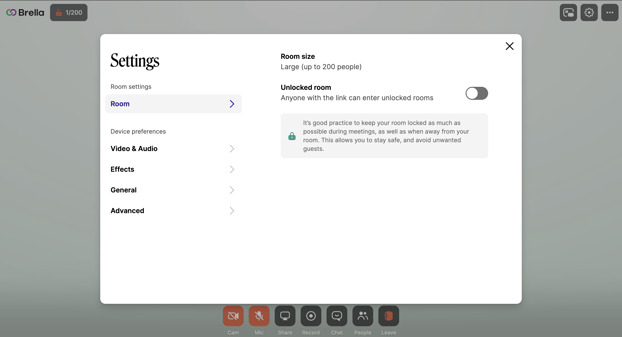
When you click on the lock or the controls icon (on the right), the settings window will open, where you'll get to modify all the room settings. (Click on the settings option - room settings/ Click on the lock option - room settings)
- Room
- If you click on the "Copy link," the attendee link will be copied to your clipboard, and you can share it with attendees who will not be joining Brella. Participants who join with this link get more control access than participants joining the room from Brella.
- The room size capacity changes based on the room size. A large room can host up to 200.
- To lock the room, you need to toggle on the button at Unlocked Room. View in detail how this works here.
- The room will be open and closed immediately at the time specified on the Admin Panel.
💡 Room settings can only be changed by a member of the relevant team or by an administrator of the event.
Device Preferences
- Audio & Video

These audio & video settings will only apply to your device. Each participant will get to choose their audio & video preferences. They include:-
- Noise reduction - Reduces the background noise in loud environments.
- HD video - Prefer HD video when available and possible (takes more resources).
- Widescreen video - Prefer widescreen video when available.
- Mirror - Mirror your own video (self-view)
You can also access your video and audio settings from the room control (below) during the session.
- General
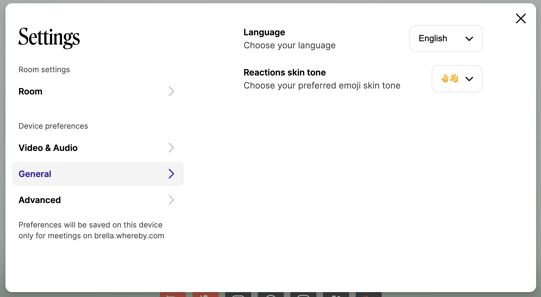
This general setting will allow you to change the language of the breakout room and the emoji color theme.
The changes will be reflected on all participants' devices; however, participants joining outside Brella can also change their setting preferences.'
- Advanced

The advanced settings allow you to set up the Pre-call review if you enable this option, participants will be asked to enable browser cam and microphone before joining the call.
The Low data mode allows you to limit the stream resolution along with other resource consumption optimization during the call.
The next feature which is the Reduce visual effects option allows you to disable all potentially expensive visual effects such as blurs, shadows, and rounded corners during the call.
And lastly, Automatically launch picture-in-picture allows you to launch picture-in-picture when sharing your screen during the call.
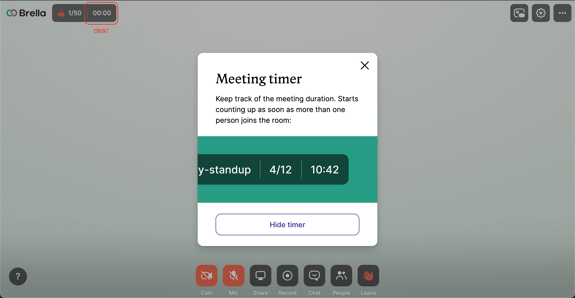
Timer
When you click on the digital clock, you'll get a Meeting timer which helps you keep track of the meeting duration. As soon as a participant joins the room, the time starts counting.
⚠️ Breakout rooms will last for the time determined given in the admin panel, and the room will close as soon it reaches its end without warning. Therefore, a good practice is to turn on the timer and keep track of the duration of the session.
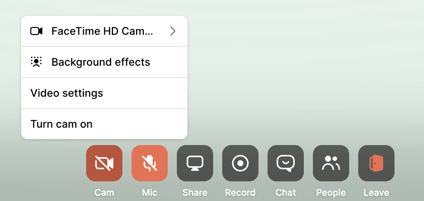
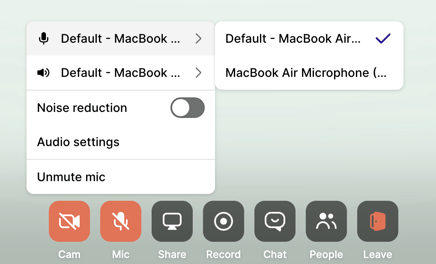
Cam & Mic
- Cam
You can also access your video and audio settings from the room control (below). In addition, you can turn on the cam anytime and ask other attendees to turn their cameras on/off.
If you cannot see the stream, please visit the troubleshooting steps for Breakout rooms.
-
Mic (audio)
You can choose what microphone you want to listen to during the session, and if you cannot hear the stream, please visit the troubleshooting steps for Breakout rooms.
- You can enable the Noise reduction function by simply clicking on the Noise reduction toggle and it will eliminate any outside noise coming in during the call.
Share screen and more
As a host, you can share multiple screens and handy tools to make your presentation more interactive.
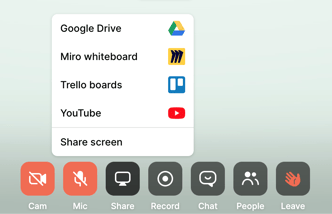
- Google Drive - If you want to share the screen with Google Drive, you have two options: 1) Add a sharing link, and Brella will start sharing your screen immediately OR 2) you can log in to your drive and share the screen.
❗If you are opt-in to log in to your drive, ensure to set up your account before the meeting starts and that you have a particular public folder that can be shared with everyone (not only your colleagues).
- Miro Whiteboard - This option is great for workshops, brainstorming, and having definitive explanations. When using this tool, you will have two options 1) create a new wall as a guest and 2) sign in to Miro and have complete control of the board.
❗Only with a Miro account can you save the board after the meeting.
- Trello boards - You can share a Trello board by adding the sharing link. To be able to share the board, it has to be public.
- Youtube - To share a video from Youtube, you need the sharing link, and that's it! As soon as you play the video in Brella, it will be saved in your history, and you can share it anytime you click on Youtube.
How to use the sharing screen options 👇
Recording a breakout room
Before recording a session, ask for permission! Then, you can register for a session by following the steps to make a recording of a Breakout Room Session Step-by-Step and learn how you can share the Breakout Room recordings file in Brella post-event.
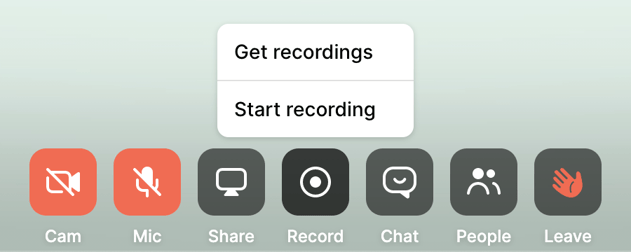
💡 The recording option in the breakout room is only available for the host.
Chat & People
- Chat - You can send emojis and moderate the chat by following up on questions. Unfortunately, you cannot delete messages.
- People - When you click on people, you'll see the participants' list and get a clear idea of the options you have when interacting with them. As a host, you put a participant in the spotlight, and you can ask them to turn their mic & cam on/off, share their screen, and remove them if needed.
-
👉On this tab, you can create groups inside the breakout rooms and assign people during the event in a matter of minutes.
Learn how to use them here: Using Breakout Groups.
-
How to use the chat & room controls with participants👇
Last updated - July 2023.
Written by Rajinda Wijetunge.

If you didn't find an answer to your questions, please get in touch with the Support Team here.
👇