Learn how to set up the event agenda with content slots.
To be covered
Intro
To create a comprehensive event agenda, Brella supports two types of schedule slots. They are networking slots and content slots. In this article, you will learn how to create a content slot as an event organizer. A content slot can be a session, keynote, workshop, etc.
Create a content slot
- Navigate to the Admin Panel -> Content -> Schedule
- Click "+New content slot" in the top right corner.
- Add the details for the content slot.
- Title - the title of the session.
- Subtitle - add additional information such as a 'tagline' can be added here. The subtitle is only seen in the detailed view when clicking on 'more details', not on the main schedule view.
- Track - Select the track from the drop-down you want the session to be added to. The tracks for the schedule will have to be created prior to creating content slots. Click on this article to learn how to create tracks.
- Who can access this slot? - At this point, you can execute 'session gating' if needed.
- This session is virtual oriented - You can turn this toggle on if your event is virtual. This marks the session more catered toward a virtual audience. In session screens, we display an icon to highlight this. This is also given as a filter option for the attendees when navigating the schedule.
- Stream/Video Url: Click here for instructions on adding virtual content to Brella.
- Date, start time and end time - Choose the date of the session, the start time of the session, and add the duration OR the end time.
- Locations - essential for large or multitrack agendas. This help to direct your attendees and ensure they know where their sessions are. They can also filter the sessions based on the location. You can select from the pre-created list of locations from the given drop-down or add a new location at this point by clicking on the 'add new location' button.
- Tags - these help attendees filter for content relevant to them. Having detailed tags help attendees navigate your event with ease. You can select from the pre-created list of tags from the given drop-down or add a new tag at this point by clicking on the 'add new tag' button.
- Speakers - a great addition to your sessions. You can first input all the speakers or add them at this point and then link them to their sessions. They will be displayed under the details. You can link speakers to sessions by selecting names from the drop-down. At this point, you can assign a pre-made role from the drop-down given for each speaker selected or write your own role for the speakers. You can learn how to add speakers on Admin Panel here. You can change the order of the speakers added by moving the speaker names as well.
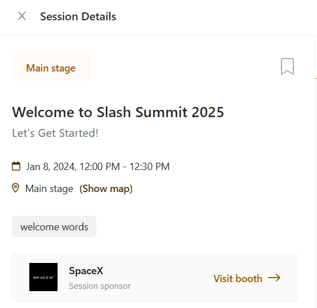
- Session is sponsored - Turning this toggle on (green) gives you the ability to connect sponsors to sessions. This is a great way to monetize event sessions. The sponsor's logo will be visible on the session tile, and there will also be a link to visit the virtual booth of the sponsor in the details section. You can add only one sponsor per content slot.
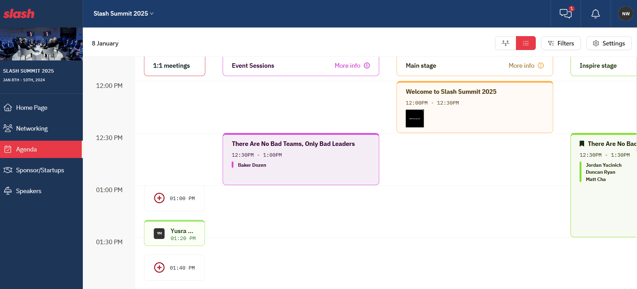
Web App view
Mobile app view
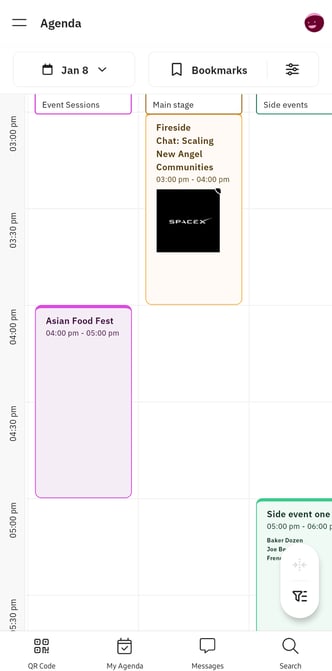
-jpg.jpeg?width=332&height=672&name=Screenshot_20230615_044206_Brella%20Demo%20(1)-jpg.jpeg)
- Description - You can add a session description here. The content you add here will be visible when clicked on 'more details' on the session tile.
- Highlight this session once the event has ended. With this tag, you can position the sessions in the order wanted on the home screen once the event is over. Go here for details.
- Once you're done, select Create to save the content slot created. You can tick Create another check box to continue creating content slots for the schedule.
✍️POINTS TO NOTE
- You will not be able to add overlapping sessions for a specific time slot on the same track. Only one slot can be created for any given time period in one track, and a warning will be shown if the timings are overlapping. If you have two sessions at the same time, it is advised to add them in two separate tracks to avoid such overlapping.
- If a session is sponsored and has highlighted speakers as well, only the sponsor logo will be visible on the schedule card. If a session is not sponsored and has featured speakers, the speaker images will be shown on the schedule card.
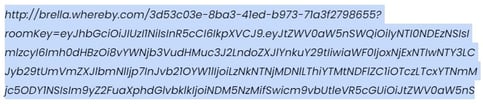
🚨 Note: links/hyperlinks must follow the below structure:
💡Once you build your first content slot, you can see how it looks in the actual event at next.brella.io and on the Brella mobile app. The changes you make to this content slot will be automatically reflected on the front-end site.
Last updated - June 2023.
Written by Nisansala Wijeratne.

If you didn't find an answer to your questions, please get in touch with the Support Team here.
👇