Learn how to add participants/sponsors and classify them according to their attendance/ticket types or remove them from groups.
To be covered:
Intro
Event participants and sponsors can be easily added or removed within a specific group in an event. They could also be classified according to the ticket type they purchased or the access level that they have been provided by the group function.
Adding Members to a Group
After creating a custom group, you can add members and categorize them according to their attendance and ticket types.
You can add members from two places:
- From the People - Groups tab - if your event registration is with the public join link OR
- From the People - Invites tab - if your event registration is with the Invite-only (unique join link)
➡️ Method 1: Through the GROUPS tab
You can also add members to a group manually through the Group card. This flow applies to both default and custom groups.
- Navigate to the Admin Panel - People tab and click Groups.
- If you need to add new participants to a new group, you will see a prompt to +Add members.
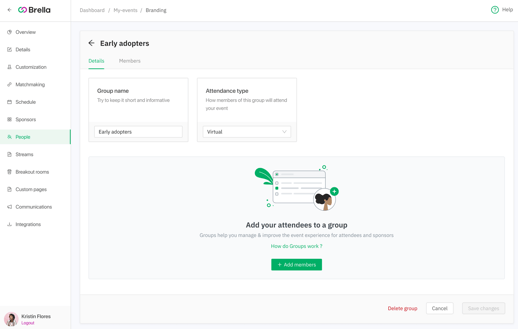
- 📌 If the group already has some members, you will have the +Add member button on the right side.
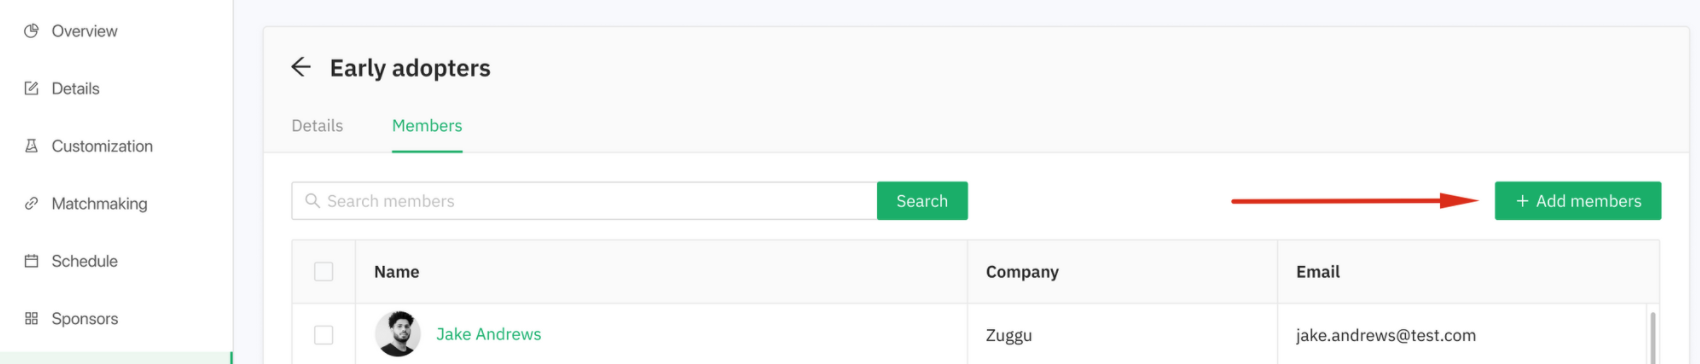
- 📌 If the group already has some members, you will have the +Add member button on the right side.
- Click +Add members.
-
Inside the Add Members drawer, the list of all attendees will be loaded. You can select multiple attendees at a time, and search by attendee name. There is also a switch to show only Sponsor representatives for a quick selection.
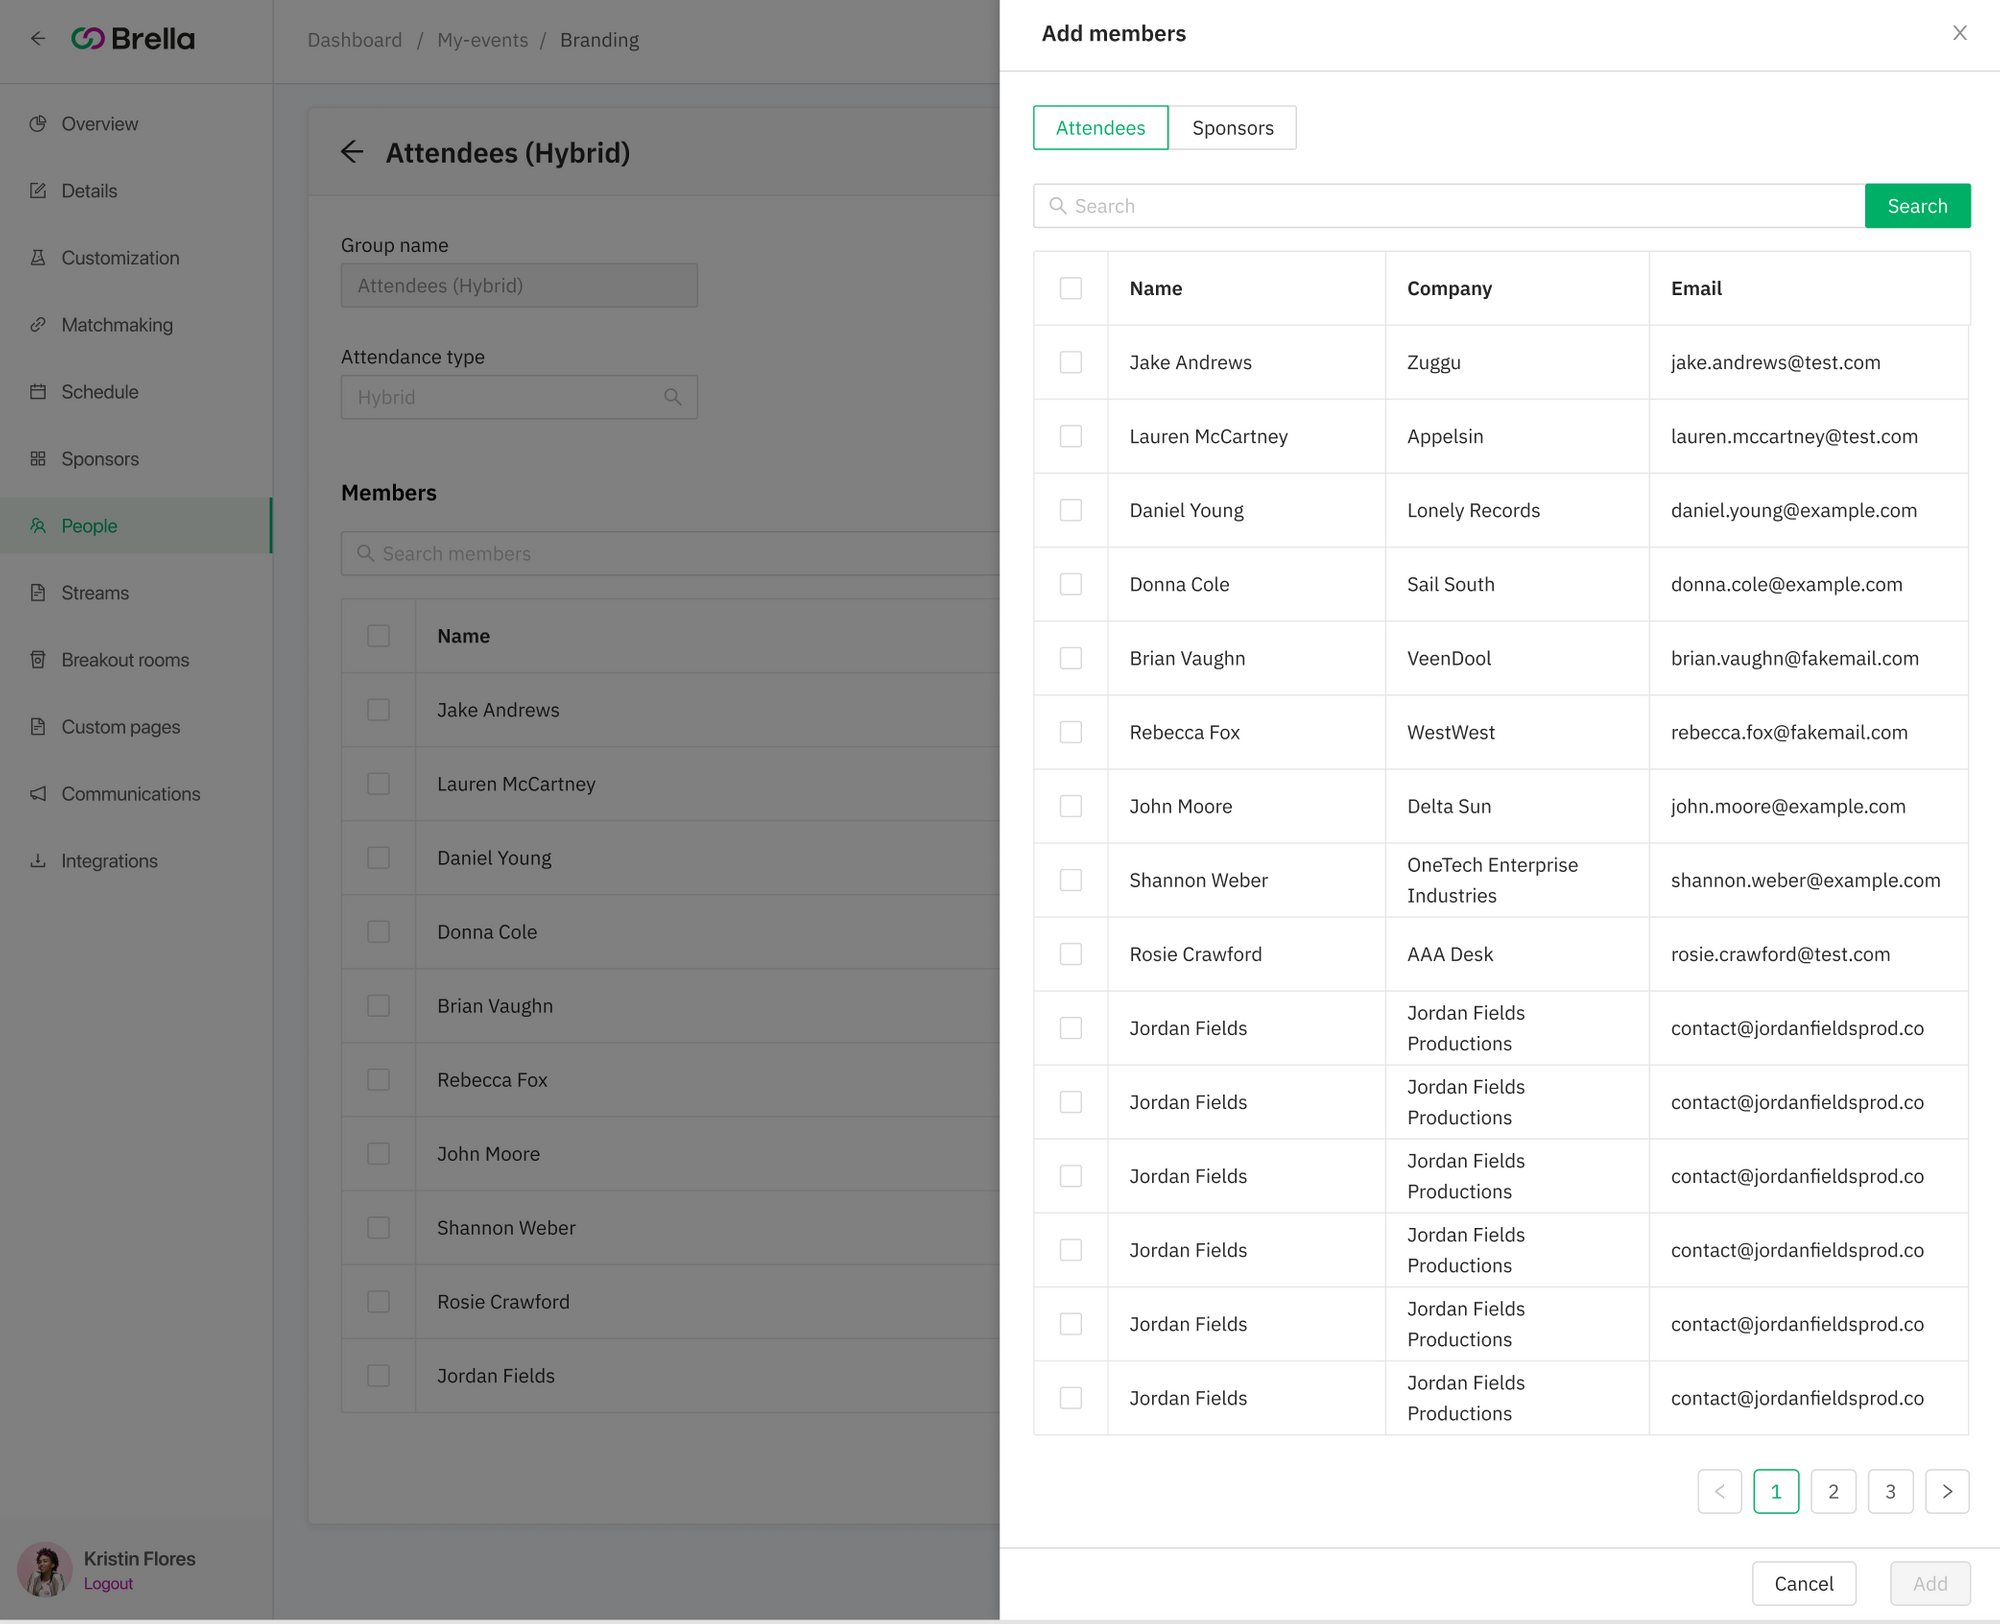
-
Make your selections and save the changes.
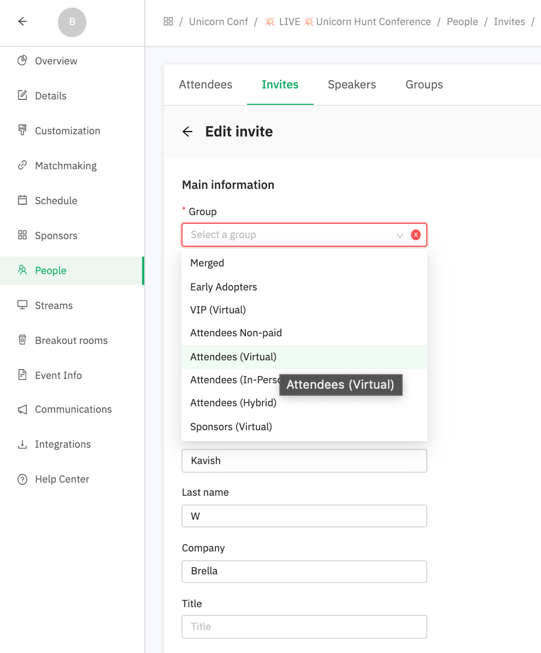
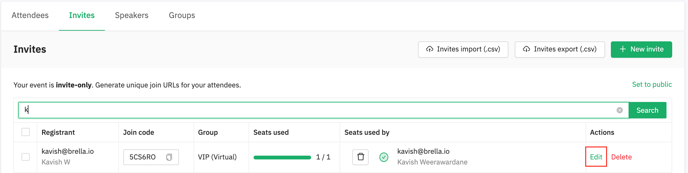
Method 2: through the INVITES tab
When creating an Invite, you will need to select a Group, so this new invite (unique join code) is assigned to the appointed Group. This way, you add new members to a Group through Invites. Let's see the steps:
👉 To add a NEW PARTICIPANT OR SPONSOR to a group, you need to:
- Navigate to the Admin Panel - People tab - Invites.
- Click on the New Invite button.
- Once you have the Invite open, you can choose a Group name, Email, and Seats. These are mandatory columns to fill in, and the others are optional.
- Once you have completed filling in the details, the invite is created and is now waiting to be redeemed.
💡 Once an attendee uses a join code from that invite to join the event, the attendee will be added to the group. You will see his name, his code, his group, how many seats he has, and what email he used to join the event.
Method 2.1: through the INVITES tab (CSV file)
You can add multiple new members to a Group by importing their details and creating a new unique join code for each.
To do so, follow the instructions in this article.
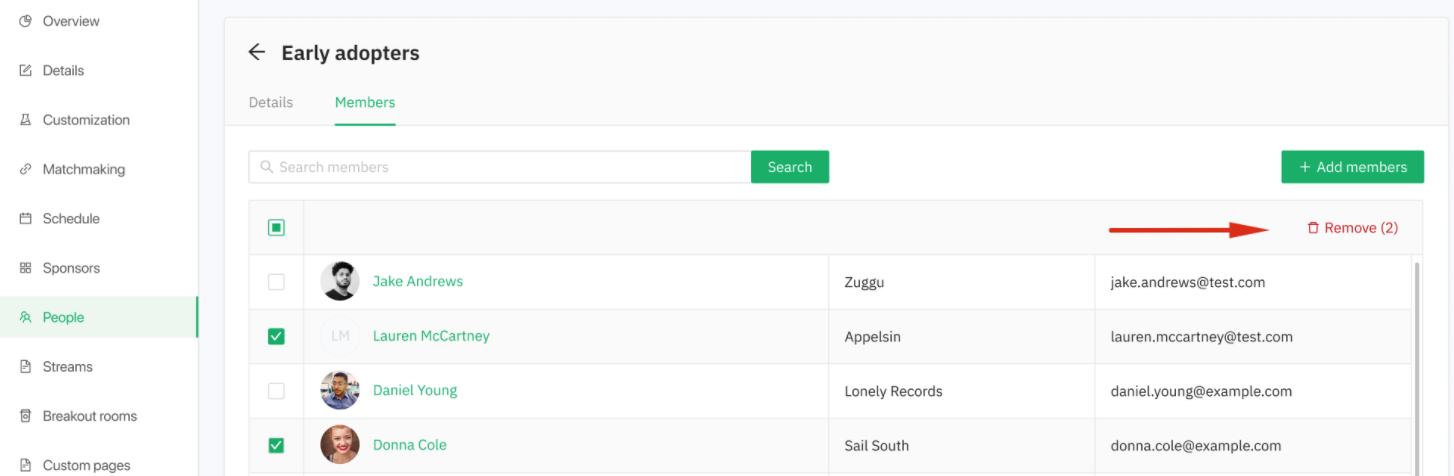
Removing Members from a Group
It's possible to remove one, multiple, or all participants from a group by clicking the checkboxes to the left of their names. Once at least one item in the table is selected, the table header will have a Remove button.
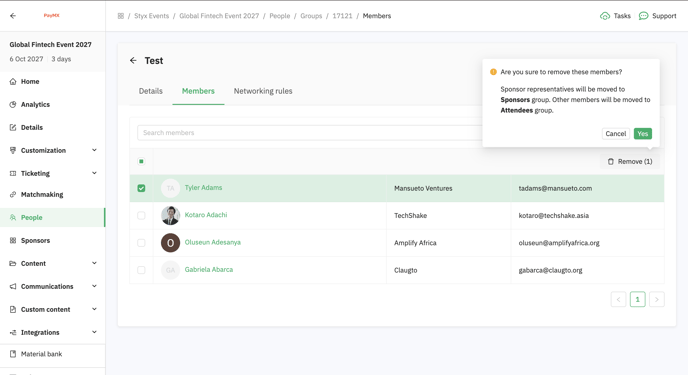
❗Removed members are moved to a default group - Attendees / Attendees (Virtual), or if the members were a sponsor representative, to Sponsors / Sponsors (Virtual).
👉 Removing an Attendee from a Group
- Navigate to the Admin Panel - People tab - Groups.
- Select the attendee profiles you want to remove.
- Once you are done with your selections, click on Remove.
💡This removal option will not be activated for the default groups of your event. If you wish to remove an individual from a default group, go to the group you want the participant to be added and follow the same steps as Method 1: through the Groups tab and move the participant from one group to another. This will remove the individual from the default group automatically and add them to the group you desire.
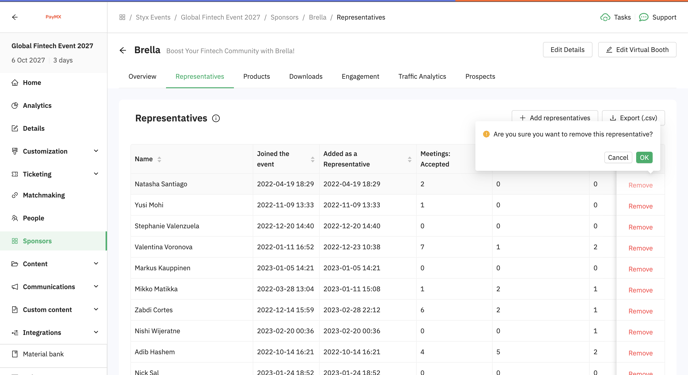
👉 Removing a Sponsor Representative from a Group
- Go to the Sponsor tab.
- Select the Sponsor profile you want to edit.
- And then select the Representatives
- Click on Remove.
- When you remove a Sponsor Representative from the last booth, they're assigned to, AND they're not a member of a custom group, the rep will be moved to the Attendee Group.
-
MESSAGE: ❗Are you sure you want to remove these members?
- If that person was in Sponsors (Virtual), the attendee will be moved to the Attendee Group. (Image above)
- If the person was in Sponsors (In-Person) or Sponsors (Hybrid), the attendee will be moved to the corresponding Attendees group (Attendees) (Image below)
Last updated - July 2023.
Written by Rajinda Wijetunge.

If you didn't find an answer to your questions, please get in touch with the Support Team here.
👇