Learn how to set up ticketing for your event along with social media links
To be covered:
Intro
Brella ticketing is available on the admin panel to offer you as an organizer a much simpler system to get your participants an interactive ticketing and registration experience without using different platforms and websites.
Using Stripe as the primary joint software for ticketing, you get multiple features including customizable registration pages, paid or free ticket options, discount coupons, etc.
Where to find on the Admin Panel
- Navigate to manager.brella.io
- Click on the event
- Navigate to the 'Ticketing' tab
- Here you can set up the preferences for ticketing!
Set up Ticketing (steps)
To set up ticketing, follow the steps below:
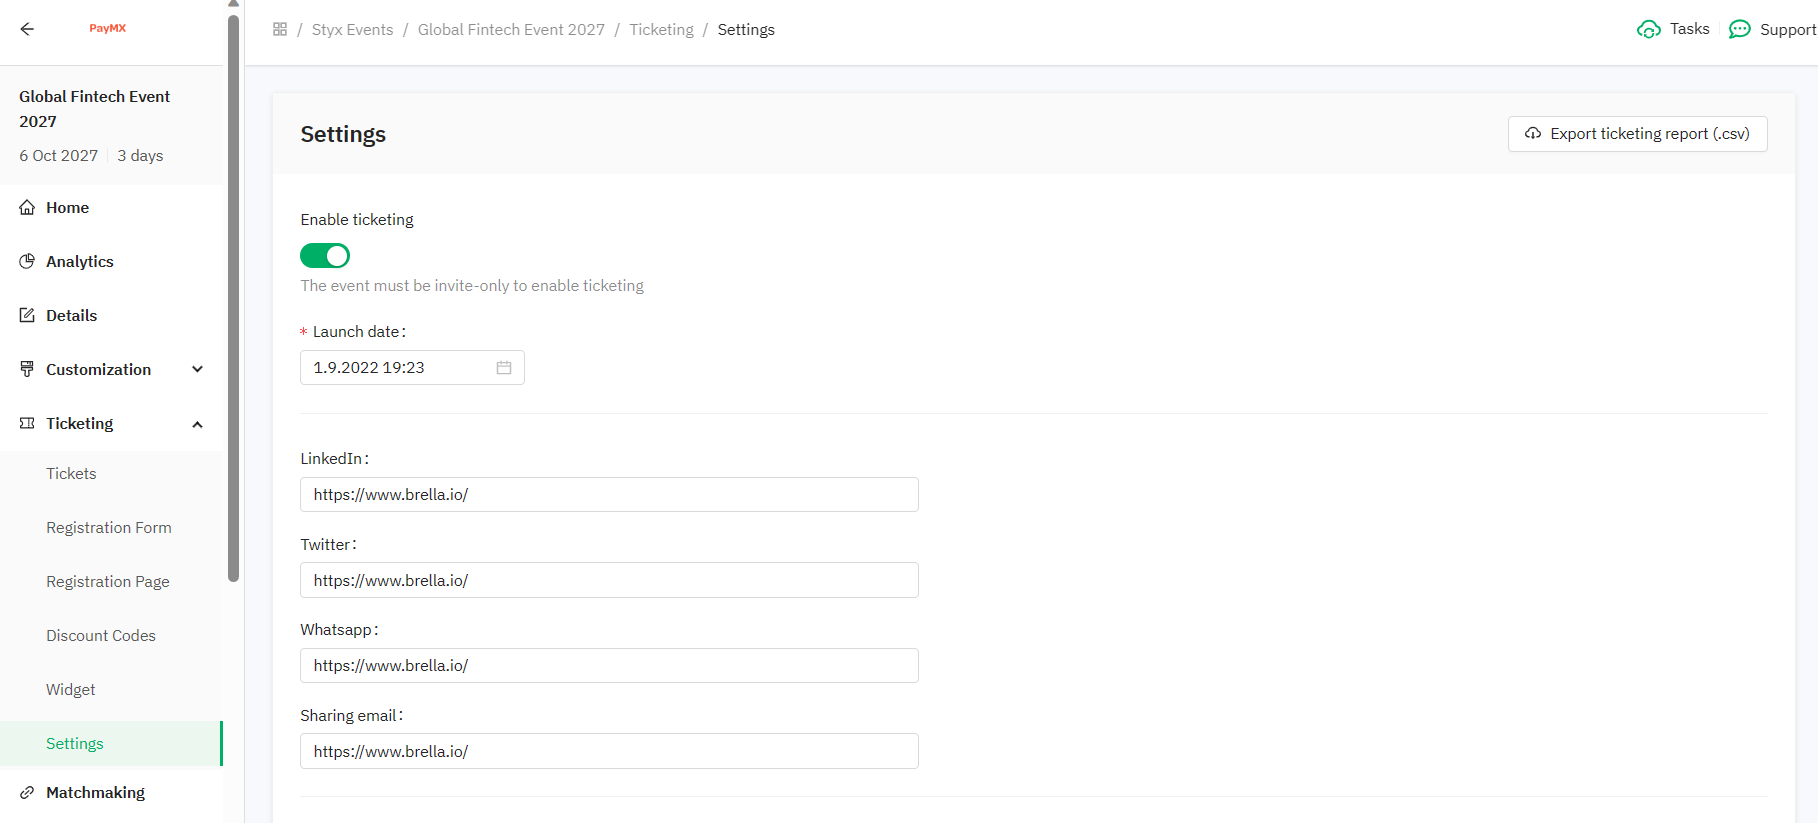
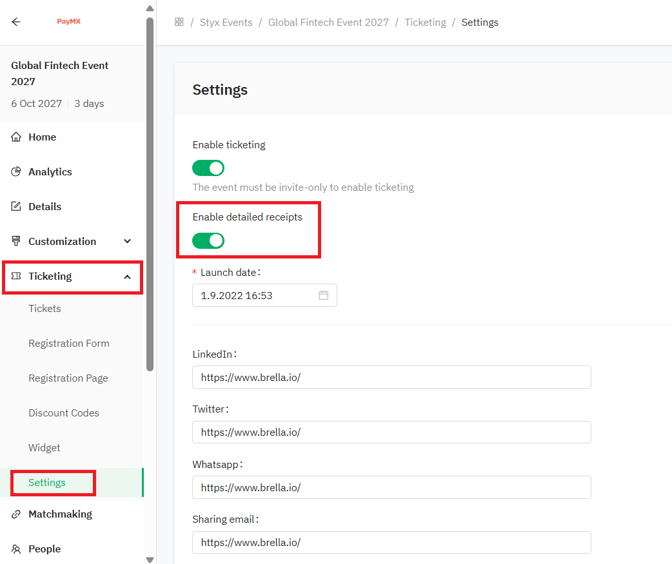
- Admin Panel -> Ticketing -> Settings
- Toggle to enable ticketing (disabled by default) (Only available for invite-only events)
- Select the launch date and time
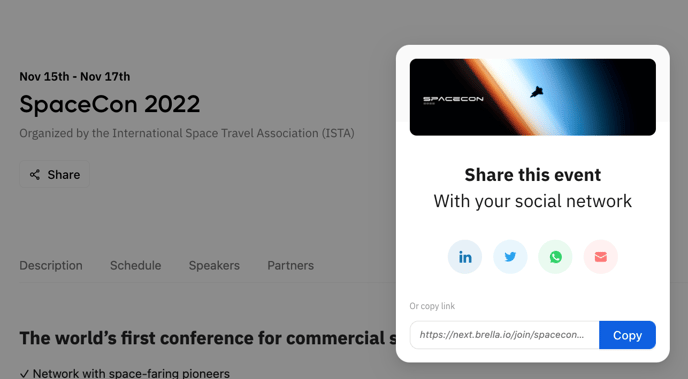
- Set up the SM share links (links with pre-filled text so attendees can share the event registration page with others almost instantly)
- Save and proceed to the first tab, 'Tickets'
- Under 'Tickets' - follow the steps to link the stripe account
- Proceed to the third tab - Registration Page
- Complete the provided form to finalize the registration page - a preview of the same can be viewed immediately.
- Scroll down and click save and proceed to the second tab - Registration Form
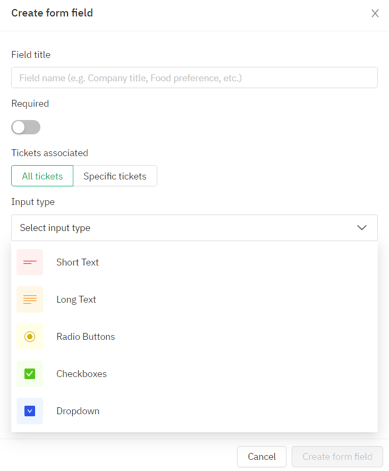 By default, only the first name, last name, and purchaser and registrant's email details fields are made available.
- Create new form fields through the 'create new button', which will open up a form as shown.
Once this step is completed: you have successfully set up the ticketing feature for your event.
Keep reading to learn more about the launch date, Stripe connecting, and SM share link setup details.
Launch date
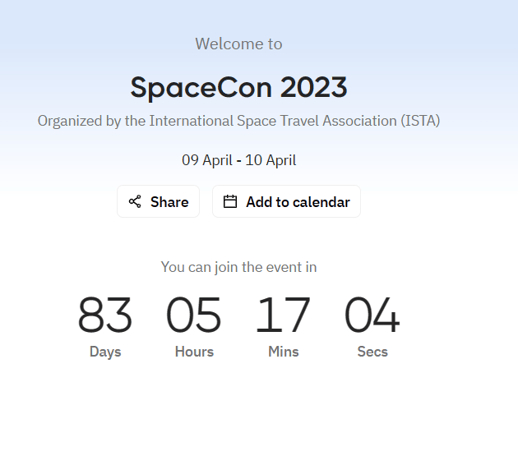
- Registrants will land on a countdown page after claiming the event until the platform is launched. This count-down page is excellent for building expectancy and excitement! 🙌
- 'Launch date' is a mandatory field. It can be modified, but it is highly recommended to set the launch date to two weeks before the start of the event or align it with your communications strategy.
❗Note: Launch date and event dates are different. The launch date is when you allow participants to access the platform to start setting their profile, pre-book meetings, and get familiar with the app and content displayed (schedule, sponsor booths, etc.). The event date is when the event officially starts.
Connect your Stripe account
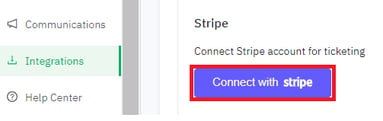
- Go to the Admin Panel > Integrations tab > click on 'Connect with Stripe'
- Follow the steps to connect your existing Stripe account. It will ask you to create a new account or verify it, if you already have an account.
- If you already have an account, make sure to log in to your account first and then verify it again by filling in the account details again on Brella.
- If you don't have a Stripe account, create one during the integration process with Brella or do it separately before connecting to the platform. Have at hand your company's billing information and details, especially for taxation and legal purposes.
❗ With Brella, you are always required to create a new Stripe sub-account with a new ID that is linked to your main Stripe account, as we do not support connecting existing Stripe accounts to Brella.
If you don't complete the sub-account creation entirely, it will go into test mode and will prevent Ticketing from working properly with Brella. Ensure to have it complete before testing.
Enable detailed receipts
Now you have the ability to enable a detailed receipt on the Stripe end by activating a toggle in Brella. Please note that Stripe levies a small charge for each sent invoice. This toggle is available under the 'Settings' section of the 'Ticketing' tab on the admin panel.
Social Media Links
Formulate your personalized sharing links to allow attendees to share your event with others.
To-do
Before adding the social media links to the admin panel, it's necessary that you encode the text and event URL or registration page URL for some of the social media options (LinkedIn, Whatsapp, etc.)
- Find the Registration link from the admin panel > Ticketing tab > Registration page sub-tab

- Find your event URL from the admin panel > Details tab

- Use free online software here. All you need to do is to type the message you want to appear as a message and add the corresponding link to your event.
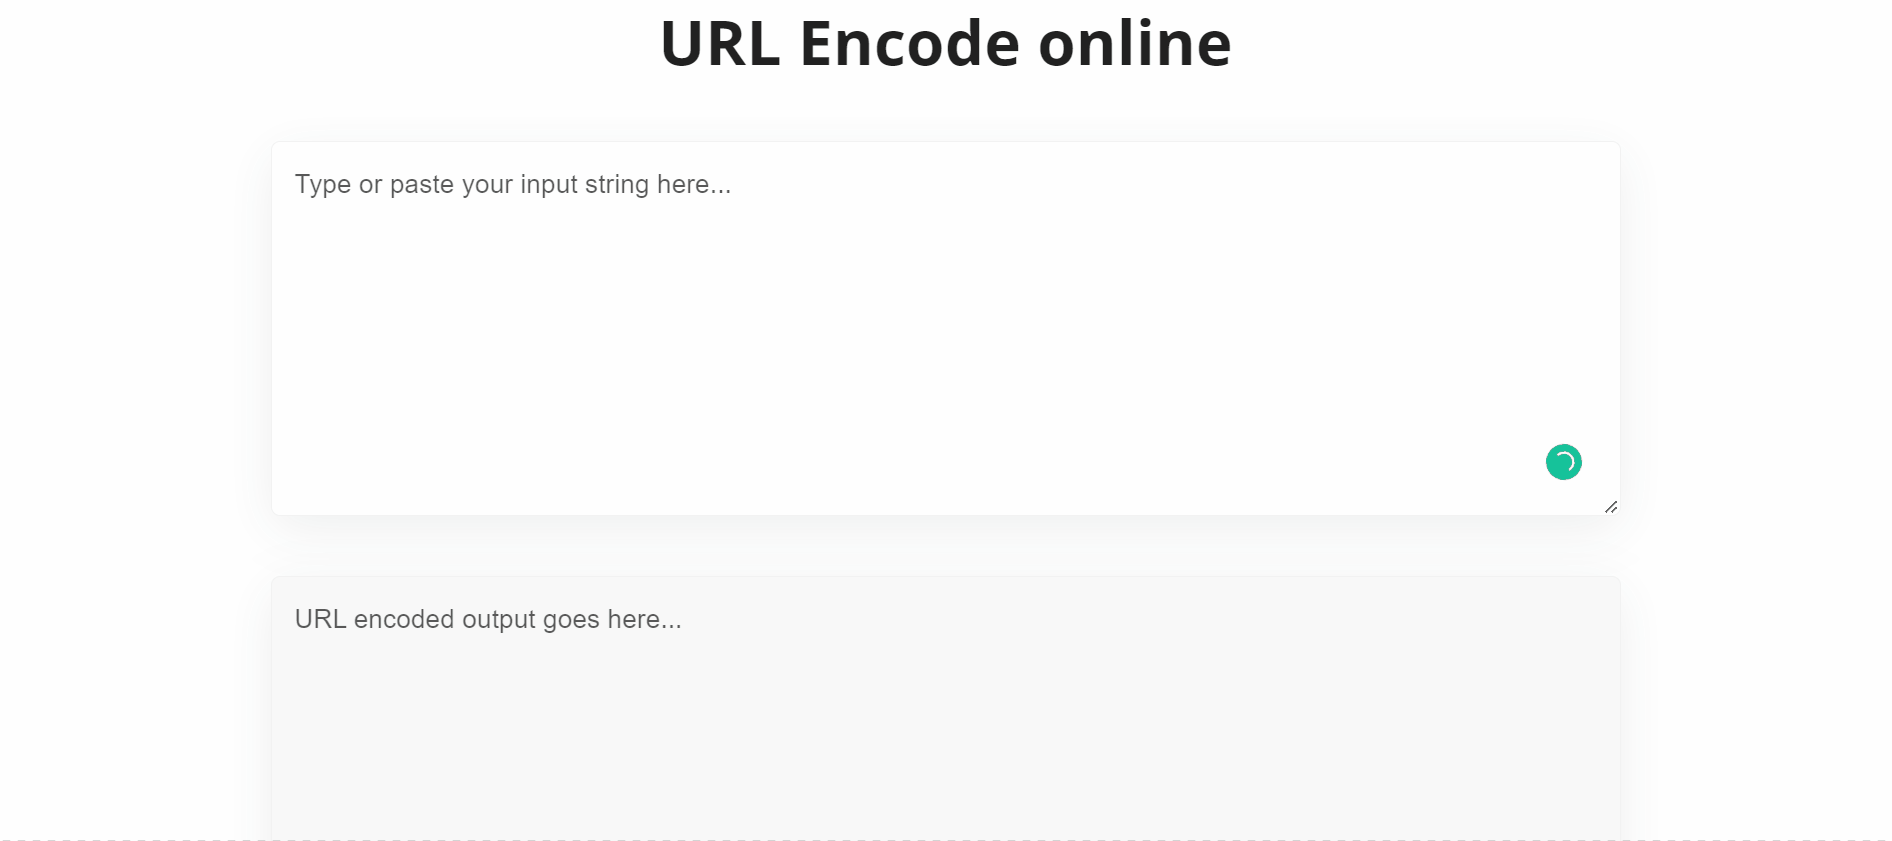
Create a personalized link to share your event
1. Use the Encoded link of your event registration or event URL
2. Encode the text
3. Copy the link below and replace the bold areas:
https://www.linkedin.com/shareArticle?mini=true&url=&title=
🔢For example:
https://www.linkedin.com/shareArticle?mini=true&url=https%3A%2F%2Fnext.brella.io%2Fjoin%2Fcommunitylaunch&title=Join%20the%20upcoming%20Community%20Launch%20event%20on%20Brella%20
Creating your own WhatsApp link for sharing purposes
As long as you have an actual phone number and an active WhatsApp account, you can create a link that will allow you to create a sharing link. A chat window will automatically open by clicking the link, and anyone can chat with you. 'Click to chat' works on both your phone and WhatsApp Web.
👉 Option 1 - Create a personalized link for chat
Use https://wa.me/<number> where the <number> is a full phone number in international format. When adding the phone number in the international format, omit any zeroes, brackets, or dashes.
Examples:
✅Use: https://wa.me/1XXXXXXXXXX
🚫Don't use: https://wa.me/+001-(XXX)XXXXXXX
👉 Option 2 - Create a share link with a pre-filled message
Follow the steps in this article or copy the link below and replace the encoded text with your own text and event URL.
1. Use the encoded link of your event registration or event URL + text (all together)
2. Copy the link below and replace the bold area:
https://wa.me/?text=
🔢 For example:
https://wa.me/?text=
Join%20the%20upcoming%20Community%20Launch%20event%20on%20Brella%20https%3A%2F%2Fnext.brella.io%2Fjoin%2Fcommunitylaunch
Creating your personalized link
1. Use the encoded link of your event registration or event URL + text (all together)
2. Copy the link below and replace the bold area:
https://twitter.com/intent/tweet?text=
🔢 For Example:
https://twitter.com/intent/tweet?text=Join%20Community%20Launch%20on%20Brella%3A
%20https%3A%2F%2Fnext.brella.io%2Fjoin%2Fcommunitylaunch
Creating your own link for sharing purposes
1. Encode the text you'd like to add. For example:
Subject: Join the Community Launch
Body:
Hey,
Join the Community Launch on Brella.
You can join here + link
2. Use the encoded link of your event registration or event URL
3. Copy the link below and replace it with the corresponding parts:
mailto:?subject=&body=
🔢 For example :
mailto:?subject=Join%20the%20Community%20Launch%20&body=Hey,%0A%0AJoin%20Community%20Launch%20on%20Brella%0AYou%20can%20join%20here%3A%20https%3A//next.brella.io/join/communitylaunch%0A
- Once an attendee clicks on the relevant icon, they will be redirected to share the link through that platform (Linked, Twitter, Whatsapp or Email).
Congratulations; you have now successfully set up the ticketing feature of your event!
Best wishes for a successful event ahead!
Last updated - June 2023.
Written by Nisansala Wijeratne.

If you didn't find an answer to your questions, please get in touch with the Support Team here.
👇