Learn how to send push notifications to event attendees
To be covered
- Scheduling announcements (Steps)
- Announcement examples to enhance your event's communication for Virtual, In-person & Hybrid events
- Publish announcements as stories - Mobile app
Intro
Event announcements are messages that participants will receive as push notifications on their browser or mobile app once they've accessed the event platform. This will depend on the app version they are using for your event.
- Announcements will only reach participants who have allowed notifications on their Brella account and their devices (desktop and mobile).
- The participants only receive these notifications if the devices are connected to the internet.
- Announcements can be sent instantly or scheduled for a specific time.
Let's get started!
Instant announcements are great for sharing messages at any point in time.
Create an announcement
- To create an instant announcement, navigate to the Communications > Announcements tab. Then, click the Create New button to call the drawer.
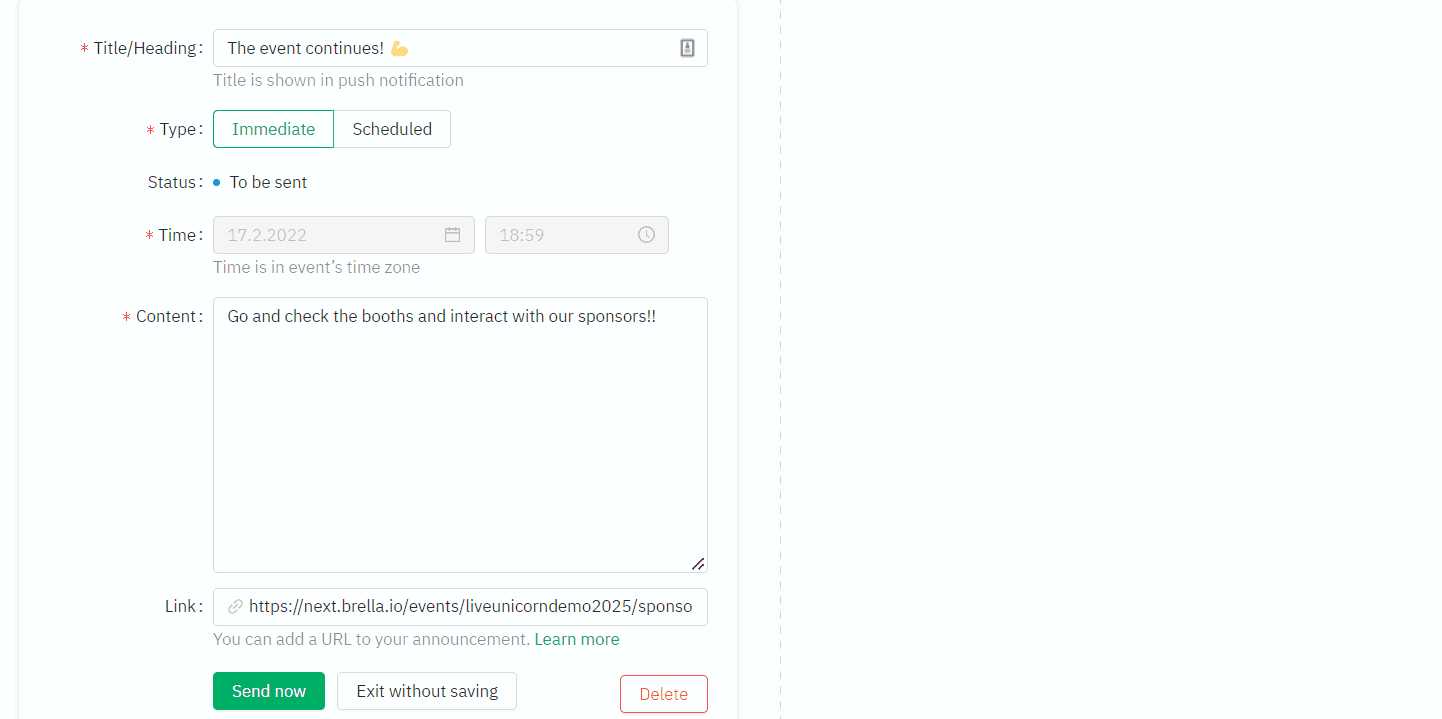
- Next, add the details of the message with a Title, Message, and Link.
- Select who can see the announcement. If it is anyone or a special group.
- Select if the announcement should be sent immediately or if it should be scheduled.
If the announcement is "Immediate" you have to toggle on the send button whereas in a "Scheduled" you need to select the date and time when it should be sent.
Immediate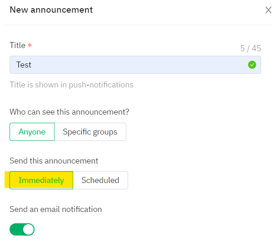
Scheduled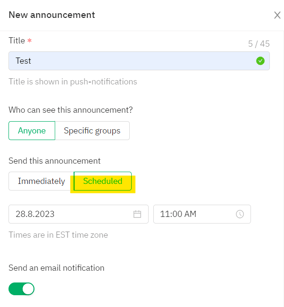
- Select the toggle to send an email notification for the announcement.
- You can preview how the announcement will be.
- If everything is correct, then select Save.
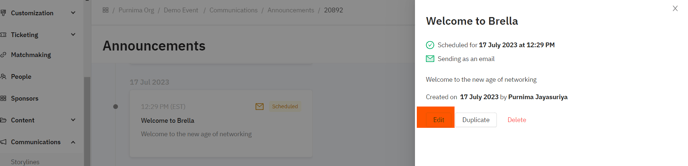
Editing an announcement
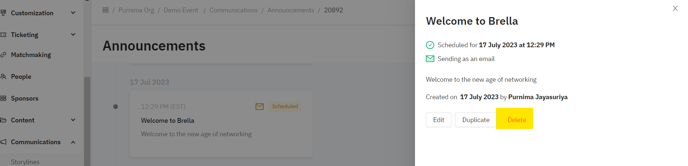
If you need to make any changes to the announcement, you can simply select the announcement and click on EDIT.
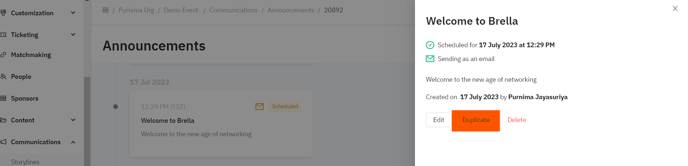
Duplicating an announcement
You have the option to simply duplicate the announcement. This helps you to save time and no need to fill in the details from scratch.
Delete an announcement
You can click on the announcement that you don't want and delete it from the admin panel. You cannot undo it after the deletion.
What can be added to announcements:
- A title (max. 45 characters)
- Text content
- Emojis
- For Mac users: Press the Control + Command + Spacebar keys on your keyboard at the same time. A small window overlay appears with a bunch of Emoji characters in it.
- Other pc: Hold down Windows Key + Period / Full Stop (.) or Windows Key + Semicolon (;) - One URL
Scheduling announcements (steps)
- Navigate to the Admin panel - Communications.
- Click on Create (first) announcement;
- Fill in the details title, type, time, content
- Click 'Save.'
The announcement is now scheduled. You can edit your announcements at any time before they are sent out.
Sending good vibes; wishing you all the very best toward a successful event!
Publish announcements as stories - Mobile app
Brella now introduces event organizers to add stories and make it an easy way to communicate with the attendees - either by providing them the event-related and/or sponsored content.
The first storyline on the mobile app with the 'megaphone' icon is always the announcements.
Currently, this feature is available only on the mobile app.
Refer to the below article to find information on editing or deleting an announcement Communications: Edit or Delete Announcements
Last updated - July 2023
Written by Purnima Jayasuriya.

If you didn't find an answer to your questions, please get in touch with the Support Team here.
👇