Learn how to select the basic settings and create your first custom email
To be covered
Intro
Emails are essential, and Brella offers two options for sending emails to your event attendees: Brella default emails and custom emails. The choice between them depends on your needs and desired level of personalization. You can use custom emails to create high-impact marketing campaigns, send personalized messages to specific attendee segments, and build brand awareness to engage attendees more deeply.
Creation process - Step 1
Composing your first custom email might seem daunting, but it's an exciting step in communication! Here's a breakdown to guide you through the process:
Basic Settings
Setting up the subject and sender information for this email is essential.
-
Navigate to the Admin Panel (manager.brella.io).
-
Click on the ‘Custom Emails’ tab within 'Communications' in the left menu.
-
Click on the '+ Create custom emails' button in the middle.
-
Fill up the Email Name and the Subject of your email.
-
Email Name
These are descriptive titles you assign to emails created within Brella's custom email builder. They appear internally in the Brella platform, helping you organize and identify different email campaigns. -
Email Subject
A well-crafted subject line acts as a teaser trailer for your email, piquing curiosity and prompting users to click. In Brella's context, it can mean the difference between attendees staying informed and engaged with your event or missing out on vital updates.
To come up with an effective mail subject refer to this article : Communications: Custom Emails Best Practices
Sending Modes
When it comes to Brella's custom emails, timing is everything. Choosing the right delivery method ensures your message reaches your audience at the most impactful moment. This guide unravels the different sending options, empowering you to optimize your event communication.
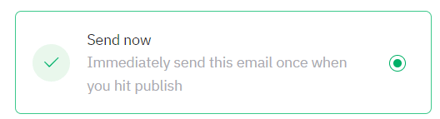
Send now
This option instantly dispatches your email to the targeted recipients once you hit "send." Ideal for urgent updates or last-minute reminders.
Brella's "Send Now" mode within custom emails offers flexibility in who receives your message. Here's how the two options you mentioned operate:
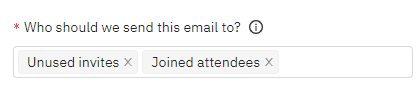
Unused invites
This option targets specific invites within your event that haven't been accepted or used by attendees. These could be invites created and sent out, but not yet activated by potential attendees.
Joined attendees
Select both
❗ Due to the nature of email delivery, confirming this action will send the email instantly, and changes cannot be made afterward.
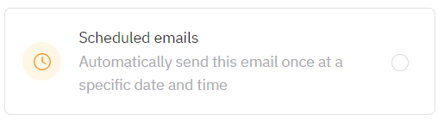
Scheduled emails
Plan your email's arrival for a specific date and time, perfect for pre-event announcements or post-event follow-ups.
Brella's Scheduled Emails offer another powerful option within the custom email-sending mode, allowing you to plan your communication strategically. Here's how the two options you mentioned come into play:
Unused Invites & Joined Attendees within Scheduled Emails:
- You can combine scheduling with targeting options like unused invites and joined attendees. This allows you to:
- Schedule a reminder email for unused invites: Prompt potential attendees to register closer to the event date.
- Schedule a welcome email for joined attendees: Greet and inform them about upcoming sessions or Brella features on a predetermined date.
"Select Both" for All Registrants:
- Similar to Send Now, you can target all registrants, including those with unused invites and those already joined, within a scheduled email.
💡 The email will be scheduled and delivered according to the event's time zone.
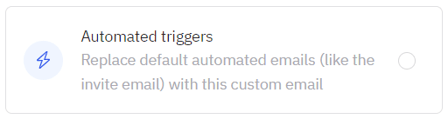
Automated triggers
Leverage built-in triggers to automatically send emails to specific attendees based on the triggers you select. 'Invite Created, Invite updated, Attendee joined and Ticket purchase created' are the four triggers available as of now, and the following are the situations in an email that will be sent:
- Invite Created: This powerful trigger automatically activates when a new attendee submits their registration form for your event. It acts as a digital handshake, offering the perfect opportunity to make a great first impression and set the tone for a positive experience. An email will be created when ever following options are enabled.
- A new invite is created via CSV upload
- A new invite is created manually in the Admin Panel
- A new invite is created via the public API
❗The trigger will be activated only when a NEW INVITE is created in the admin panel. If you already have any invites created at the point of trigger activation, the custom email will not be sent to those.
- Invite Updated: In keeping attendees informed and engaged even after they've registered. It automatically sends emails whenever details about your event change, ensuring everyone has the latest information at their fingertips.
- A new invite is created via a ticket purchase
- An existing unused invite’s email address is updated
❗You now have the option to personalize your communication with attendees by replacing the standard ticketing confirmation email with a custom one you create within Brella. This means you can tailor the message to your specific event and audience, enhancing their experience from the very beginning.
- Attendee joined: If an attendee uses the invite and joins the event an email is triggered.
- Ticket purchase created: An email is triggered whenever someone buys a ticket with an email address.
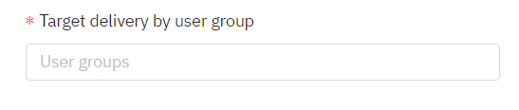
Sending to Target delivery groups
A flexible function within Brella's custom email builder that lets you segment your audience based on various criteria. Imagine dividing your attendees into smaller, more relevant groups and sending each group a message tailored to their interests, needs, or registration choices.
❗Target delivery groups are deactivated if you are using the 'Ticket purchase created' automated trigger because there can be multiple tickets linked to multiple groups purchased in one order.
Creation Process - Step 2
Let's go through the rest of the process of creating the custom email content
- Click on Proceed
- Create the content from scratch using different editors
Visit the links below👇 if you want to learn more about how to customize your email content using the Visual editor and HTML editor.
Communications: Custom Email Builder Using the Visual Editor
- Once the email has been created using one of the editors and the preview has been checked, click on 'Review and Send.'
- You can select, Save as draft, if you still need to make any edits and send the custom email later.
- If you want to activate the custom email, Click on Enable trigger and select OK. Clicking confirm will start sending this email whenever the triggered action occurs. You can delete, cancel, or change this at any time.
The email custom summary
Once the custom emails are set up you can see a summary in the status column and also take any actions (edit, duplicate, delete) if needed in the email list view.
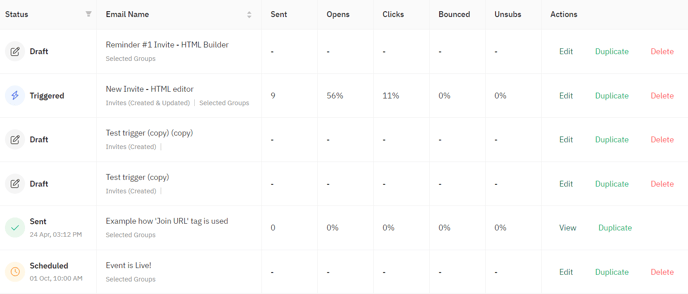
The status column:
Sent: If you select "Send now" mode, the status shows as "Sent."
Scheduled: If you select the mode "Schedule emails," the status shows as "Scheduled."
Triggered: If you select "Automated Triggered," the status shows as "Triggered."
Draft: Your email is still in the creation phase. It hasn't been sent yet, and you can continue editing it.
The action column:
Edit: If the custom email has been sent, the "edit" will change to "view"; otherwise, alterations can be made before sending the email.
Duplicate: It will allow you to create a duplicate of the template you have already created, so you don't have to start from scratch.
Delete: It will allow you to delete the custom emails that are in status draft only.
Other columns:
Email name: This column displays the unique name or title you assigned for your reference to each custom email you've created in Brella.
Sent: This number indicates how many people the email has been sent to.
Opens: This indicates the number of recipients who have opened your email.
Clicks: This tracks the number of recipients who clicked on any link within your email.
Bounced: A percentage of recipients couldn't receive your email permanently due to factors like inactive accounts or invalid addresses.
Unsubs: Some recipients choose to unsubscribe from your Brella emails. This helps maintain engagement with interested recipients.
❗These email statistics will not be available if you are creating an email using the 'Ticket purchase created' trigger.
Last updated - April 2024.
Written by Mass Rahim.

If you didn’t find an answer to your questions, please contact the Support Team here.