- Help Center
- I am a Web App User
- 📖 Account set up
-
I am an Event Organizer
- 📖 Getting Access
- 📖 Event Details
- 📖 Customization
- 📖 Ticketing
- 📖 Matchmaking
- 📖 Sponsors
- 📖 Schedule & Widget
- 📖 Attendees & Groups
- 📖 Event Onboarding
- 📖 Speakers
- 📖 Streams
- 📖 Breakout Rooms
- 📖 Event Info Pages
- 📖 Communications
- 📖 Home Analytics
- 📖 Exporting Reports
- 📖 Analytics Tab Overview
- 📖 Traffic Analytics
- 📖 Integrations
- 📖 Best Practices
- 📖 Troubleshooting
-
I am a Sponsor
-
I am an App User
-
I am a Web App User
-
Integrations
-
Brella Partners
-
Brella Dictionary
Web App: Enable Notifications
Learn how to turn on notifications.
To be covered:
Intro
It's important to have notifications in your Brella account, as it will allow you to stay informed of all the important announcements before, during, and after the event.
Steps
- Go to next.brella.io
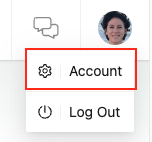
- Navigate to your account from your profile picture in the top right corner and click 'Account.'
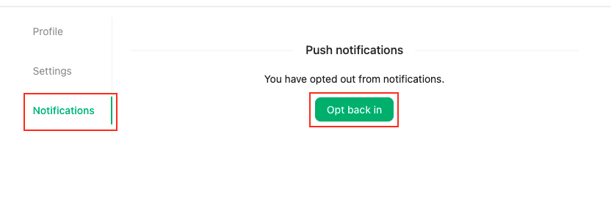
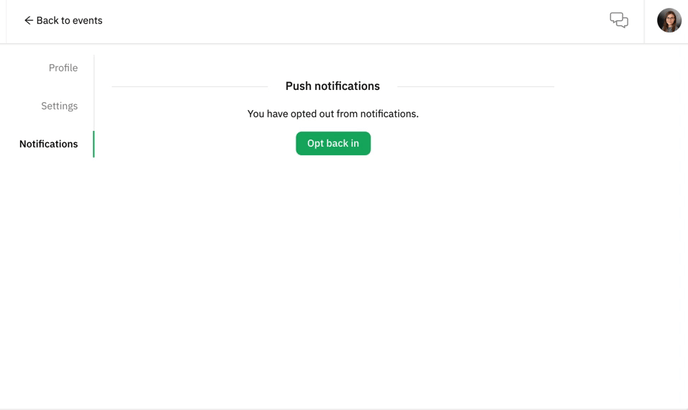
- Go to Notifications and press Opt back in if you don't have them on yet.
- The push notifications will appear in the small bell icon next to your profile picture once you're in an event.

💡 Learn more about enabling notifications here.
Last updated in March 2023.

Written by Yusra Mohideen
If you didn't find an answer to your questions, please contact the Support Team here.
👇