Learn how to customize your ticketing widget through CSS
All customization options:
- Widget's styling
- Customize the "Get tickets" button
- Customize the "Buy tickets" button in ticketing modal header
- Customize the primary background color
- Customize the secondary background color
- Customize the primary button and highlight color
- Customize the border of the ticketing modal
- Customize the divider between sections
- Customize the close icon
- Example of dark theme widget styling
- Fix radio buttons to change upon click
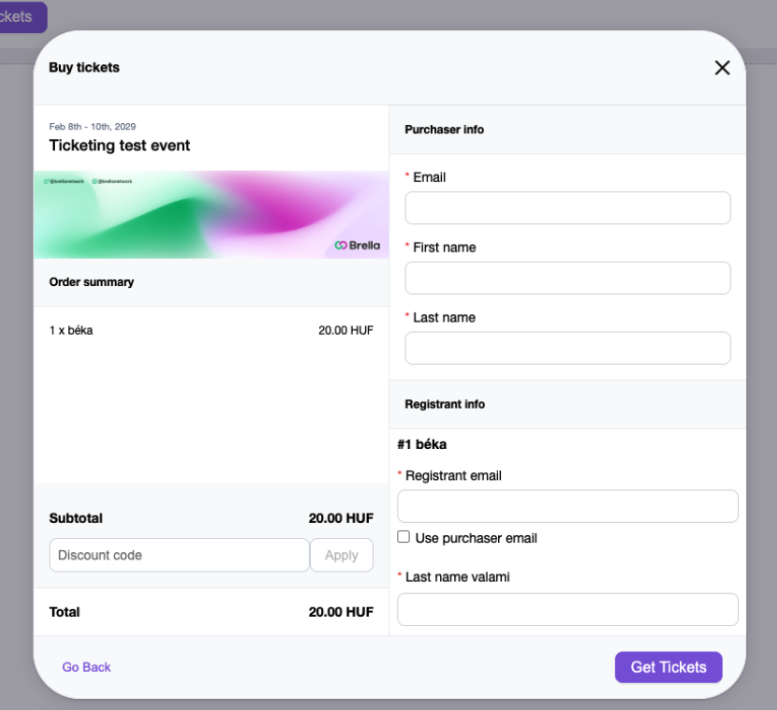
- Show ticket buying modal instead of "Get Tickets" button
- Remove the "Use purchaser email" checkbox for registrant emails when buying a ticket
- Hide and/or modify individual tickets' name, price, description
- Disable auto-zoom on Safari (iOS)
- Widget's purchasing conditions
-
- Add a maximum number of tickets that can be purchased per order (by ticket type)
- Allow attendees to purchase minimum increment of tickets for all tickets
- Allow attendees to purchase minimum increment of tickets for particular ticket types
- Have a discount code only work when a certain increment of tickets has been selected
- Have a discount code pre-filled on the widget
- Have tickets pre-selected on the widget
- Show particular tickets in your widget
- Thank you modal customization
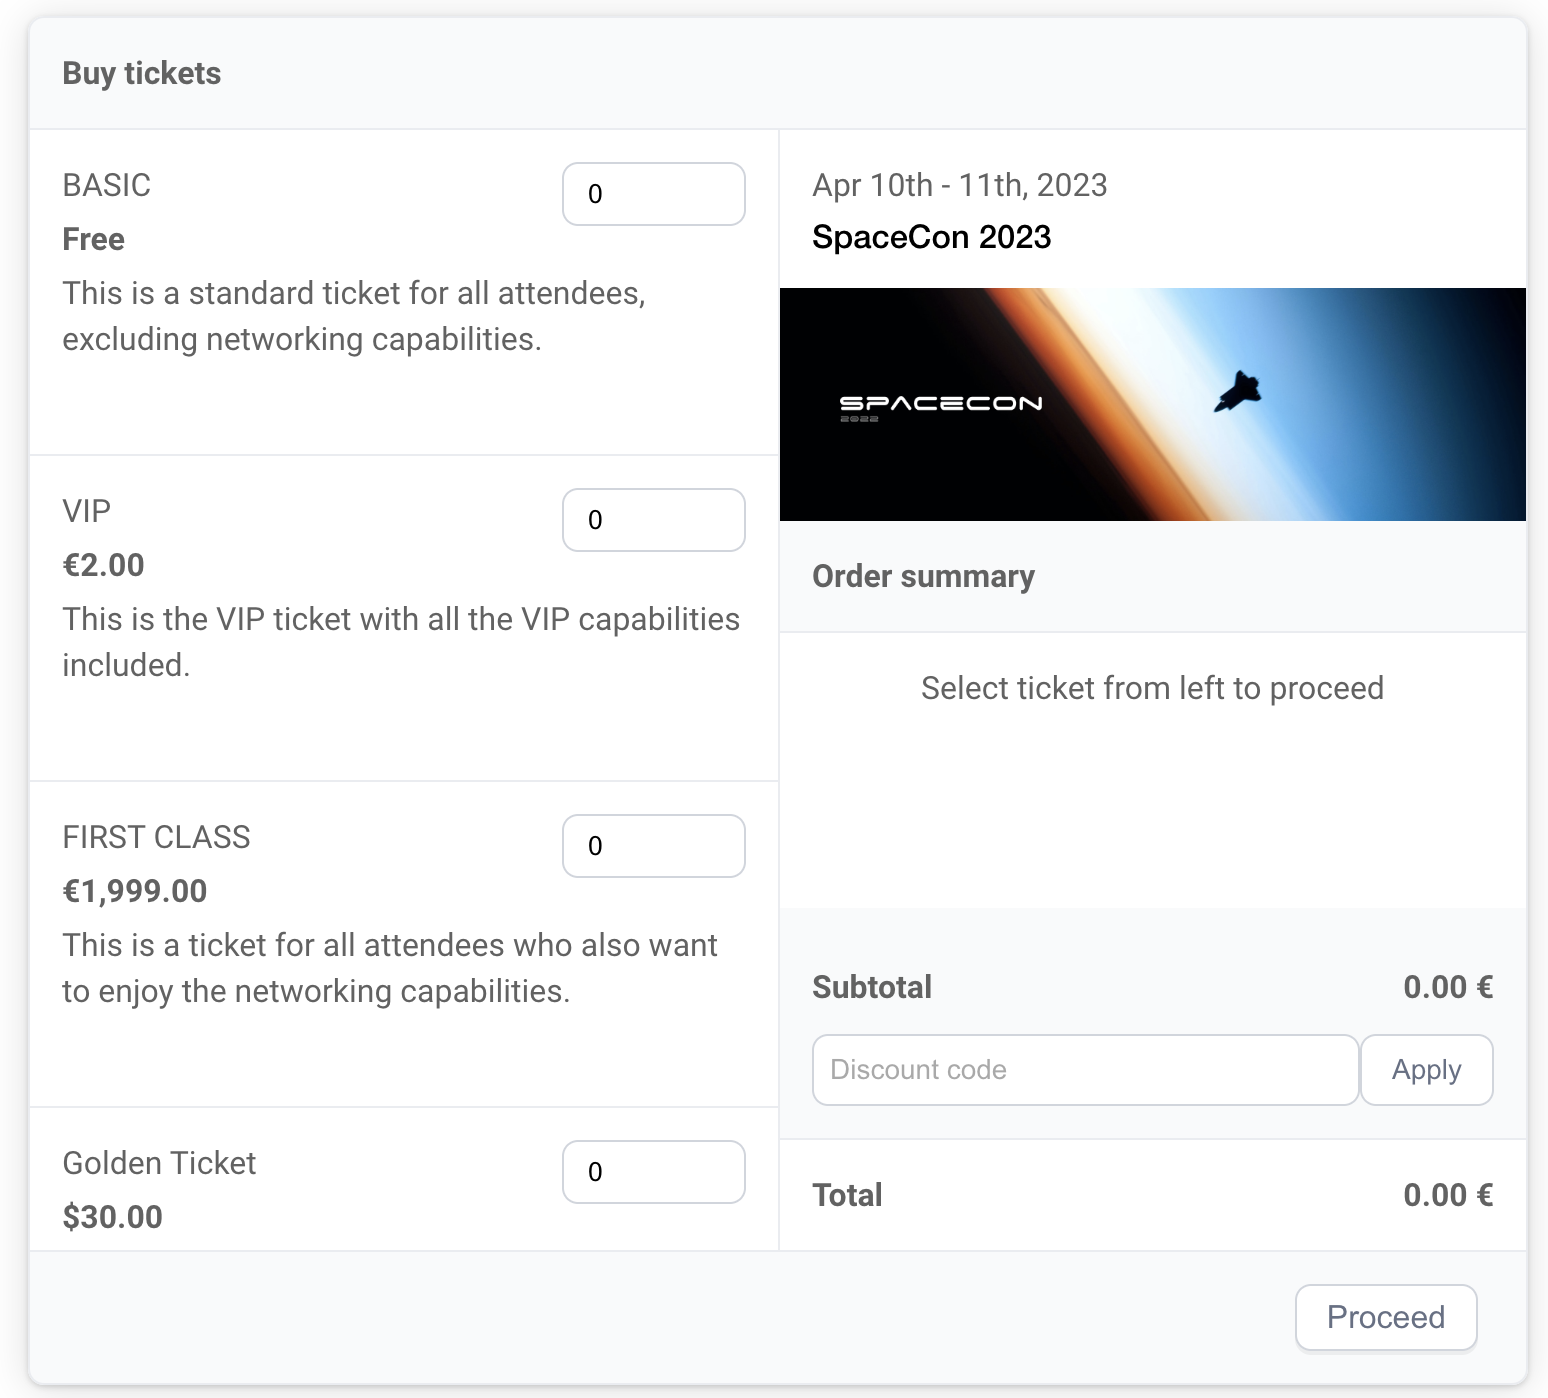
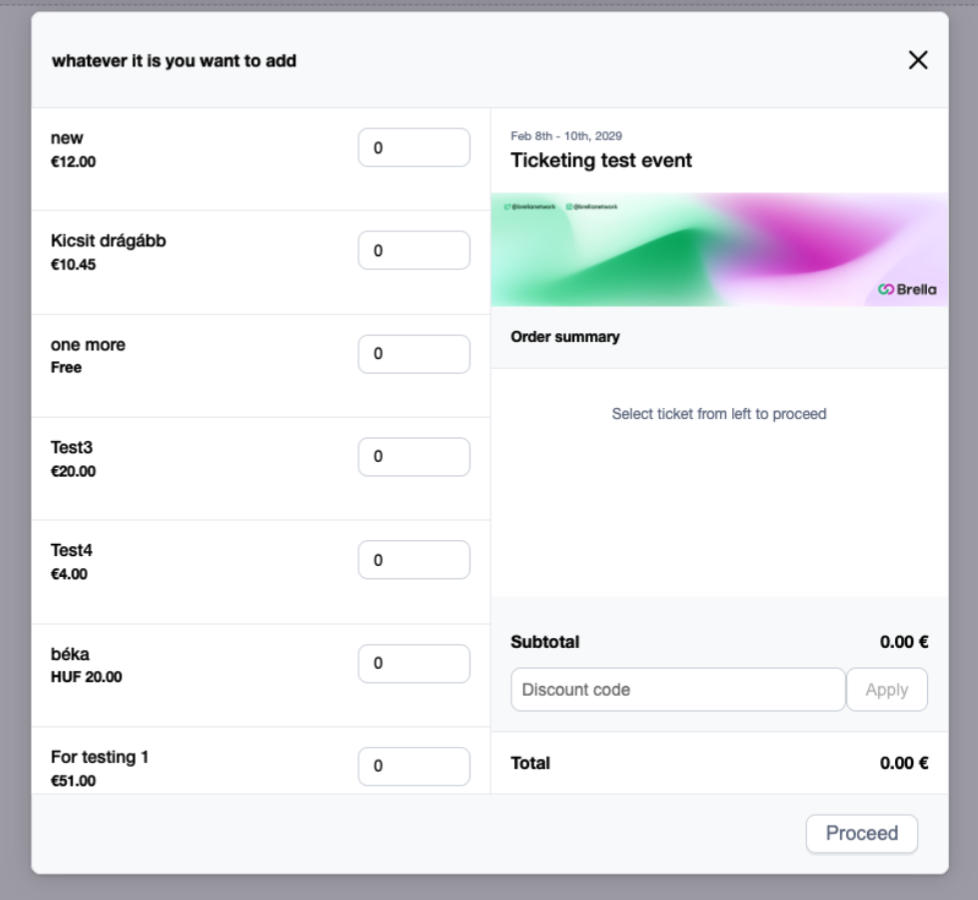
👉 To only show particular tickets in your widget (this way you can enable multiple widgets on your website and each button will open the widget with only specific tickets):
<div id="brella-widget">
  <script type="text/props">
   {
     "joinCode": "spacecon2022",
     "widgetType": "ticketing",
     "organizationSlug": "ISTA",
     "ticketsToShow": [80, 56]
   }
  </script>
</div>
<script async src="https://widget.brella.io"></script>
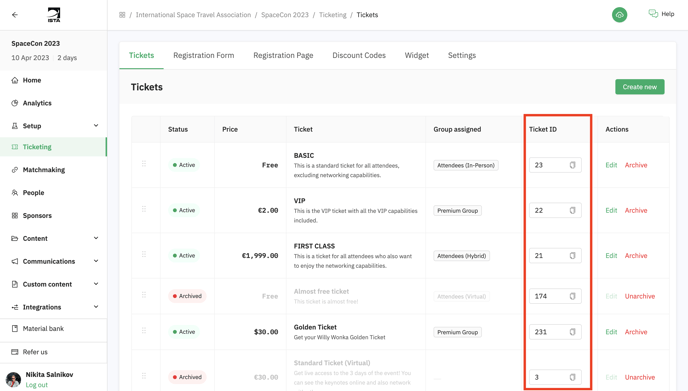
ticketsToShow specifies the tickets that will be displayed on the widget. Go to your admin panel to see the IDs that you should use with each ticket:
👉 To allow attendees only purchase the minimum increment of tickets to your liking (e.g. if you want attendees to buy minimum 2 tickets because of the campaign you're having now, you can do so):
<div id="brella-widget">
  <script type="text/props">
   {
     "joinCode": "spacecon2022",
     "widgetType": "ticketing",
     "organizationSlug": "ISTA",
     "minIncrementOfTickets": 2
   }
  </script>
</div>
<script async src="https://widget.brella.io"></script>
You can set the increment to be anything.
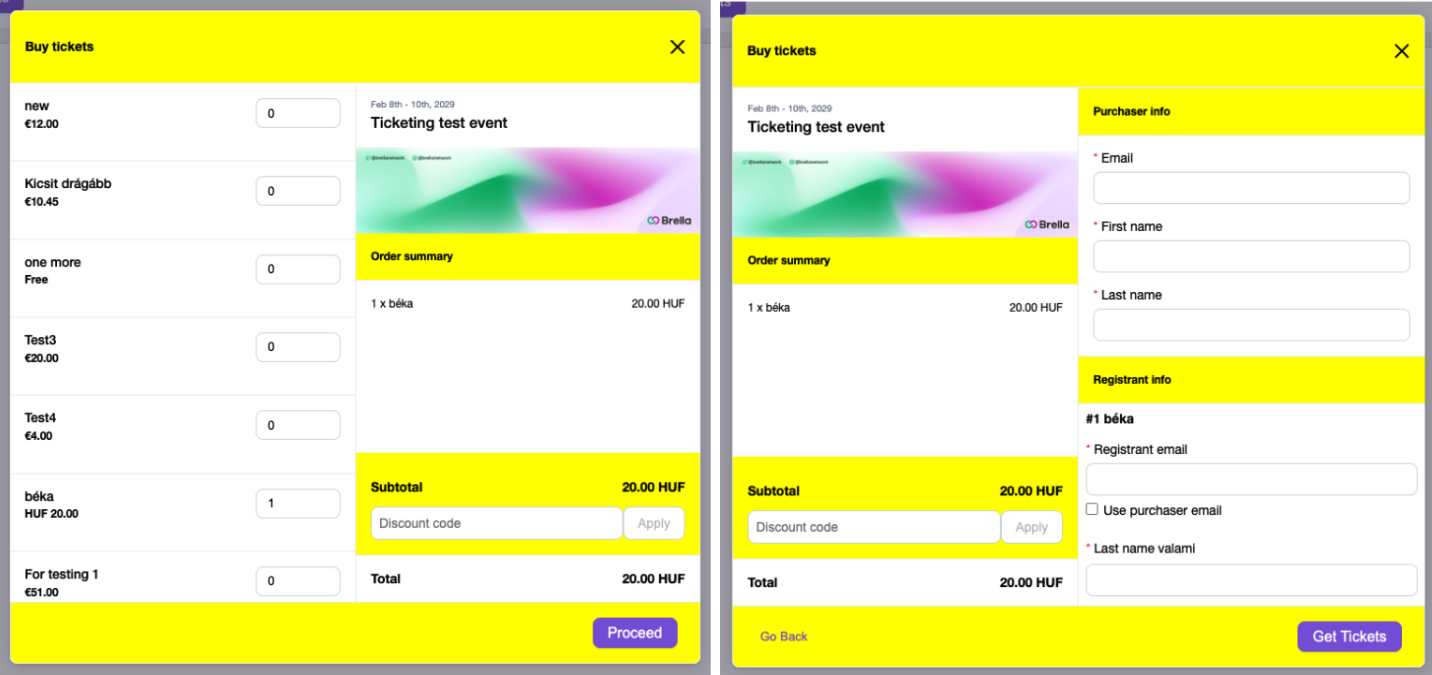
👉 Show ticket buying modal instead of "Get Tickets" button:
<div id="brella-widget">
  <script type="text/props">
   {
     "joinCode": "spacecon2022",
     "widgetType": "ticketing",
     "organizationSlug": "ISTA",
     "showModalOnly": true
   }
  </script>
</div>
<script async src="https://widget.brella.io"></script>
Result:
👉 To customize the "Get tickets" button:
 .brella-get-tickets {
     text-indent: -9999px;
     line-height: 0;
   }

   .brella-get-tickets:after {
     content: 'whatever it is you want to add';
     text-indent: 0;
     display: block;
     line-height: initial;
   }
Result:

👉 To customize the "Buy tickets" button in ticketing modal header:
 .ticketing-header-title {
     text-indent: -9999px;
     line-height: 0;
   }

   .ticketing-header-title:after {
     content: 'whatever it is you want to add';
     text-indent: 0;
     display: block;
     line-height: initial;
   }
Result:
👉 To customize the primary background color (default white):
.brella-ticketing-widget {
     --brella-widget-background: yellow !important;
   }
Result:
👉 To customize the secondary background color (default: #F9FAFB):
.brella-ticketing-widget {
     --brella-widget-secondary-background: yellow !important;
   }
Result:
👉 To customize the primary button and highlight color (default: #7F56D9):
.brella-ticketing-widget {
     --brella-color-ticketing-primary-600: red !important;
   }

   #brella-widget {
     --brella-color-ticketing-primary-600: red !important;
   }
Result: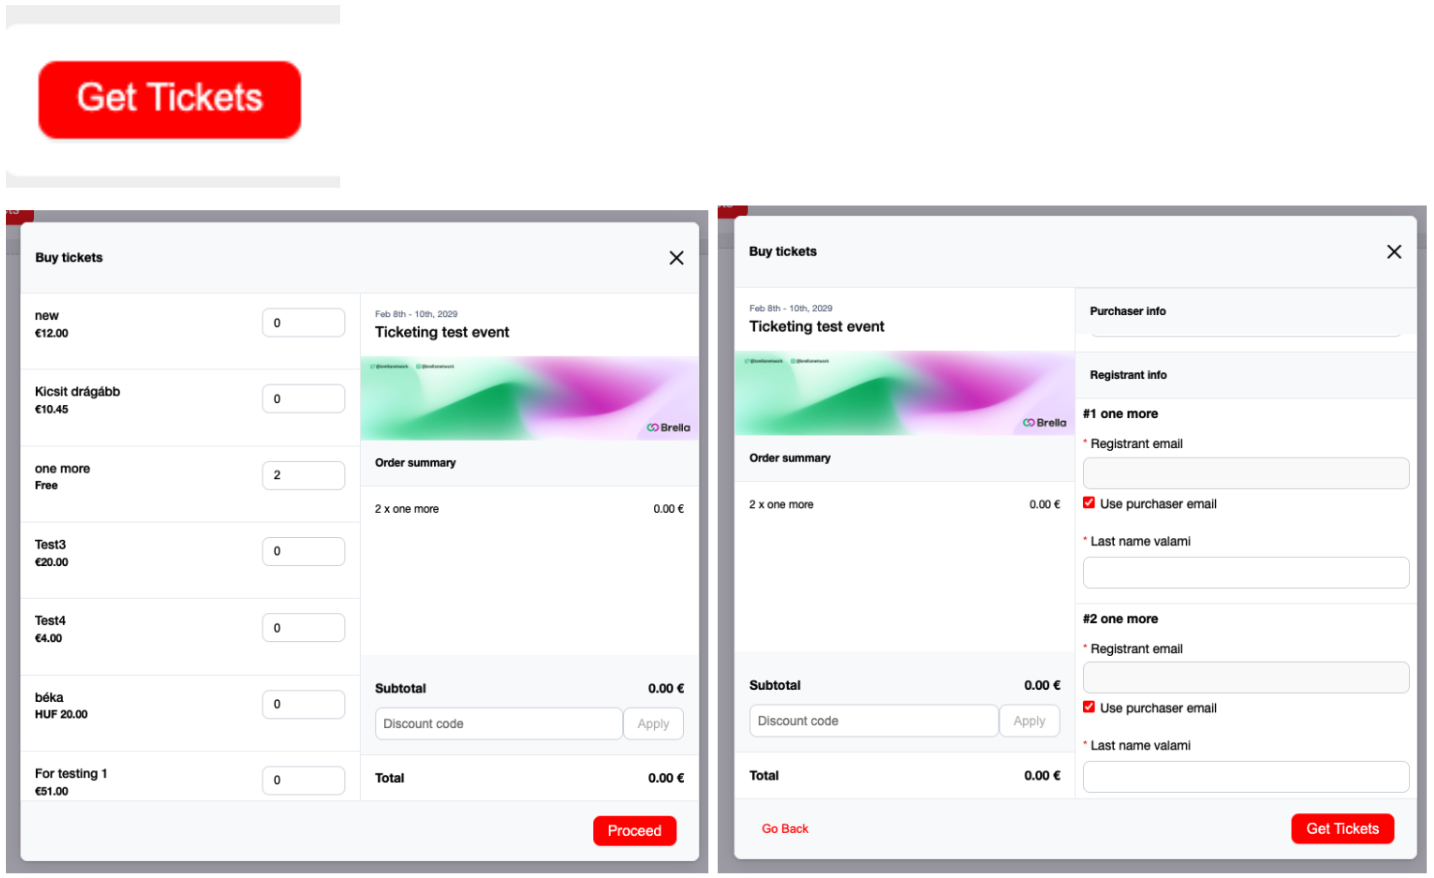
👉 To customize the border of the ticketing modal (default: 1px solid #EAECF0; border radius (default 8px)):
 .brella-ticketing-widget {
     --brella-widget-modal-border-radius: 50px !important;
   }
Result:
👉 To customize the divider between sections (default: 1px solid #EAECF0):
 .brella-ticketing-widget {
     --brella-widget-modal-border-radius: 50px !important;
   }
Result:
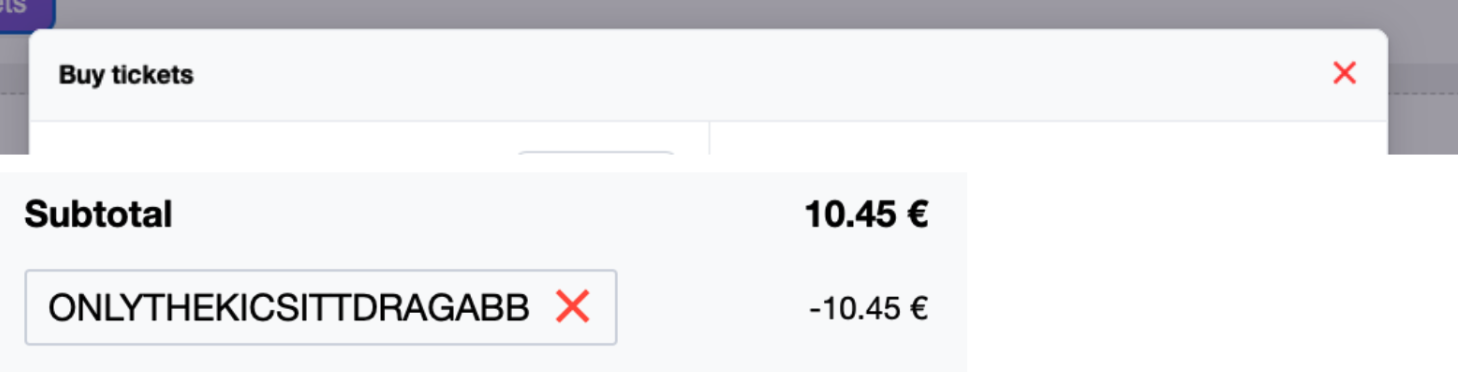
👉 To customize the close icon (default: #101828; in 2 places, close modal and remove discount code):
.brella-ticketing-widget {
     --brella-widget-close-icon-color: red !important;
   }
If you only want to change one of these, for example only the discount code one, you can do it like this:
.remove-discount-code:before, .remove-discount-code:after {
     background-color: purple !important
   }
Result:
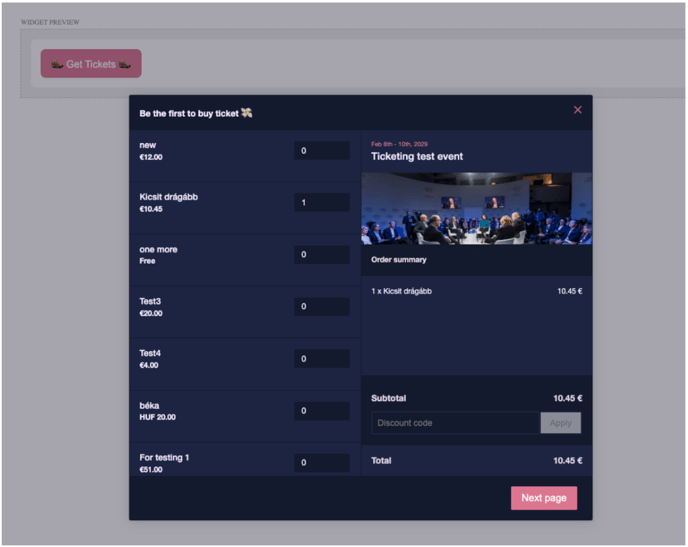
👉 Example of dark theme widget styling:
<style>
.brella-ticketing-widget {
    --brella-widget-secondary-background: #141A2D !important;
    --brella-widget-background: #1C2541 !important;
    --brella-widget-border: 1px solid #111727 !important;
    --brella-widget-close-icon-color: #DC758F !important;
    --brella-widget-modal-border-radius: 2px !important;
    --brella-widget-modal-input-border-radius: 2px !important;
    --brella-widget-input-border: 2px solid #1C2541 !important;
    --brella-color-ticketing-primary-600: #DC758F !important;
   }
   .brella-get-tickets {
    text-indent: -9999px;
    line-height: 0;
    border: 1px solid #C7637C !important;
    background-color: #DC758F !important;
  }
  .brella-get-tickets:after {
    content: 'Try it our here';
    text-indent: 0;
    display: block;
    line-height: initial;
  }

  .ticketing-header-title {
    text-indent: -9999px;
    line-height: 0;
  }
  .ticketing-header-title:after {
    content: 'Be the first to buy ticket!';
    text-indent: 0;
    display: block;
    line-height: initial;
  }

  .ticketing-footer-proceed-button {
    text-indent: -9999px;
    line-height: 0;
  }

  .brella-widget-button-primary {
   padding: 9px 16px !important;
  }

  .ticketing-footer-proceed-button:after {
     content: 'Next page';
    text-indent: 0;
    display: block;
    line-height: initial;
  }

   .ticketing-secondary-text {
     color: #D6BBFB !important;
   }

   .brella-ticketing-widget p, .brella-ticketing-widget h3, .brella-ticketing-widget h4, .brella-ticketing-widget a, .brella-ticketing-widget label, .brella-ticketing-widget input {
     color: #F4EBFF;
   }

   .brella-ticketing-widget input, .brella-ticketing-widget input:disabled {
     background-color: #141A2D;
   }

   .ticketing-footer-proceed-button:disabled, .discount-code-apply-button:disabled {
     opacity: 0.5;
   }

   .summary-event-date {
     color: #DC758F !important;
   }

   .summary-order-summary-text, .total-summary-text, .custom-form-title, .custom-form-title, .ticket-question-name{
     color: #E3D3E4 !important;
   }

   .purchaser-info-container p, .ticketing-question-container p {
     color: #7C86A5;
   }
 .brella-widget-error-text {
color: var(--brella-color-error-600) !important;
}
</style>
Result:
👉 If you want to set radio buttons to change upon click:
Make sure you're not applying
appearance: none
.brella-ticketing-widget input[type="checkbox"] {
 appearance: auto !important
}
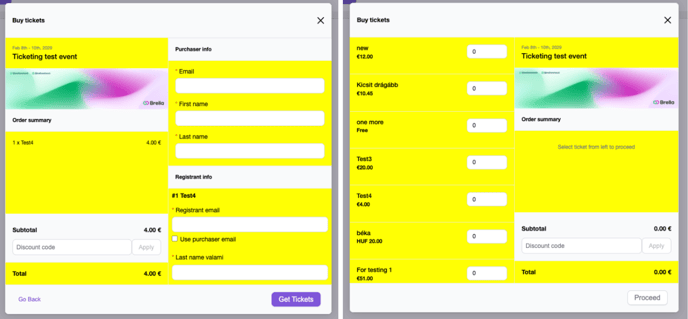
👉 If you want to remove the "Use purchaser email" checkbox for registrant emails:
You can hide it with css (only for the widget):
<style>
.purchaser-email-checkbox {
	display: none;
}
</style>
👉 Disable the Safari auto-zoom functionality on iOS
By default, Safari will zoom in when a user taps on an input field and the font-size is less than 16px. To disable this behavior, you can either change the font-size of the widget to a minimum of 16px using CSS, or set the allowAutoZoom parameter to false.
<!-- Inject Brella Widget Here -->
<div id="brella-widget">
  <script type="text/props">
   {
     "joinCode": "spacecon2022",
     "widgetType": "ticketing",
     "organizationSlug": "ISTA",
     "allowAutoZoom": false
   }
  </script>
</div>
<script async src="https://widget.brella.io"></script>
<!-- Inject Brella Widget Here End -->
👉 If you want to hide the "Claim ticket" button in the "Thank you" modal:
<style>
    .ticket-claiming-invite .brella-widget-button-primary {
      display: none;
    }
 </style>
<!-- Inject Brella Widget Here -->
<div id="brella-widget">
  <script type="text/props">
   {
     "joinCode": "spacecon2022",
     "widgetType": "ticketing",
     "organizationSlug": "ISTA"
   }
  </script>
</div>
<script async src="https://widget.brella.io"></script>
<!-- Inject Brella Widget Here End -->
👉 If you want to have ticketing widget to redirect to some other page than back to the "Thank you modal" after the ticket purchase:
<!-- Inject Brella Widget Here -->
<div id="brella-widget">
  <script type="text/props">
   {
     "joinCode": "spacecon2022",
     "widgetType": "ticketing",
     "organizationSlug": "ISTA",
     "redirectUrlAfterTicketPurchase": "https://help.brella.io/en/organizers/ticketing-widget-customize-the-ticketing-widget"
   }
  </script>
</div>
<script async src="https://widget.brella.io"></script>
<!-- Inject Brella Widget Here End -->
👉 If you have a discount code which should for example only be applied when attendee buys tickets in sets of 2 and so on. Note that the widget won’t allow user to add discount code if e.g. 3 tickets are selected, it will give an error ("The discount code can only be applied to sets of [whatever increment you add]):
<!-- Inject Brella Widget Here -->
<div id="brella-widget">
  <script type="text/props">
   {
     "joinCode": "spacecon2022",
     "widgetType": "ticketing",
     "organizationSlug": "ISTA",
     "minIncrementForDiscountCode": [
          {
            "minIncrement": 2,
            "ticketIds": ["22"],
            "discountCode": "100FORSPACES"
          }
      ]
   }
  </script>
</div>
<script async src="https://widget.brella.io"></script>
<!-- Inject Brella Widget Here End -->
👉 If you want to limit the maximum tickets that can be purchase per order (based on ticket type)
Note: The ticket type applies per ticket type. It's not a blanket restriction on how many tickets an order can have. So, for example, if ticketIds "23" and "22" allow one purchase each > A single order can contain 1 ticket of type "23" and another ticket of type "22".
<!-- Inject Brella Widget Here -->
<div id="brella-widget">
  <script type="text/props">
   {
     "joinCode": "spacecon2022",
     "widgetType": "ticketing",
     "maxNumberOfTicketsByTicketId": [
          {
            "ticketIds": [23, 22],
            "maxNumberOfTickets": 1
          },
          {
            "ticketIds": [21],
            "maxNumberOfTickets": 2
          }
        ]
   }
  </script>
</div>
<script async src="https://widget.brella.io"></script>
<!-- Inject Brella Widget Here End -->
👉 If you want to customize the increment per ticket type, not just the whole widget:
<!-- Inject Brella Widget Here -->
<div id="brella-widget">
  <script type="text/props">
   {
     "joinCode": "spacecon2022",
     "widgetType": "ticketing",
     "organizationSlug": "ISTA",
     "minIncrementOfTicketsByTicketId": [
          {
            "minIncrement": 2,
            "ticketIds": ["22"]
          }
      ]
   }
  </script>
</div>
<script async src="https://widget.brella.io"></script>
<!-- Inject Brella Widget Here End -->
👉 If you want to have a discount code pre-filled on the widget (and allow to remove the discount code or not):
<!-- Inject Brella Widget Here -->
<div id="brella-widget">
  <script type="text/props">
   {
     "joinCode": "spacecon2022",
     "widgetType": "ticketing",
     "organizationSlug": "ISTA",
     "discountCodeSettings" : {
          "discountCode": "100FORSPACES",
          "allowClear": true
        }
   }
  </script>
</div>
<script async src="https://widget.brella.io"></script>
<!-- Inject Brella Widget Here End -->
👉 If you want to have a tickets pre-selected on the widget (allow to set the amount of tickets pre-selected every time widget opens per ticket type):
<!-- Inject Brella Widget Here -->
<div id="brella-widget">
  <script type="text/props">
   {
     "joinCode": "spacecon2022",
     "widgetType": "ticketing",
     "organizationSlug": "ISTA",
     "preSelectedTickets" :
     [
        {
          "ticketIds": [80],
          "amount": 1
        }
     ]
   }
  </script>
</div>
<script async src="https://widget.brella.io"></script>
<!-- Inject Brella Widget Here End -->
👉 If you want to change the header title on the thank you modal:
   .thank-you-modal-title {
    text-indent: -9999px;
    line-height: 0;
  }
  .thank-you-modal-title:after {
    content: 'New title';
    text-indent: 0;
    display: block;
    line-height: initial;
  }
Result: 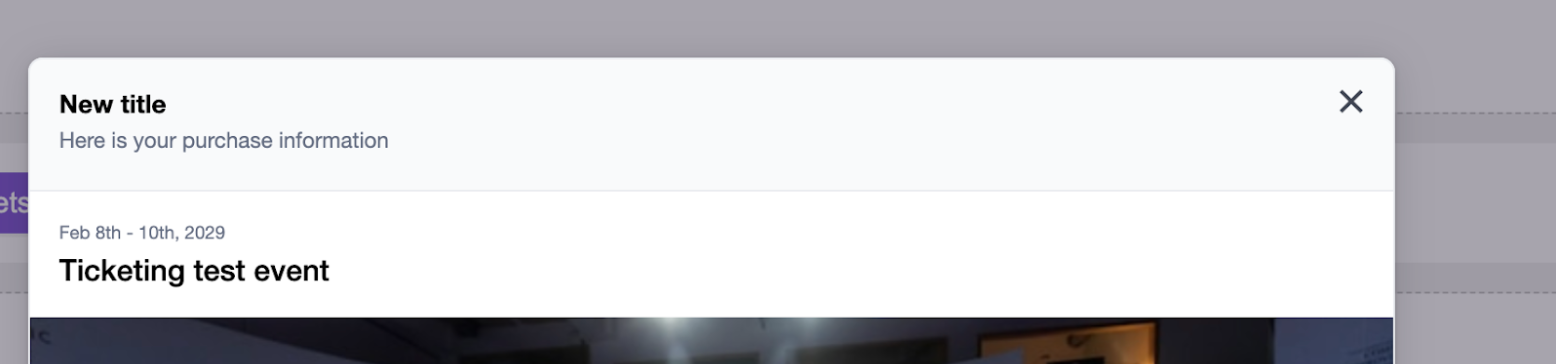
👉 If you want to change the header subtitle on the thank you modal:
.thank-you-modal-subtitle {
    text-indent: -9999px;
    line-height: 0;
  }


  .thank-you-modal-subtitle:after {
    content: 'New subtitle';
    text-indent: 0;
    display: block;
    line-height: initial;
  }
Result: 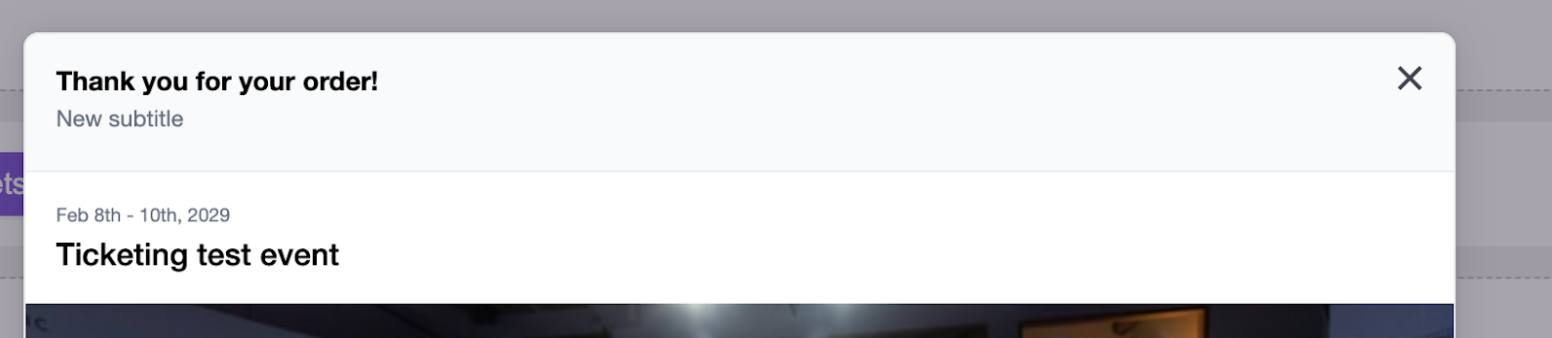
👉 If you want to hide the subtotal container on the thank you modal:
   .summary-subtotal-container {
     display: none;
   }
Result: 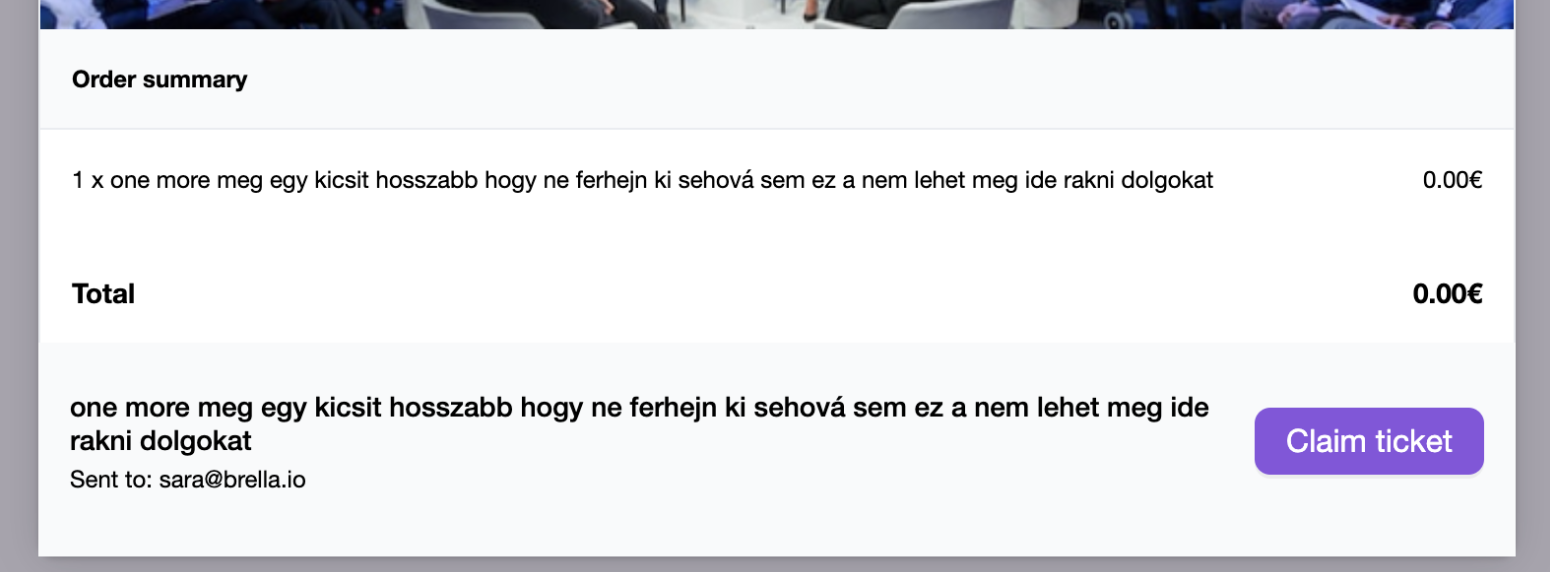
👉 If you want to change the "Claim ticket" button text on the thank you modal:
 .ticket-claiming-invite a {
     text-indent: -9999px;
     line-height: 0;
   }


   .ticket-claiming-invite a:after {
     content: 'Join Event';
     text-indent: 0;
     display: block;
     line-height: initial;
   }
Result:

👉 If you want to hide and/or modify individual tickets' name, price, description:
<!-- Inject Brella Widget Here -->
<style>.ticket-list-item-container-ticket-id-22 .ticket-list-item-ticket-price {
display: none;
}
</style>
<div id=“brella-widget”>
  <script type=“text/props”>
   {
     “joinCode”: “spacecon2022",
     “widgetType”: “ticketing”,
     “organizationSlug”: “ISTA”
   }
  </script>
</div>
<script async src=“https://widget.brella.io”></script>
<!-- Inject Brella Widget Here End -->
Last updated - July 2023
Written by Nikita Salnikov

If you didn't find an answer to your questions, please get in touch with the Support Team here