Learn how to set up your live streams through Evmux.
To be covered:
Intro
Learning how to set up and record your live streams through Evmux can be a valuable asset to your events in Brella, as it allows you more flexibility with your content.
How to Set up and Record Live Streams
- Navigate to the admin panel - 'Streams' tab
- Click on 'Create new'
- Add the Stream title
- For Stream Type, choose 'In-built Studio'
- Click 'Save'
- Click on the Stream
- Click on 'View backstage studio' and you will be re-directed to Evmux
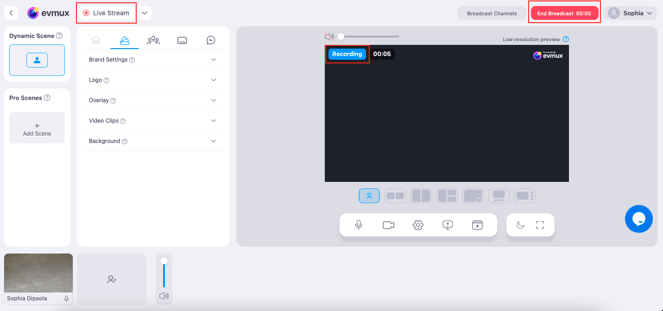
- Once at your studio, click on Go Live and toggle on the 'Record' button
- You'll see a few indications that your live stream is recording
Once you end your broadcast or your stream has finished, the recording of your stream will be saved automatically, where you'll be able to find them under 'Sessions'. Read below!
Where to Find Live Stream Recordings
Once connected, you can access your Evmux console through manager.brella.io On your Stream tab, select an Evmux stream you've recorded and click on 'Access Recordings'.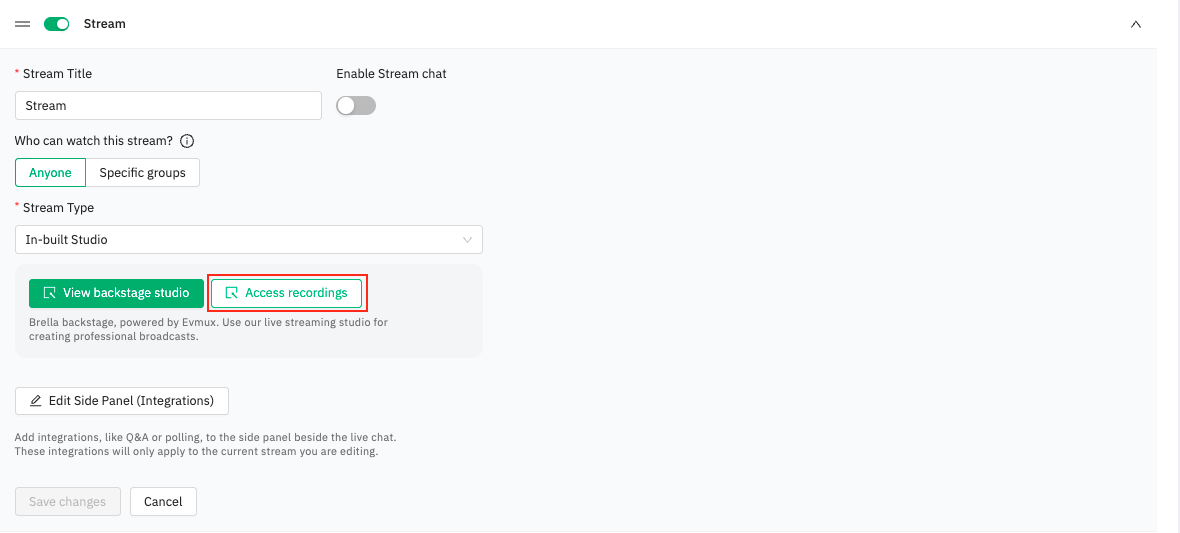
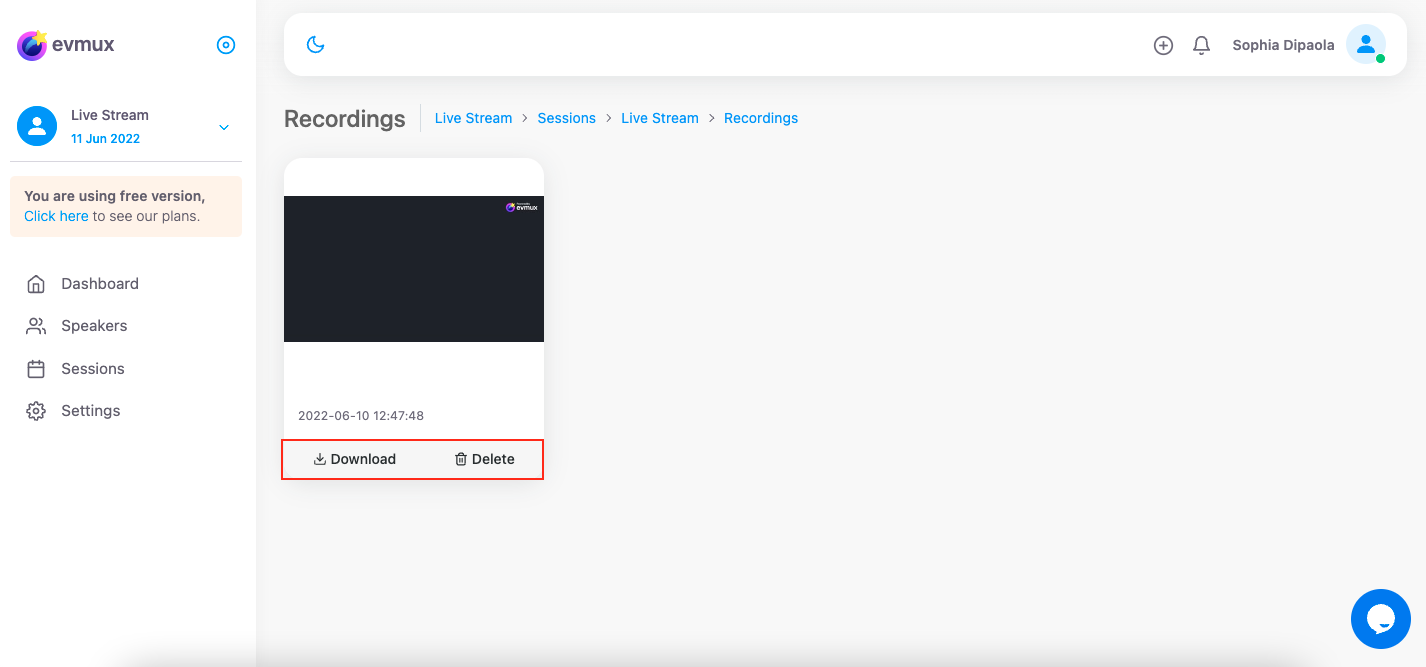
Then, select the recording 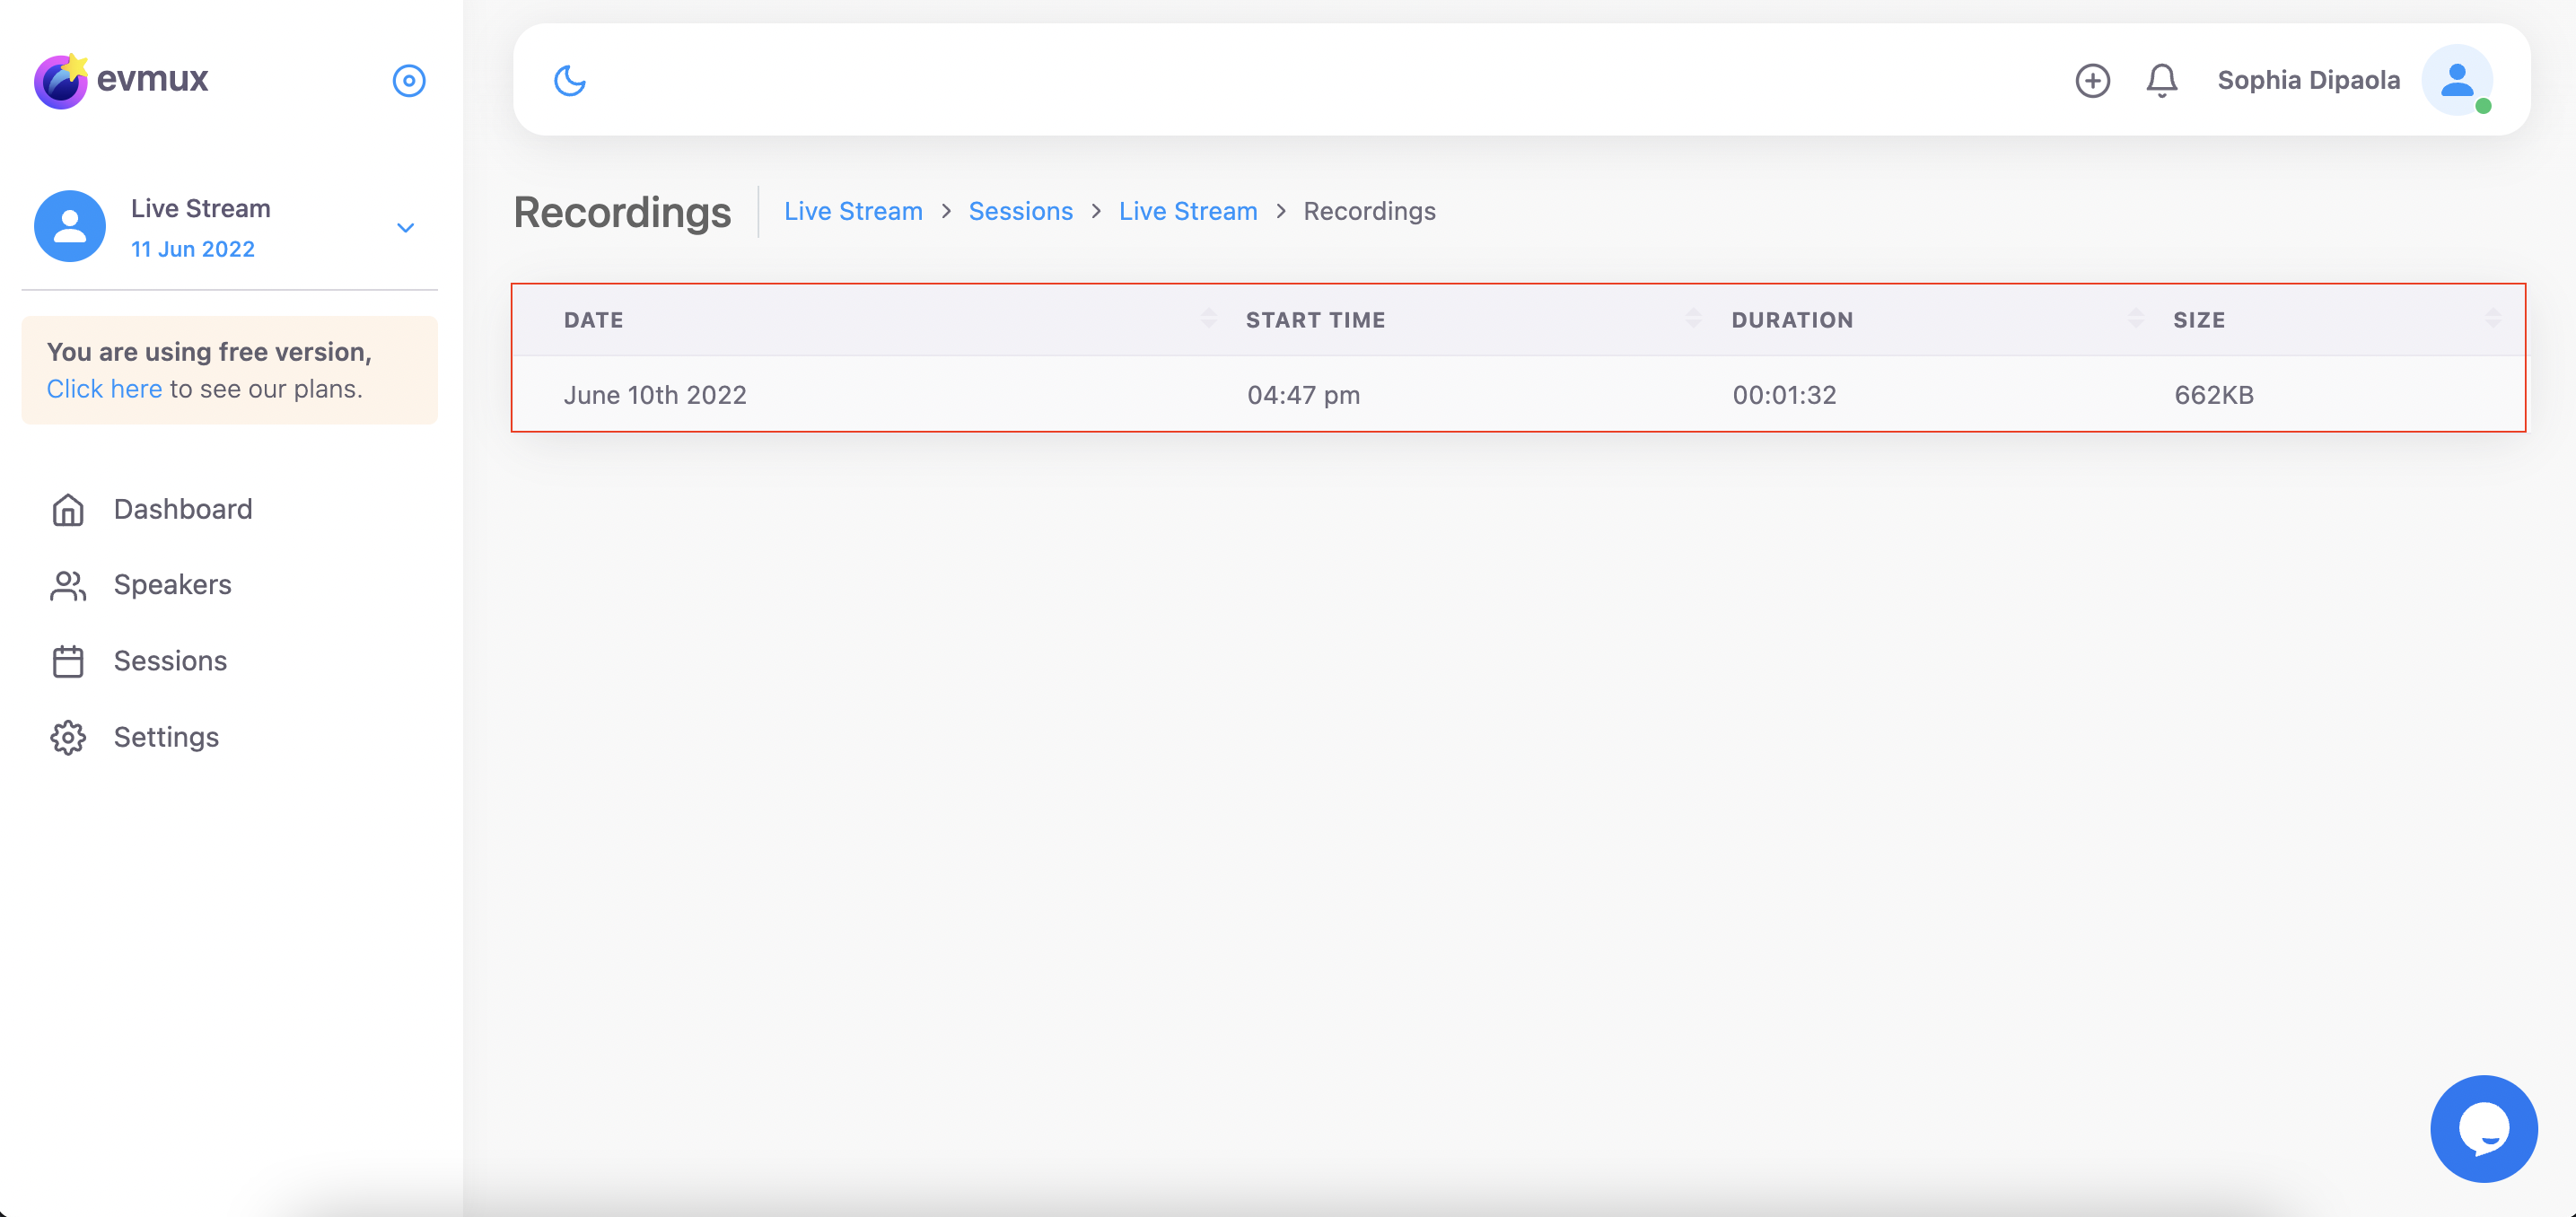
From there, you have the option to delete or download your recordings as an MP4.
For more videos and tutorials on how to make the most out of Evmux, check out this video from their YouTube Channel!
Evmux is feature flagged; it is only enabled if mentioned in the Brella contract.
💡Learn more about uploading recordings onto the Schedule and Home Page here.
Last updated - July 2023.
Written by Purnima Jayasuriya.

If you didn't find an answer to your questions, please get in touch with the Support Team here.
👇