Learn how to manage your event schedule through the settings tab
To be covered:
Intro
There are many settings available in the schedule tab for you to manage your event schedule as an event organizer. This article will give you a summary of each setting available and the detailed information can be found in the linked articles.
The settings available
- Go to Admin panel -> Content -> Schedule
- Click on the 'Settings' tab to view above the settings
Use schedule

After activating the schedule function initially and adding the relevant content/networking slots, if you wish to disable the schedule you can use the toggle in this setting to do so. Disabling the schedule will take away the schedule tab from the event front end on https://next.brella.io. You will see the following message when the schedule is disabled.

But this does not mean that all the slots/content you added to the schedule is erased. The content will be available to you again once you click on the 'Activate schedule' button making the schedule available on the event front end as well.
Export schedule data

You can use this feature to export all the schedule data you have added as a CSV to your email. This setting comes in use if you want to add more slots to an existing schedule (edit the schedule). You can find more information in this article.
Import schedule data

You can use the import schedule data setting to add your event schedule as a bulk for the first time or edit the existing schedule and add more slots through a CSV file. You can click on the 'Learn more' option to view the related article with more details.
Sync schedule data using API

You can click on the 'Sync' option to edit your schedule with your own branding and styling by using a public API key. Visit this article for more information.
Export session traffic data
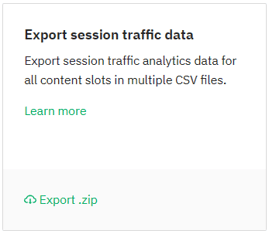
Through this setting, you can get information about how a session that has material added in the streaming section of a content slot was received by the event attendees. Refer to this article to learn more about what data you will be able to gather.
Use chat

You can enable/disable the live chat function for all the content slots through this toggle. Refer to this article to see how the chat function works.
Table settings
Use tables

You can activate this toggle if you are going to allocate tables for attendees to have 1:1 meetings to network in in-person/hybrid events. If you are having a general networking location and no tables as such, you can keep this setting disabled. Click on the 'What are Tables?' button to learn more about how tables work in an event.
Spot count

Spot count setting will appear only once the 'Use tables' setting is enabled. Here you can decide how many tables you plan to assign for the event, add the number, and click on 'Save' so that Brella can take that count into account and assign tables to every meeting booked.
Name meeting points

This setting is also activated only once the 'Use tables' setting is enabled. This gives you the option to name the location. You can select between the 3 options, Table/Spot/Point.
Default schedule view

There are two different ways to view the event schedule which are, Timeline view and Linear view. In this setting, you can decide which view you would want to keep as a default view when an attendee views the schedule on the event front end for the first time. However, the option to change the view is given to each attendee as well through their individual event profile schedule settings. Click on this article to learn more about the two different views.
Hide empty tracks

Every content slot you create for the schedule is either attached to the default track 'event sessions' or a track name you have created. These tracks are created before creating the content slots. Hence, there can be tracks to which a content slot is not attached to. This setting gives you the option to decide whether you want to hide such empty tracks or not from the event schedule view on the front end.
Last updated - June 2023.
Written by Nisansala Wijeratne.

If you didn't find an answer to your questions, please get in touch with the Support Team here.
👇