Learn how to decide on which zapier plan to work with for your integrations
To be covered:
Intro
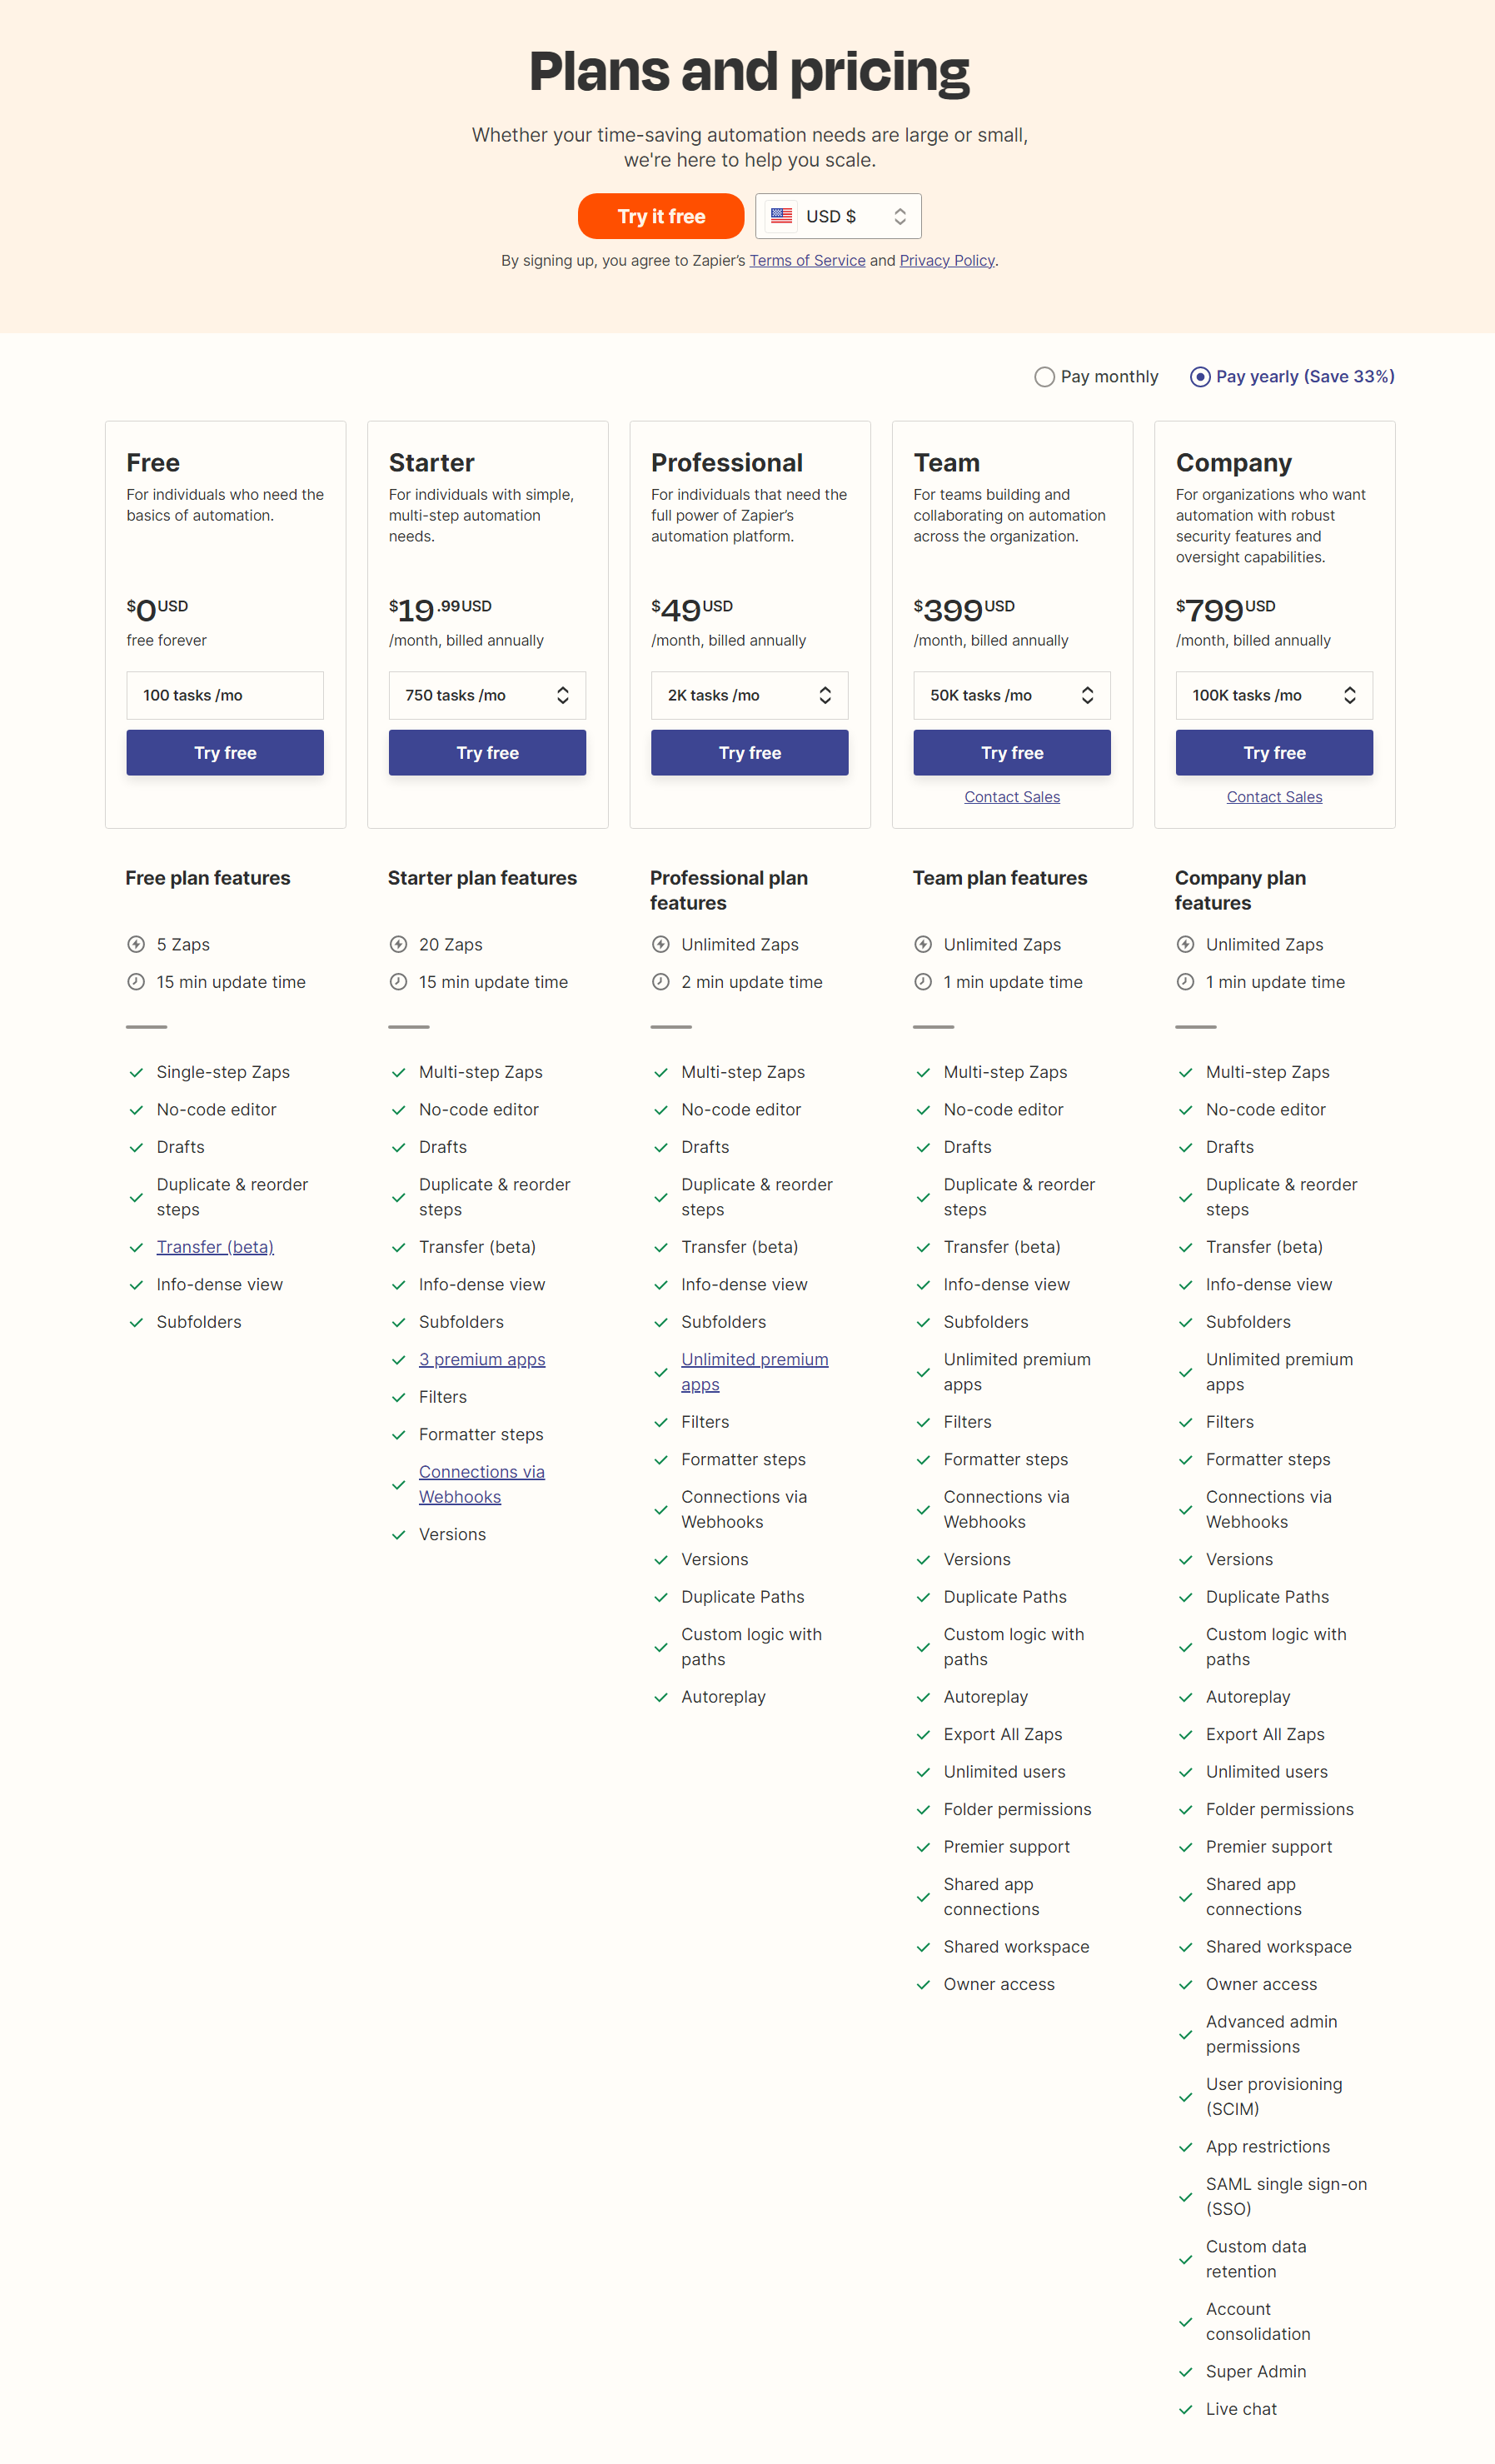
As with any product, Zapier provides a wide range of services. According to the services required, Zapier provides 5 different plans to select from. Let's look into details on what are the services offered by Zapier and the best plan to proceed with.
Deciding on a Zapier plan
Zapier provides various plans made to fit your need. To start with, the free forever plan is ideal to explore, understand the features provided and practice creating integrations through Zapier.
Once ready to take your integrations to the next level, unlock the professional features with the professional plan.
This is the plan recommended by Brella, as it supports an unlimited number of Zaps, which will be required depending on the type and number of integrations you would need to carry out to link your applications to automatically pass data.
Zapier provides a 14-day free trial period. Learn more and signup here https://zapier.com/sign-up
Last updated - Nov 2022.
Written by Natasha Santiago

If you didn't find an answer to your questions, please contact the Support Team here.