Learn how to get access to the Brella app through Zapier
To be covered:
Intro
Zapier supports integration between a wide range of applications. While many of them are listed in the site itself, Brella is set to private and requires an invite to connect with your other applications.
Getting access to the Brella app on Zapier
Our Zapier app is currently in private beta and requires an invite.
- Once you have created your Zapier account, please email your Brella Customer Success Manager to send you an email invite. Please mention the email registered with Zapier
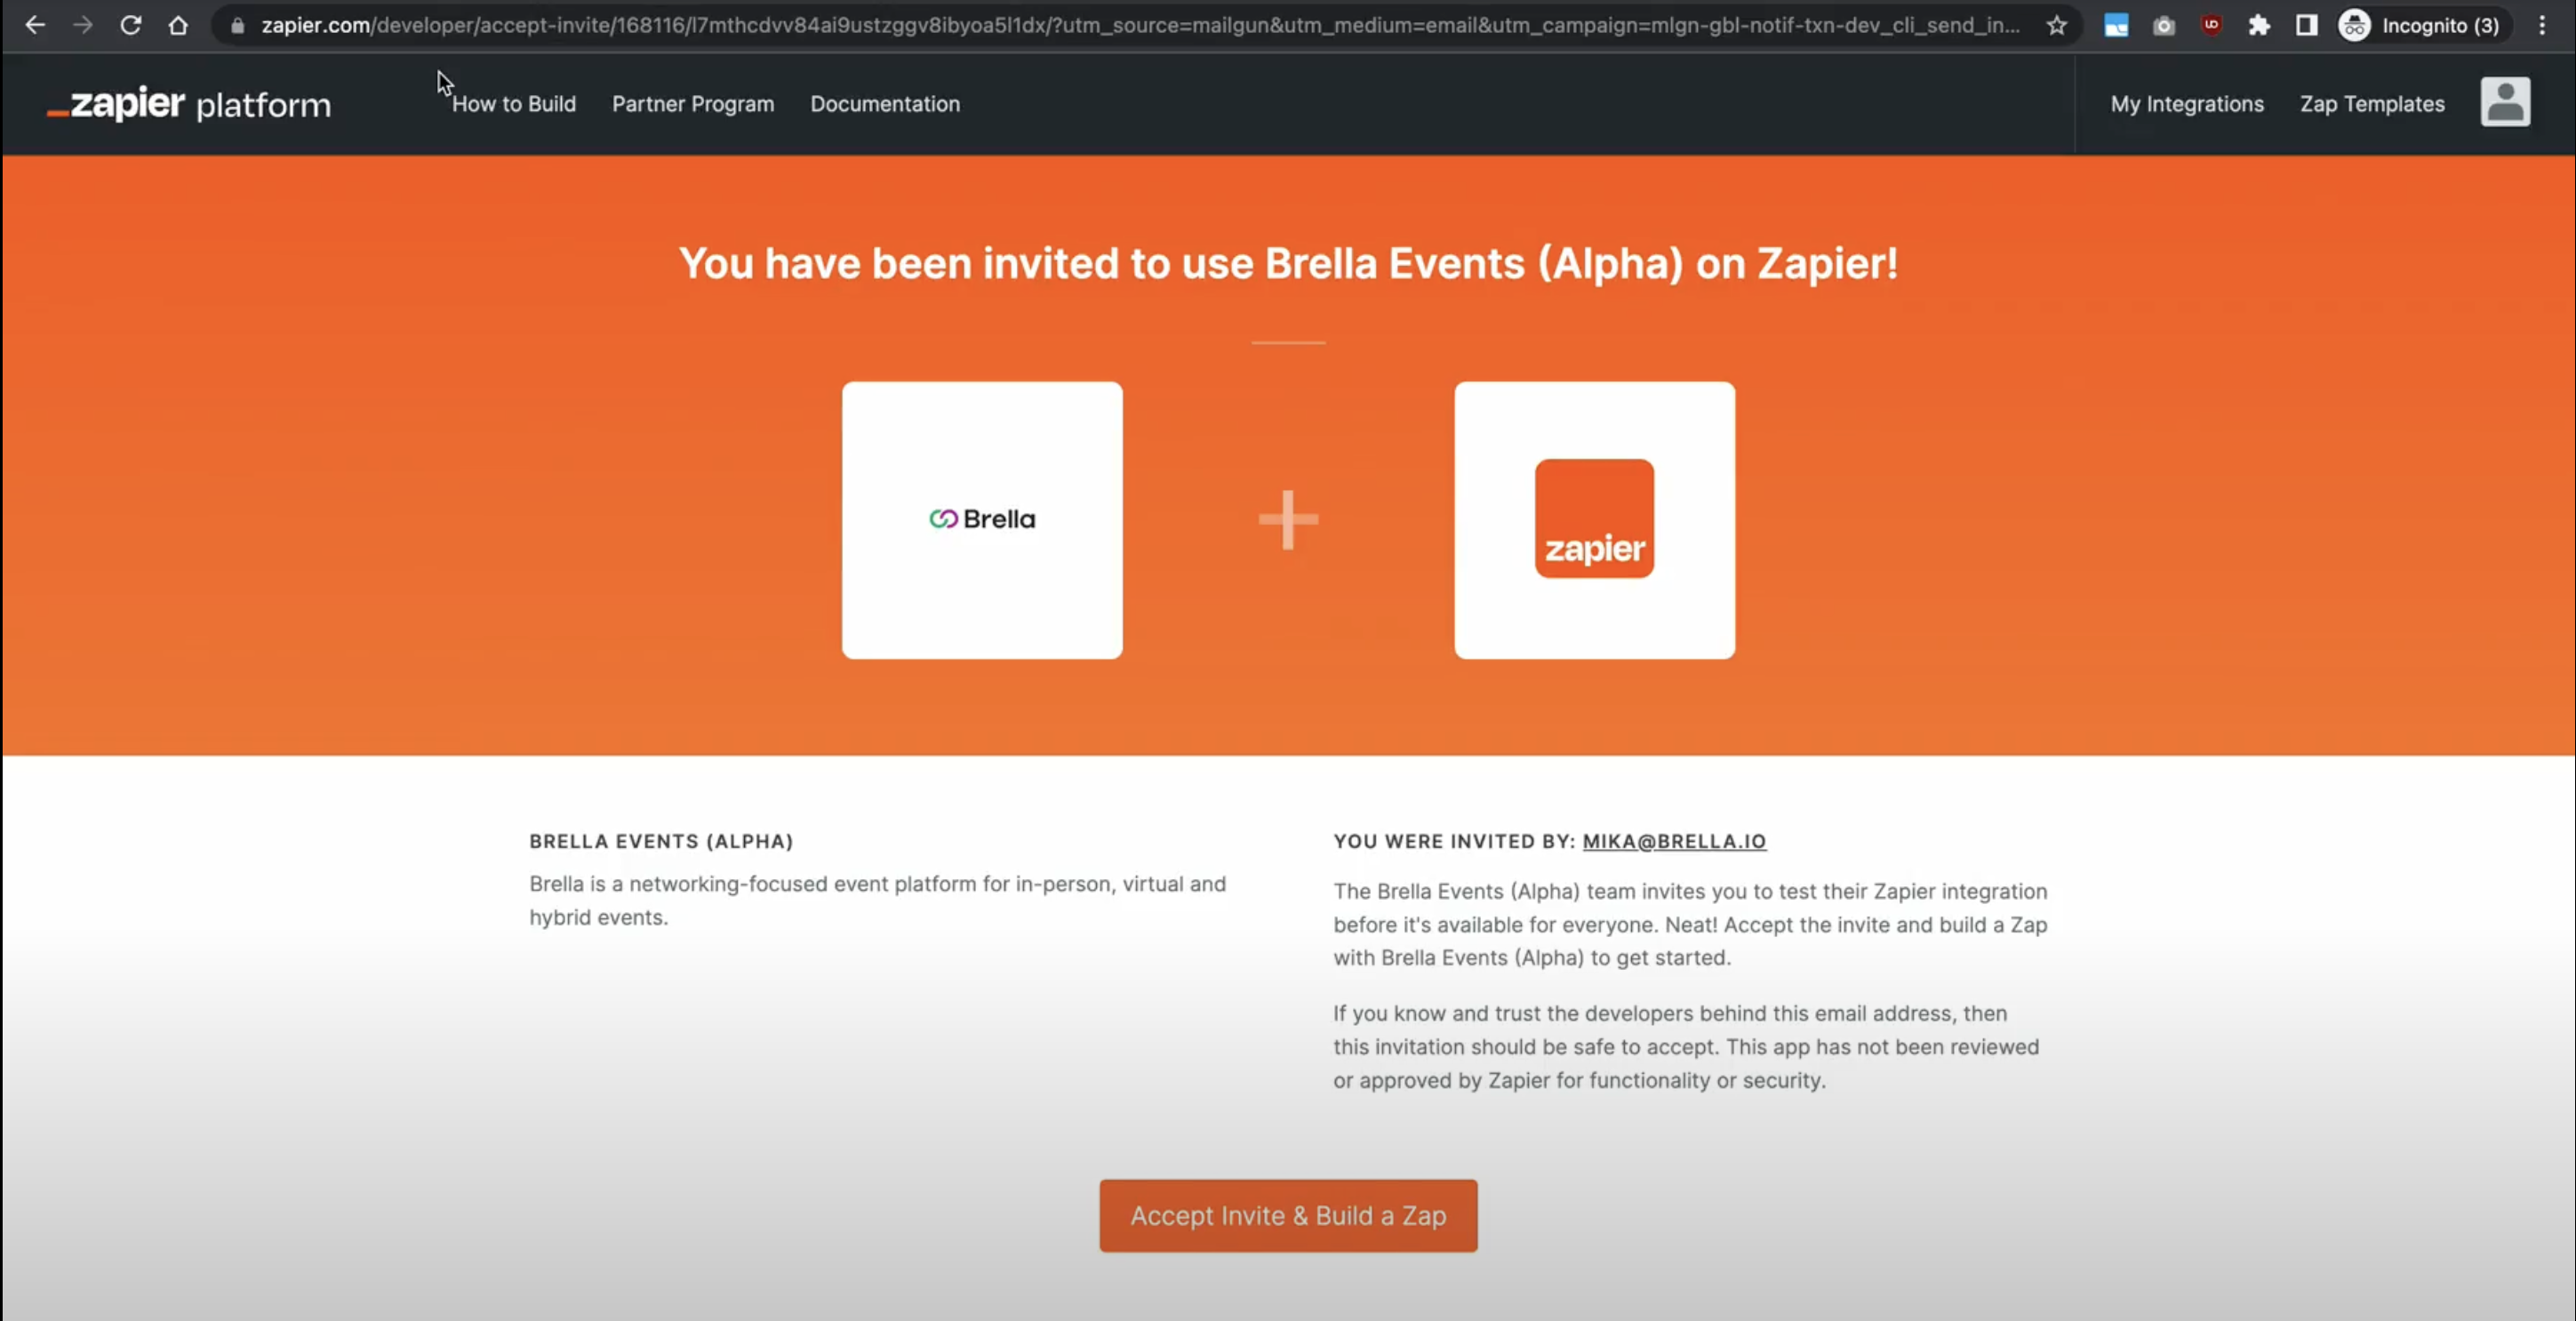
- The Brella integration team will raise an invite to your registered email in Zapier
- You will receive an invite email as shown below.
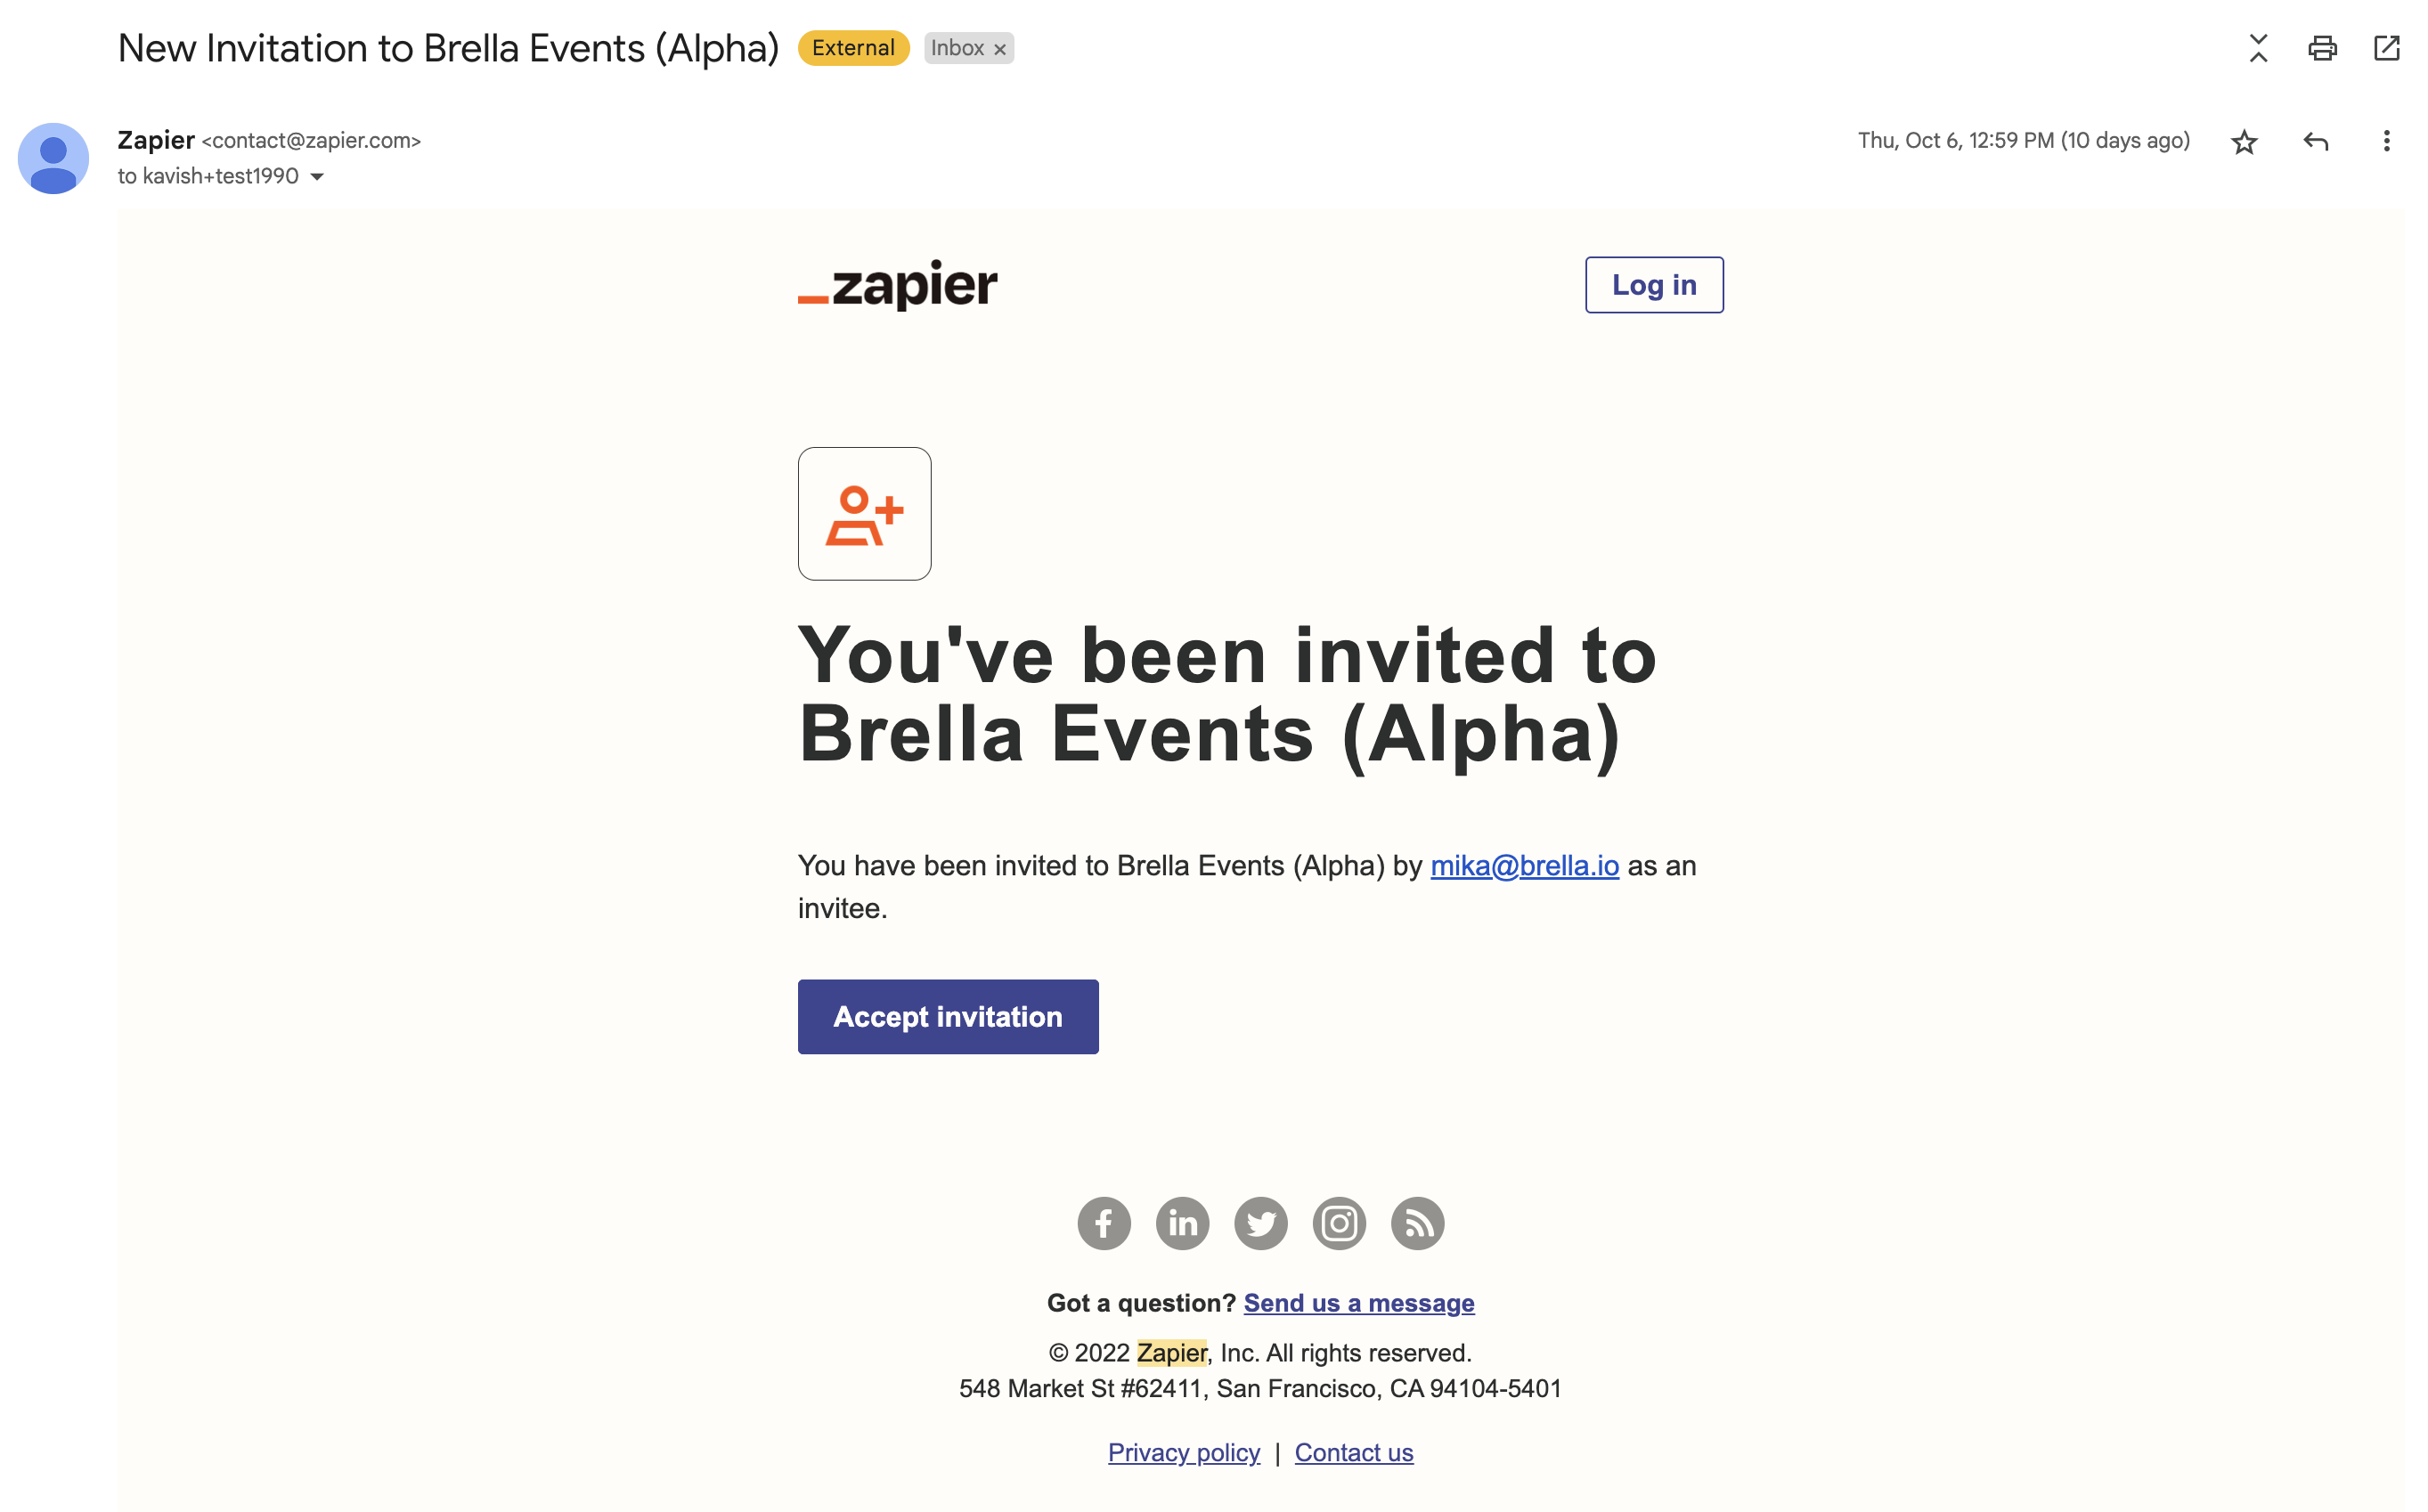
- Click on the blue “Accept invitation” button
- Log-in to your Zapier account if required
- On the next screen, click the orange “Accept Invite & Build a Zap” button.
This will accept the invite, add the Brella app to your Zapier account and take you to your Zapier dashboard.
Last updated - Nov 2022.
Written by Natasha Santiago

If you didn't find an answer to your questions, please contact the Support Team here.