Learn how to manage sponsor categories based on the sponsor types open for your event.
To be covered:
- Intro
- Create sponsorship categories
- Edit sponsorship categories
- Reorder sponsorship categories
- Delete sponsorship categories
Intro
To highlight and categorize your sponsors based on the type of sponsorship for the event, you can create different sponsorship categories in the admin panel to differentiate them during the event. Sponsor categories should be created prior to adding sponsor profiles.
Create sponsorship categories
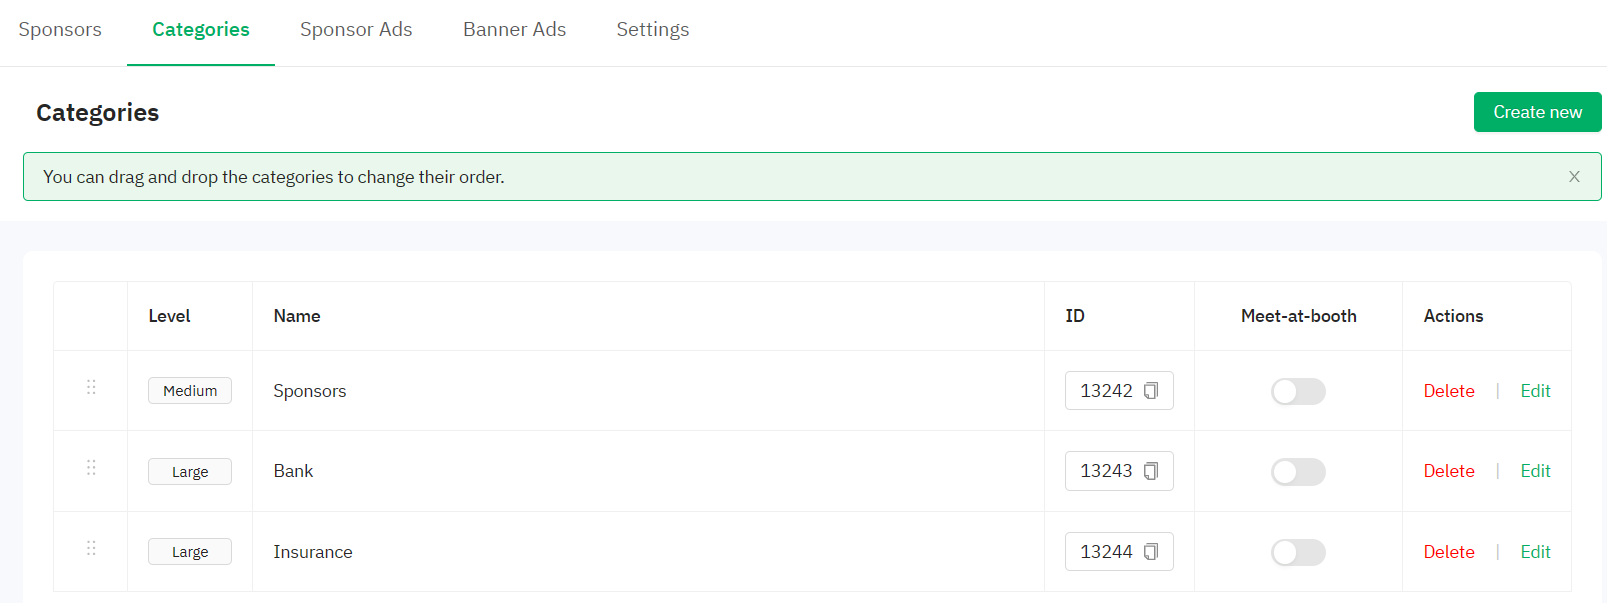
- Navigate to the Admin Panel - Sponsors - Category
- Click the create new button and you will see the following pop up
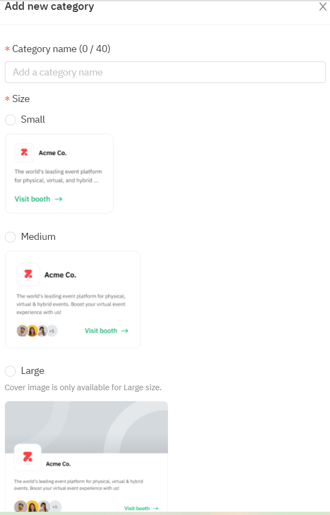
- Select the category type and enter the name of the new category. The sponsor profile size is what your attendees will see in the Brella event front end.
- When you’re finished, click Add and exit.
- Repeat as necessary until all Sponsorship levels (categories) are added.
❗ The cover image is only available for Large size category types.
Edit sponsorship categories
- Navigate to the Admin panel - Sponsors tab
- Click on the Category tab and select the relevant category.
- In the pop-up window, change the name and size.
- Click on Update and Save.
Reorder sponsorship categories
- Navigate to the Admin Panel - Sponsors - Category tab
- From the right side, drag and drop the category to the desired location (up or down).
- Any changes you make will be saved in real-time.
Delete sponsorship categories
- Navigate to the Admin Panel - Sponsors - Category
- Navigate to the right side and select the category to be deleted.
- In the pop-up window, click the Delete category at the bottom.
- Confirm your choice by selecting the Confirm button.
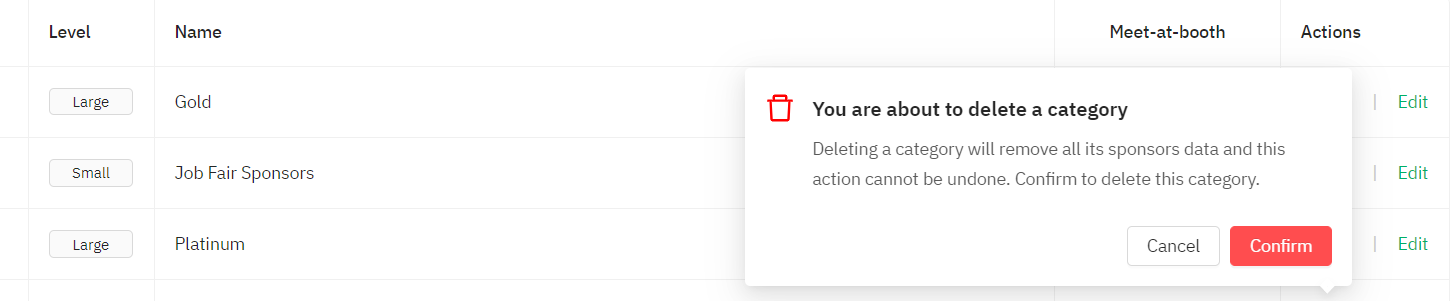
⚡️Caution! Deleting a sponsor category will delete all sponsors in that category and any sponsored ad linked to it. Make sure you add your sponsors to a new category before deleting an existing one.
💡 The meet-at-booth option is now available to be activated on the Sponsor category level. When enabling this feature for a sponsor category it enables the feature for all the sponsor profiles created for that category; the same thing with disabling.
Last updated - July 2023.
Written by Yusra Mohideen

If you didn't find an answer to your questions, please get in touch with the Support Team here.
👇