Learn how to define capacity and manage RSVPs for each session of your event schedule
To be covered:
Intro
Setting the capacity for a particular session will allow you as the event organizer to make more informed decisions regarding venue selection, seating arrangements, and materials/resources needed. Most importantly it will help to highlight a session as exclusive and create the possibility to come up with customized ticketing packages to access such sessions as well. Such sessions will attract an audience who are genuinely interested in the topic of discussion.
RSVPs are a fundamental tool for successful event planning. By encouraging event attendees to RSVP a session you can ensure that your event is well organized and creates a more personalized overall experience.
Set RSVP and define session capacity
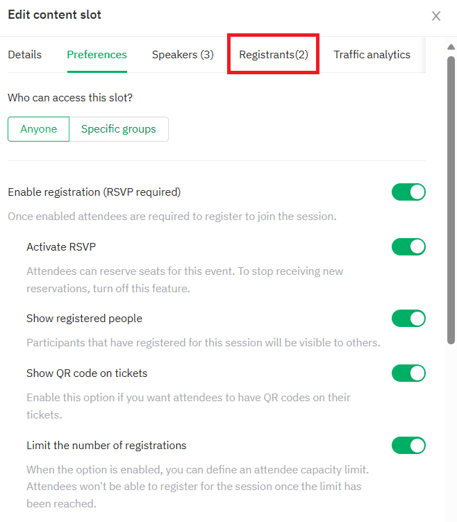
You can enable registration (RSVP) when creating a new session slot in your event schedule on the admin panel.
- Go to Admin panel -> Content -> Schedule
- Click "New content slot"
- Click "Preferences"
- Activate the toggle to 'Enable registration (RSVP required)'.
- 'Activate RSVP' toggle will be turned on by default. You can turn off this feature if you have not set a fixed attendance limit and want to stop receiving new reservations.
- Activate the toggle to 'Show registered people' if you want to make the attendees who have registered for the session visible to others.
- Activate the 'QR code on tickets' option if you need to use the Brella QR code to check in attendees to sessions.
- Turn on the 'Limit the number of registrations' toggle if you are going to limit the attendance for the session and set the number under the 'Limit' section. Click 'Create' to save changes.
💡Attendees won't be able to register for the session once the limit you set has been reached.
Track RSVPs
Once event attendees start registering for a session by reserving their seats, a new tab will be created as 'Registrants' for each content slot of the event schedule.
When you click on the 'Registrants' tab you will be able to see who has reserved a seat for the particular session. You are also given the option to export the registrants' list as a CSV from this point.
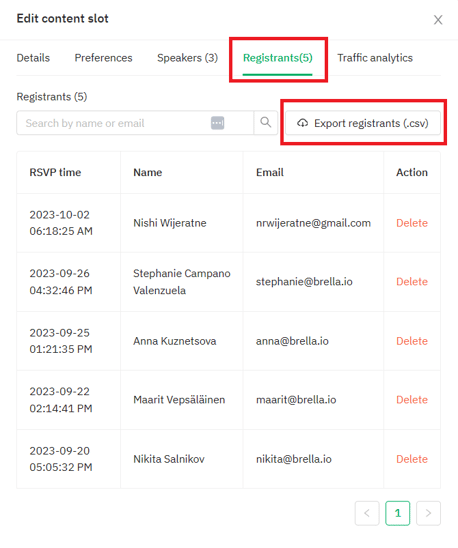
The CSV export will contain the following details of the registrants.

You will be able to manage the registrants who have RSVP a session from this tab since you are given the option to 'delete' registrants as well.
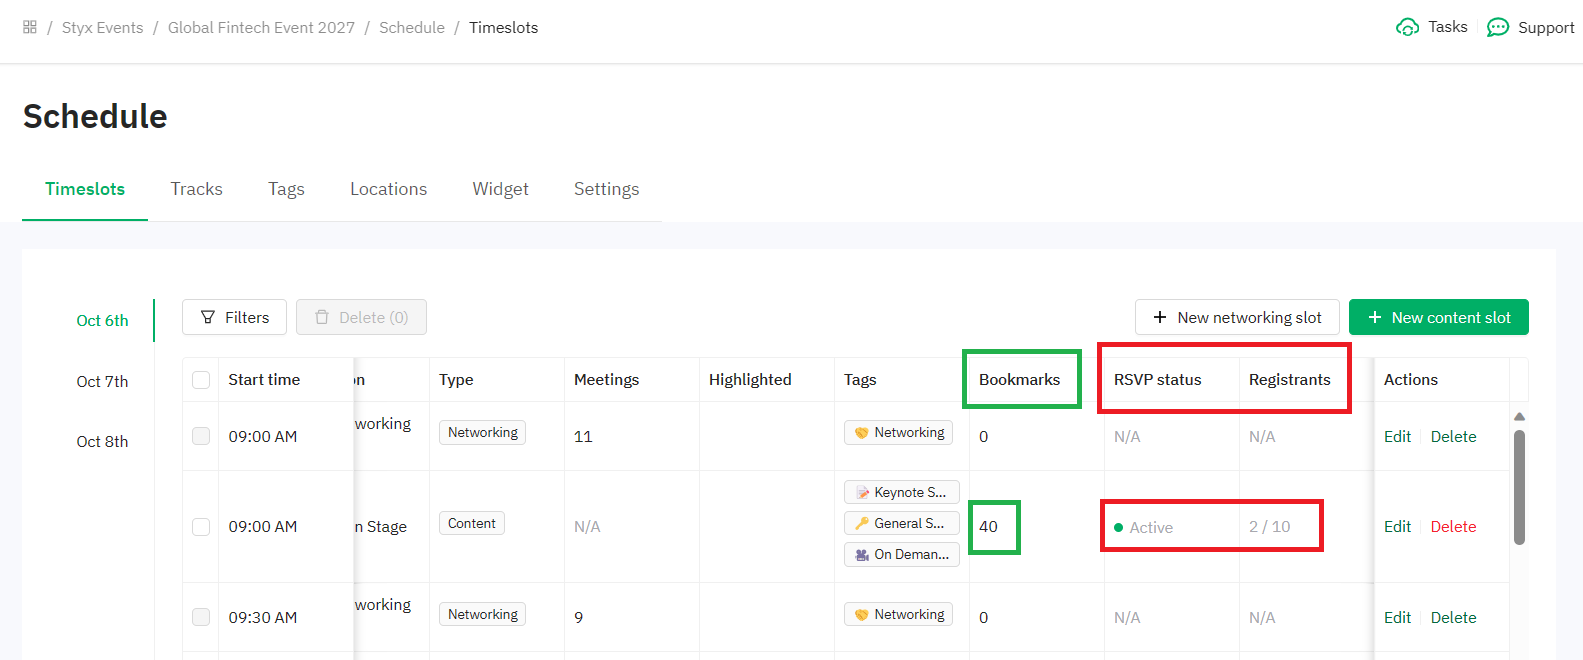
You can see whether you have RSVP is activated, and how many attendees have RSVP or bookmarked a session on the schedule table view as well. The bookmarks count will be shown whether RSVP is enabled or not.
Last updated - September 2023.
Written by Nisansala Wijeratne.

If you didn't find an answer to your questions, please get in touch with the Support Team here.
👇