Learn how to activate the custom domain feature
To be covered
Intro
Brella now gives you the possibility to keep your event emails on-brand by sending them from a custom domain of your choice. You can add one domain per organization.
Note: Once a custom domain is added to your organization, it will result in all emails and every event in that organization being sent from email addresses that use this domain.
You can enable/disable the custom domain at any time. Please contact your Customer Success Manager to have the custom domain tab added or removed.
What do you need to get started?
- A domain you own
- Access to your domain registrar’s DNS records
- Some basic technical knowledge
Let's get started!
After the custom domain tab is activated by our integrations team through your Customer Success Manager, visit the “Custom Domain” tab inside your organization. The process consists of three guided steps.

Add domain to Brella
Enter your domain name (no need for https://, www etc.) and hit the “Next” button. The format of your domain should look like one of the following examples:
- myfantasticdomain.com
- Sub.myfantasticdomain.com

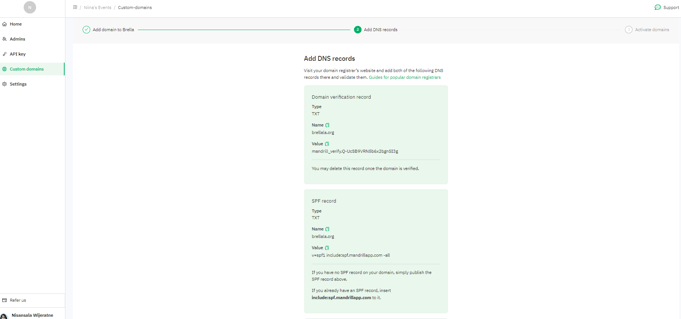
Add DNS records
You will be provided with three DNS records, which will help to verify that you own the added domain, and make sure that your emails are optimized for maximum deliverability. Copy each of the records and add them to your domain registrar.
As part of the DNS records, you will need to have your network administrator add the following records.- Domain verification record
- SPF record
- DKIM record
- DKIM2 record
- DMARC record
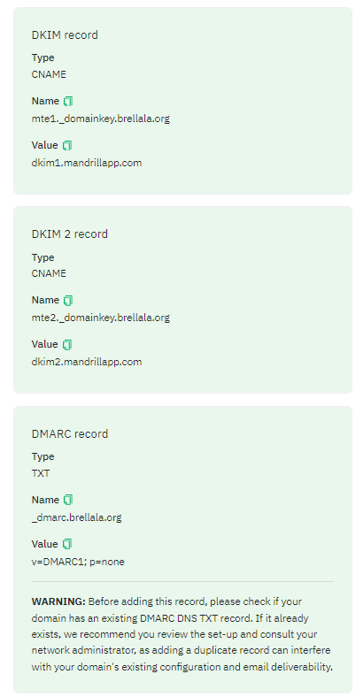
IMPORTANT: If you already have a DMARC record configured in your domain, then please consult your network administrator before adding this. Adding duplicate DMARC records may cause unintended side effects that may result in email deliverability issues from the domain.
Note: These steps may vary depending on your domain registrar. If you need help, please contact your webmaster or network administrator. If you don’t have a dedicated technical person, our Technical Support team or your Brella Customer Success Manager are also here to help out.
8) Wait a few minutes and click on the green “verify records”
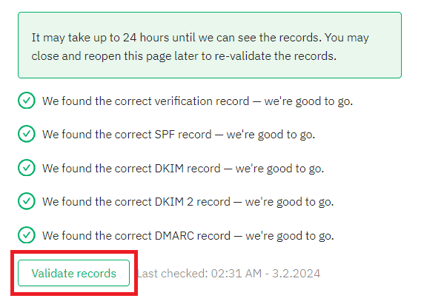
Note: Record verification may happen in just a few minutes, however, it could take up to 48 hours in the worst case.
Just check back periodically and hit the “validate records” button to see if the records are visible. We recommend clicking the “validate records” button no more than once every two hours.
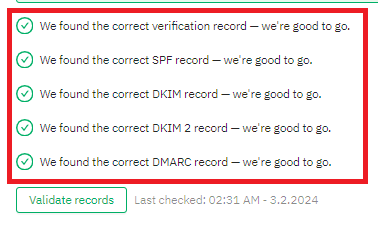
Once all 5 of the records show the green check mark and the “We found the correct record” message, you can proceed to the next step.
Activate domains
In the final step, you can enable/disable the custom domain and define a custom sender name and email address. While the email address doesn’t necessarily have to exist, we recommend using a real one, as this will be set as the “reply-to” address for all sent emails.

What’s a domain registrar?
This is the company where you would have purchased your domain. You can customize your DNS records and other information here. To learn more about registrars, visit this handy article by Cloudflare on the subject. Some popular registrars include GoDaddy, NameCheap and CloudFlare.
For example, if you are using NameCheap, you would enter your DNS records as follows:
1) Login and navigate to the domain you want to use
2) Click on “Manage”

3) Navigate to the “Advanced DNS” tab

4) Add a new DNS record (TXT Type)

5) Add the copied values from Brella to the host and value fields.
6) Repeat this for each of the three records Brella provides you
7) Save your changes and return to the Brella tab

Last updated - February 2024.
Written by Nisansala Wijeratne.

If you didn't find an answer to your questions, please get in touch with the Support Team here.
👇