Learn how to set the identity feature to create personas, industries, and functions after you have set up matchmaking for your event
To be covered:
- Intro
- What are Personas, Functions, and Industries
- How to set the identity feature after setting up matchmaking
- Identity feature settings
Intro
Networking with the right person at an event can be a game-changer. It can help your event attendees to build meaningful relationships, gain new insights, and open doors to new opportunities. However, it’s important to note that networking is not just about meeting the most influential people in the room. It’s about building genuine relationships with people who share your interests and values. Adding attendee personas, functions, and industry details will help your event attendees to do exactly this by being able to find the correct person to network within the crowd.
What are Personas, Functions, and Industries
Persona
A persona is the aspect of a person’s character or nature that they present to others, perhaps in contrast to their real character or nature. In the context of an event, this can be the role they play in the event. For example, Start-up, Investor, Accelerator, Corporation, PR/Media or Sponsor etc.
Functions
A function is what tasks an individual performs in an event. One person can perform many functions in an event and having this information will yet again make networking more meaningful because you will be connecting with the correct individuals. Functions can be Product Development, UX & Design, Leadership, Sales & Business Development, Marketing, Finance & Legal etc.
Industries
There can be many industries in an event. Now the attendees can highlight which industry they are from in their profile so that they connect with the correct people and set up meetings accordingly. Examples of different industries are SaaS, AI/Machine Learning, AR/VR, Gaming, MarTech, HealthTech, HRTech, FinTech, InsurTech, Crypto & Blockchain, FoodTech, eCommerce & Retail etc.
How to set the identity feature after setting up matchmaking
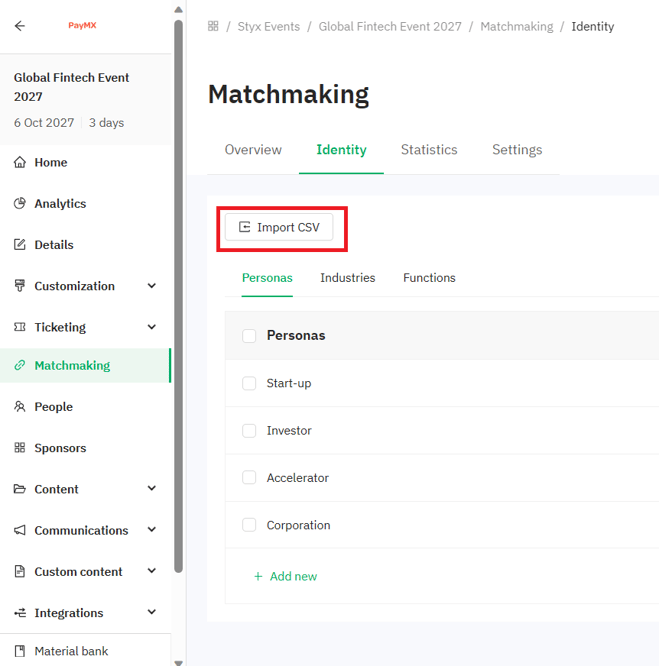
💡The 'Identity' tab will not be visible to you until you activate the identity feature in the settings section of matchmaking.
- Go to manager.brella.io and click on 'Matchmaking'
- Go to 'Settings' and 'Enable identity' feature
- Click the 'identity' tab to see the sub-menu with personas, industries, and function options
- Click on the section you want to add and click the 'Add new' option
- Once done typing make sure to click 'Save changes'
Refer to this article if you are setting up matchmaking and identity data from scratch using Brella templates.
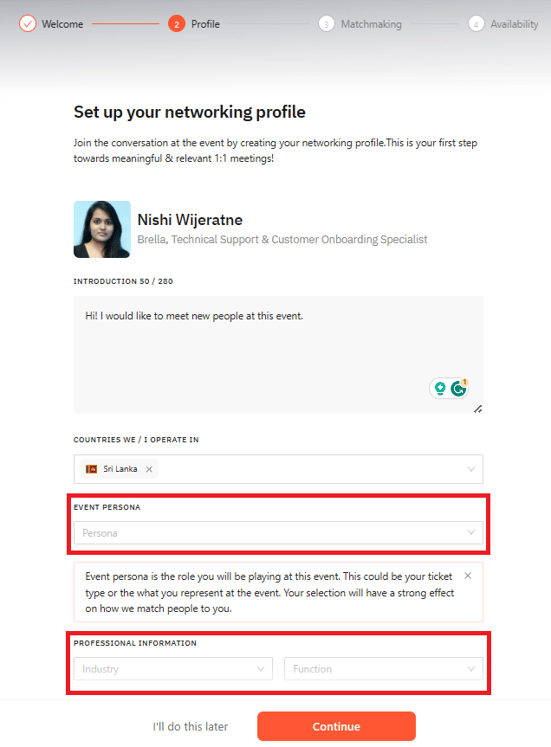
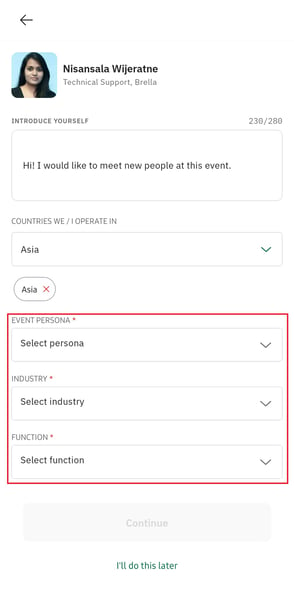
How it will look for the event attendees
| Web app view | Mobile app view |
 |
 |
You can also import this information as a CSV by clicking on the 'Import CSV' option.
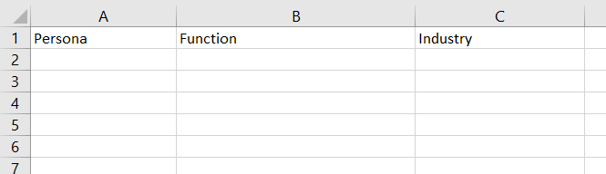
The format of the CSV is as follows:
💡If you would prefer to use a Brella template for identity data, click here to view and download the identity template that will suit your event as a CSV.
Identity feature settings
Enable / Disable identity
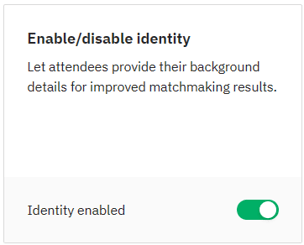
This toggle should be activated for the identity feature to be available for the event attendees. You can disable this feature at any point. Disabling this toggle will not delete any identity information already added.
Mandatory identity data
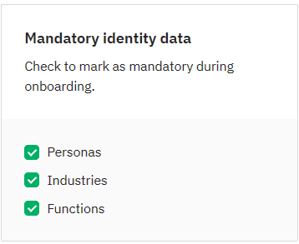
This setting lets you decide which information you want to make mandatory to be added when attendees are creating their event profile. You can select/deselect as you wish. Once a field is made mandatory here, attendees will not be able to complete creating their profile until they fill in that field.
Export identity data
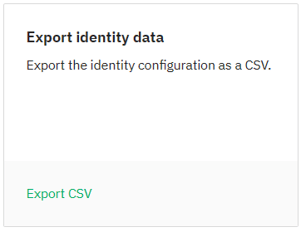
This setting lets you export the identity data that you have already added as a CSV.
Last updated - December 2023.
Written by Nisansala Wijeratne.

If you didn't find an answer to your questions, please get in touch with the Support Team here.