Learn how you can use Brella QR codes for lead scan and check in purposes.
To be covered:
Intro
QR codes can be used in events to keep track of potential leads, locate other event attendees, and for check-in purposes in the event.
Use Brella QR codes for lead scanning
- When you are scanning as a sponsor:
- if the person you're scanning did use the invite, then you can scan the QR code from their badge (or also from their app), and the app will find that attendee as a user in the app and allow you to save this person as a lead;
- if the person you're scanning didn’t use the invite, then you can still scan the QR code from their badge, and you will be able to see their registrant details and also save them as a lead.
- When you're scanning as a regular attendee:
- if the person you're scanning did use the invite, then you can scan the QR code from their badge (or also from their app), and the app will find that attendee as a user in the app and allow you to save this person as a lead;
- if the person you're scanning didn’t use the invite, then you can still scan the QR code from their badge, and you will be able to see their registrant details and also save them as a lead.
If the event is public, then the QR codes can only be found within the app and so there would only either be the sponsor lead scanning experience or the attendee contact scanning experience described in the linked articles.
💡To discuss the integration options, contact your customer success manager.
To get the QR codes exported via the Brella CSV export, follow these steps:
- Go to the admin panel (manager.brella.io);
- See that your event is in in-person or hybrid mode on the Details tab;
- Make your event invite-only by following these steps;
- After that, navigate to the People tab, then Invites;
- If you haven't yet, create the invites by following these steps;
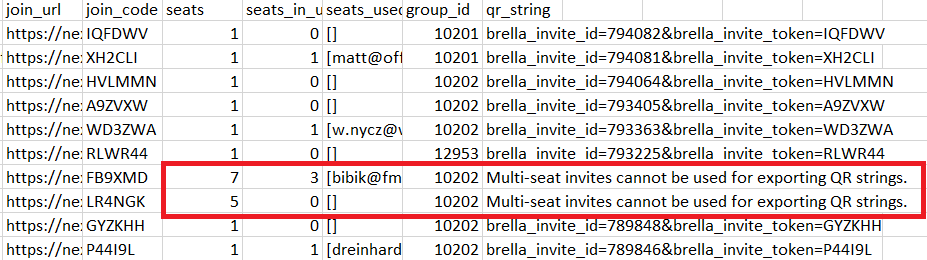
- After creating invites successfully, export the list of invites as a CSV, and there you'll find a column with the title qr_string, which can be converted into the Brella QR code either via the ticketing/badge printing system that you use or then manually through some free QR code generator (e.g. here);
- These QR codes can then be used for the use cases described above.

One thing to note is that Brella doesn't allow to export QR codes for multi-seat invites. So if you want to have the QR codes on your event badges, make sure to have one seat per invite.
Use Brella QR codes for check-in
Brella QR codes can also be used to check attendees into the event. By using Brella custom emails or via the integration, you can send your attendees their QR codes.
Keep in mind that you would need to make sure the check-in platform of your choice and the Brella platform is integrated.
In some cases, we have already established direct integrations. For example, Brella has direct integration with Xtag (read more here), so if you opt-in to use their services, the registrant information from Brella will automatically pass on to Xtag and you would see the Brella QR codes on the Xtag dashboard, be able to customize badges with the Brella QR codes, and check in people to the event or sessions with Xtag's hardware by scanning Brella codes.
To learn about other integration options, don't hesitate to contact your customer success manager.
Last updated - July 2023
Written by Rajinda Wijetunge

If you didn't find an answer to your questions, please get in touch with the Support Team here