On the People page of your event, attendees will have the chance to see all participant's profiles, including those that didn't complete their profile to network through a meeting or chat.
Content
- What's the People tab?
- Attendee Profiles
- Search Bar & Attendee Filters
- Start Networking > Suggest a Meeting
💡This tab is only available for attendees who have access to networking features.
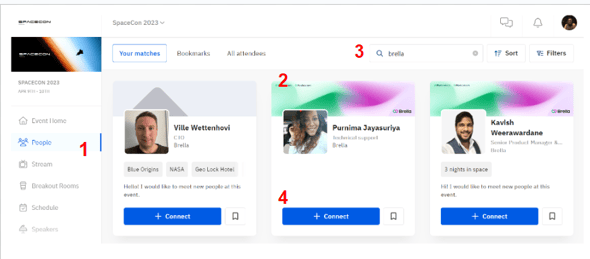
1. What's the People Page?
This page is where the networking magic happens and where partners and all attendees can see all participants whether they created a profile or not. Additionally, it has two sub-tabs that help search and find people based on their interests.
- Your Matches - this tab displays only participants with at least one similar interest based on the categories a participant chose during the registration process.
- All attendees - this tab displays all attendees, including those who didn't enable networking yet or haven't completed their profiles.
- Bookmarks - this tab shows the attendee profiles that you bookmarked during the event.
👤 The Sponsor Ad is placed on the fourth profile card. How to create a Sponsor Ad?
2. Attendee Profiles
There are two types of profiles at Brella.
👤 1. A Completed Attendee Profile
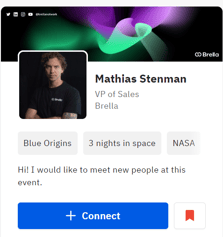
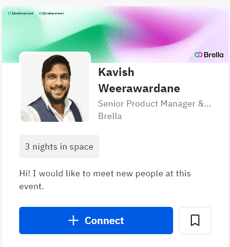 The image shown on the right is an attendee profile card that has been created properly and is ready to network!
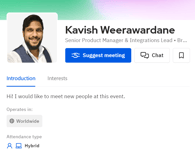
The profile card shows an overview of the attendees details. To learn more about the attendee you need click on the profile card.
It will show the participants' basic details, including a short introduction, their interests and the countries they operate in. It will also show the attendance type (Virtual, In-person, or Hybrid). Additionally, as an attendee, you can connect with other participants through a video call or onsite at the Networking area, depending on your attendance type.
2. Incomplete Attendee profile
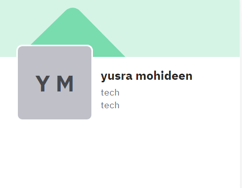
On the right, you can see an attendee profile card that hasn't been completed and is not ready for networking.
You can only see the basic information details of this attendee.
❗Attendees who haven't customized their cover photos are themed to the event's primary brand color.
👉 When registering to Brella for the first time, Brella will ask participants to add a profile and cover photo. How to add a profile picture and cover photo?
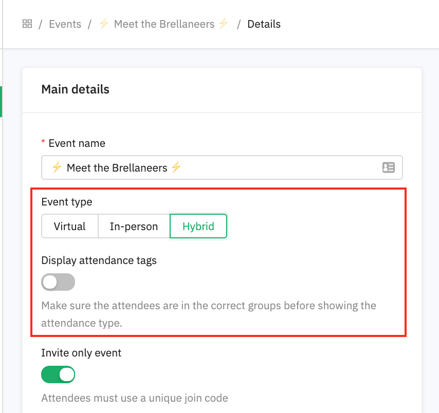
How to Enable Attendance Type Tags?
There are three attendance types in Brella; virtual, in-person, and hybrid.
To enable the attendance types on each profile, go to the Admin panel, navigate to the Details tab, under Display attendance tags, toggle the button on/off once you've created Groups, and populated it with participants. What are Groups?
❗Please note: Attendance tags rely on user groups to identify an attendee's mode of attendance. Therefore, ensure your attendees and sponsors have been sorted into the correct groups before you turn this feature on.
This function comes in handy for participants' networking feature availability. For example, virtual attendees can see the video call icon, and in-person attendees can only see a Table number instead.
3. Search Bar & Attendee Filter
The Search Bar and Filters button work to help find specific people by searching their name, company, title, interests, and introduction in the search bar.
The filters help to find relevant connections at the event. Search for a specific interest and goal, and you'll find a list of people with the interests of your choice.
Case in point, Peter is a travel consultant looking for people looking for the best practices on networking . So, he selects to filter people by interest (3 nights space) and goal (Exploring or networking about this service). He can now see the list of people looking for his services and suggest a meeting or start a chat.
4. Start Networking ➡️ Suggest a Meeting
Additionally, on this page, the networking magic happens! Participants will get to suggest a meeting to others by clicking on the button "Connect" After that, they will need to introduce themselves and select an appropriate time for both parties.
For steps on how 1:1 meetings work, please go to How 1:1 meetings work?
💡The "connect" button will remain the same until the a meeting has been suggested.
Last updated in January 2024
Written by Yusra Mohideen

If you didn’t find an answer to your questions, please get in touch with the Support Team here.
👇