Learn how to share the invites directly from the Admin Panel, and how attendees can claim the invites to join the event.
To be covered:
- Intro
- How to send invitation emails to all registrants?
- How to send invitation emails only to selected registrants?
- Enable invite visibility on the event app (Web and mobile App)
- How do attendees claim the invites
- How to un-publish Invites?
- Troubleshoot invites not received
Intro
After creating the invites or unique join codes for your audience, you can now send the join codes directly to each attendee via email.
Each attendee (unique join code) will receive an email from Brella if you click publish. Additionally, attendees will receive their invitation on their Brella account if you enable "Show Invites on Brella Apps".
The invites should be sent out or published when your event is ready. Learn below how to send the invites to your attendees and how it works from start to finish.
How to Send Invitation Emails to All Registrants?
Once you have created all invites and you are ready to invite registrants to the event, you can invite them:
- On the top section of the Invites sub-tab, click the Publish button
- It will open a new pop-up, giving you the option to click Publish or Cancel.
As soon as you click Publish, all invites will be sent out. Invites without an email address will not receive an invitation. You will also be shown a count of the invites getting published.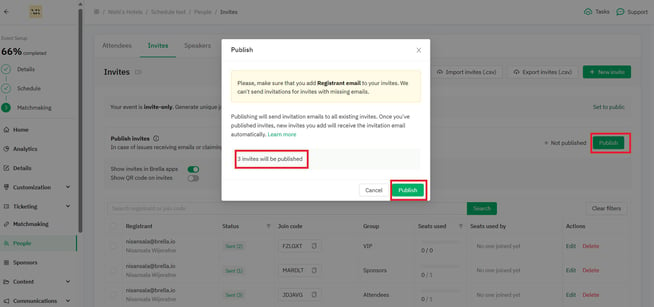
❗After you click 'Publish', every time you create a new invite, Brella will automatically send an invitation email to the recipient.
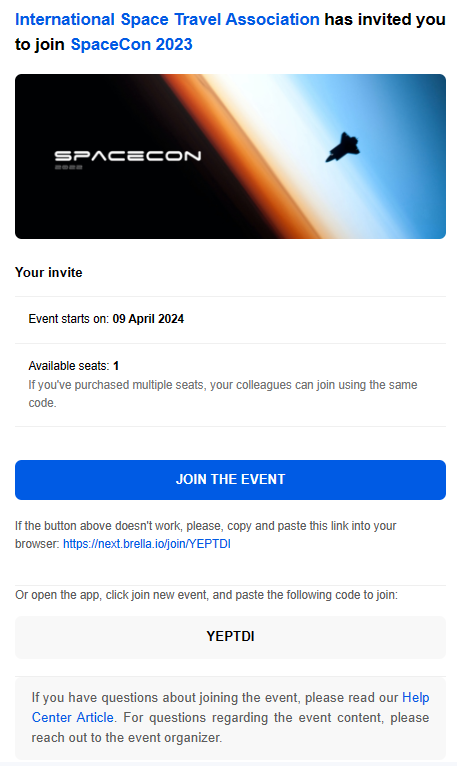
Example of invite email:
How to Send Invitation Emails Only to Selected Registrants?
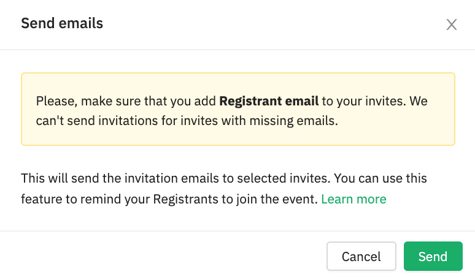
- Select multiple invites and click on the "Send emails" option in the selection bar next to the "Delete" option to send emails to specific registrants.
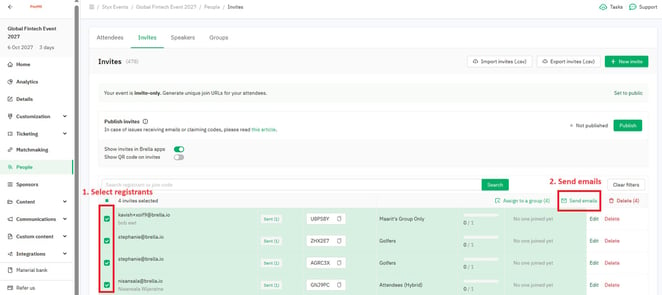
- A new window will open, click Send.
☝️ Note: An email will not be sent out if all seats in an invite have already been claimed or if the number of seats is zero.
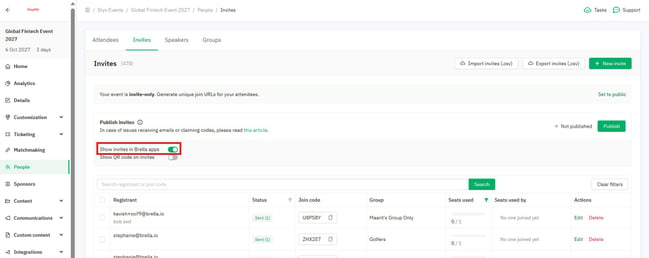
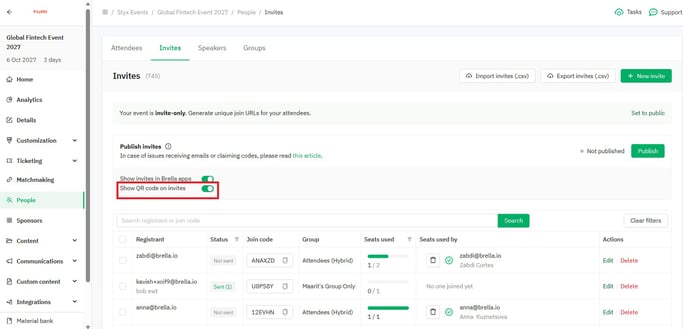
Enable Invites Visibility on the Event App (Web and Mobile App)
You can use the "Show Invites in Brella Apps" switch if you want to have an additional option for participants to claim the seat from the Brella web app or the mobile app.
- To enable it, toggle the "Show invites in Brella Apps" option before or after clicking the "Publish" button.
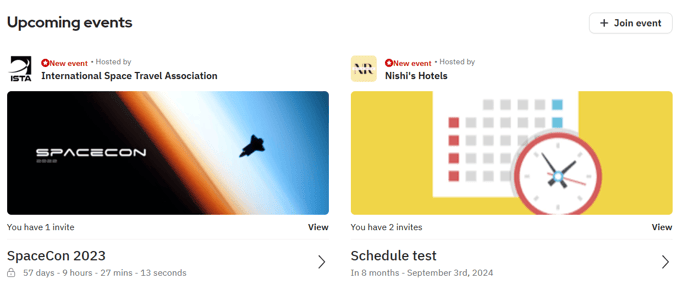
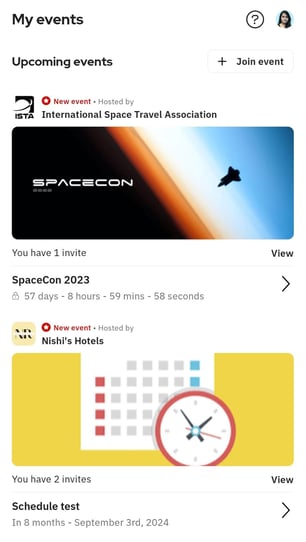
- 💡To claim the join code or invite, attendees can go to their account and the invite will be shown to them as follows (Web app):
- 💡To claim the join code or invite, attendees can go to their account (Mobile app)
- You can now show the QR code on the invite as well. Simply switch on the Show QR code on invites option and the QR code will be visible to the attendee when they are claiming the invite.
How Do Attendees Claim the Invites
✉️ If the invite is delivered to their email, they have to go to their inbox and open the invitation email coming from Brella.
👤 If the invite is delivered to their account, attendees go to their Brella account at next.brella.io. On the home page, it will show the invite for the new event.
👥 Where the invitation has multiple seats, the attendee registered to the event can either,
- Navigate to view the multiple invites and share the code
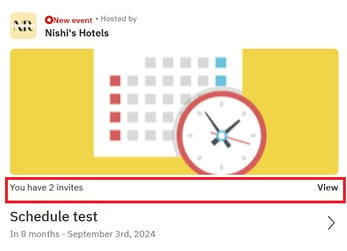
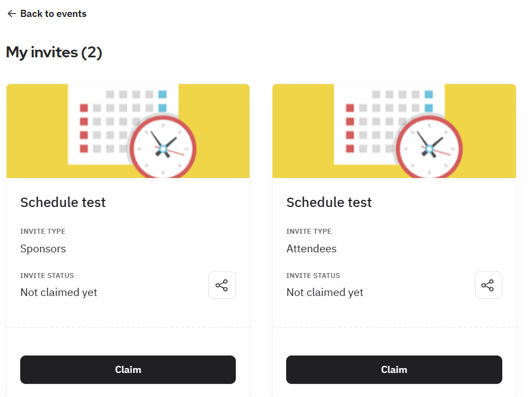
- OR Click on the event cover image and claim a preferred invite
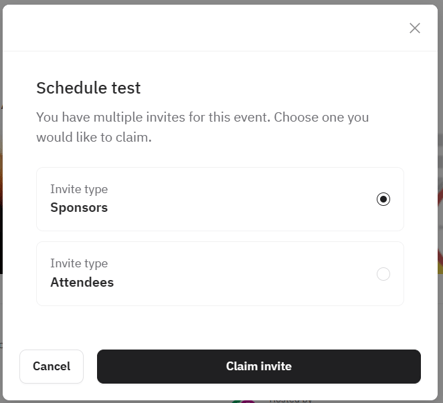
Clicking on the black Claim button will prompt you to create an event profile. See how the profile set-up screen.
How to Un-Publish Invites?
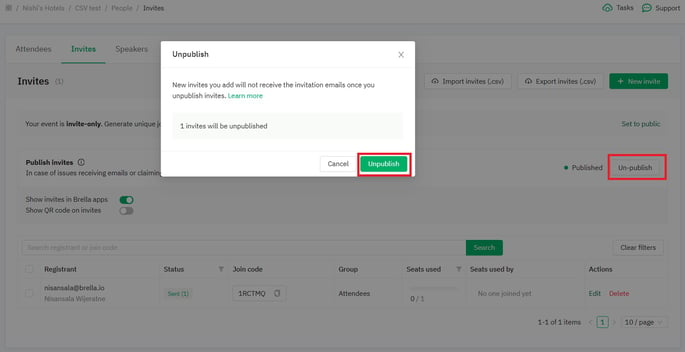
🔑 Unpublish invites to prevent new registrants from receiving automated emails.
You can unpublish invites at any time, ensuring that future registrants won't receive automated emails with the join code when their invites are created in Brella.
Go to the People tab > navigate to the Invites sub-tab > Click on Un-Publish and confirm by clicking Unpublish again.
Troubleshoot Invites Not Received
- Check that the attendee email matches the email assigned in the Invite.
- Ask whether the attendee can claim the ticket from their account. Check if the "Show Invites in Brella Apps" is enabled.
- Ask them to enable our domains. brella.io and *@brella.io. A strong firewall could be blocking emails from being successfully delivered in time. For details, go to Troubleshooting steps for Strong Firewall Security Setup.
Last updated - January 2024.
Written by Nisansala Wijeratne.

If you didn't find an answer to your questions, please get in touch with the Support Team here.
👇