Learn and understand in detail the journey your customers will go through when joining your event and how they will interact with Brella.
Putting yourself in your attendee's shoes will allow you to go through their experience at Brella.
The steps in this article will walk you through all Attendee-Brella touchpoints where you as the organizer can impact how you communicate this to your audience. There is a takeaway on each step for you to remember and implement in your communications plan.
Before going to the first attendee step with Brella, let's clarify that the attendee journey has started when they have registered for your event on your registration web page. Then, they receive the Brella invitation sent by you, the organizer.
Let's start! 🚀
Content
- Receiving the invite email to Brella
- Signing-up to Brella
- Creating an event profile
- Landing on the event homepage
- Exploring the People page
- Setting up 1:1 meetings
- Exploring the Schedule page
- Watching the Streams page
- Joining a Breakout room
- Exploring the Sponsor booths
- Post-event
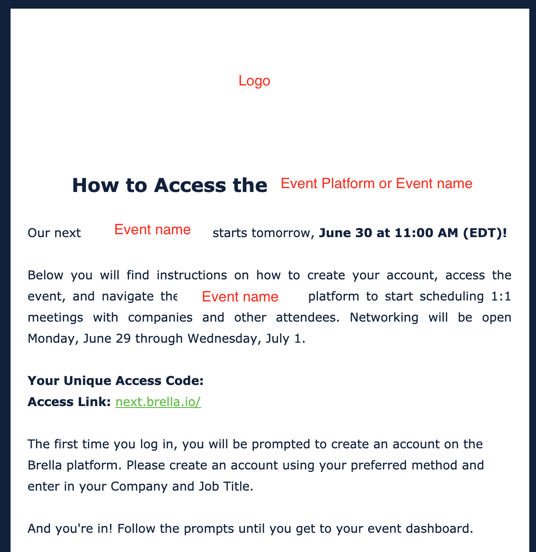
1. Receiving the invite email 📧
👉 Once attendees have registered for your event, they will receive an invitation email with a join link and join code to access the platform sent by the organizer. For example:
- Join URL: https://next.brella.io/join/CODE123
- Join code: CODE123
👉 After receiving the email, attendees should proceed, and 1) click on the join link and create an account OR 2) go to next.brella.io and create an account and then input the join code.
- If they have an existing account, they can proceed with their account by selecting the same sign-in method and email when created.
- If they don't have one yet, they can create a Brella account by following these steps. They can join Brella through the Web App or Mobile App, both land on the same sign-in page.
🎯Take away
The invitation email should include clear instructions on how the attendee can access Brella through your email software. Send both join link and code as the join link and join code work differently. You can use the join link to go to the Web App on desktop or mobile devices, while the Mobile App requires the join code.
Example:
💡 When planning your event, choose an attendee registration method.
2. Signing-up to Brella 📋
👉 After receiving the email, attendees should proceed and 1) click on the join link and create an account or 2) go to next.brella.io and create an account and then input the join code.
- If attendees have an existing account, they can proceed with their account by inputting their email and following the given steps.
- If the attendees don't have one yet, they can create a Brella account by inputting their business email and Brella will authenticate it as their email is not linked to any Brella account. Then, they can click on "Create Account".
🎯Take away
Include instructions in the email on how to join with a join code and a join link. For example, you can find the instructions from the links below.
3. Creating an event profile 👤
👉 After creating the account, attendees will land on the event's welcome page, followed by the Brella registration process.
When attendees join Brella, they go through 4 steps (Welcome, Availability, Interests(Matchmaking), and Profile) to ensure their event profile and networking possibilities are set up optimally.
🎯Take away
Include in the invite email the two steps when joining the event in Brella. First, the attendee will have to create an account, then create an event profile.
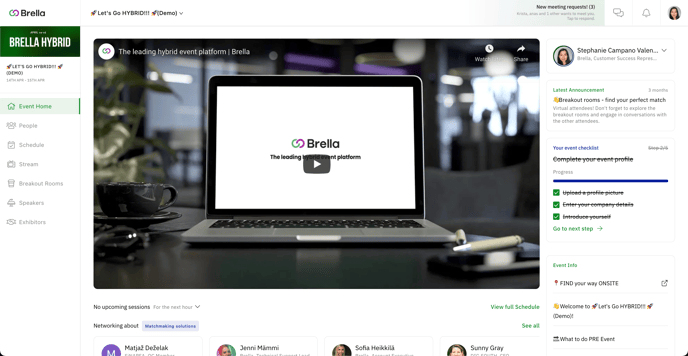
4. Landing on the event homepage 🏠
👉 After the registration is done, attendees will land on the event homepage.
This page is the engagement portal for attendees to access any area of the event. Learn how this page can benefit you, as the organizer, and the attendees together.
🎯Take away
Learn how this page can benefit you, the organizer, and your participants. Learn more here: Make the most of your event homepage!
5. Exploring the People page 👥
👉 When attendees land on this page, they will have access to the participant's list.
The attendees will first see their top matches based on the interests and intents chosen during the registration process. Also, they can see all attendees regardless of their interests and they can also bookmark people interested in follow-ups or suggest a meeting post-event.
What's more, they can use the Filter to find people per interest and intend to explore the list of people they can meet with. Our matchmaking has four intent, so you can filter people by networking, trading, investing, and recruiting.
❗If participants didn't enable networking (created a profile), they could not see this page. To see this page, they need to set up a profile to enable networking.
🎯 Take away
Encourage attendees to opt-in networking at the time of registration. This will allow them to connect with others before the event begins. You can also inform your attendees that they can filter people according to the matchmaking categories, interests, and intents.
6. Setting up 1:1 meetings 🤝
👉 Web app
From the People's page, attendees can suggest meetings to others whether they have common interests or not. On this page, they can connect with anyone who has open available meeting slots in their profile.
The attendees will easily suggest a meeting by clicking on Suggest meeting on a profile card.
Participants can learn how the 1:1 meetings work by reading this guideline: Understanding the Brella Meetings.
🎯 Take away
Explain to attendees how to suggest meetings in 3 simple steps.
7. Exploring the Schedule page 📅
👉 When attendees land on this page, they will have access to the event's agenda and their networking availability set by the event organizer.
They can search and filter sessions and networking time slots and set their networking availability after the registration to allow other participants to send meeting requests before and during the event.
Additionally, the attendee can use the filter section to:
- Bookmark their favorite sessions.
- Past content, to go back to the past sessions.
- Filter per session, meetings, and networking availability.
- See schedule per event day.
- Filter per tags & locations to see sessions per track, type of sessions, location, etc.
- Set your networking availability per day and per time slot.
- Sync your event schedule with her personal agenda.
Additionally, they can find more details on sessions and speakers from the schedule. Learn more about what a session or content slot contains.
🎯 Take away
Ensure to inform the attendees that they can see session and speakers information on this page; they can also create their own schedule with bookmarks, set their networking availability for the event, and synchronize the event agenda with their personal agenda.
8. Watching the Streams page 📺
👉 When attendees land on this page, they will have access to the event's content, whether it is a live stream or pre-recorded video. The tab is usually enabled before the actual event with a Welcome video.
🎯Take away
Each event at Brella is unique, so we encourage you to brief attendees on your event content. Also, learn what access points there are for the Streams tab of your event.
9. Joining a Breakout room 🚪
👉In the Breakout room tab, the attendees can find different virtual "rooms" that work as meeting points for the event attendees. They can find coffee breaks, workshops, and much more!
- To enter a breakout room, the attendees need to navigate the 'Breakout' room tab in the event and choose the room from the cards they wish to enter and join the meeting!
🎯 Take away
Create a breakout room and test it before the event starts. Remember to include moderators and speakers. Inform participants how to join a breakout room. Navigate your event: Breakout rooms.
10. Exploring the sponsor booths 🗺️
👉Attendees can find virtual booths designated for sponsors, exhibitors, and other interesting content about the event on this page. They can find virtual booths always with the kiosk stand icon in the event navigation.
The attendees can interact with the booth's elements: the carousel and the sidebar section,s where they can access the sponsor's digital materials, read more about the company, and chat with sponsor reps.
🎯 Take away
Attendees enjoy learning more about companies and establishing potential partnerships. Encourage sponsors reps to proactively reach attendees out and invite them to their booths to drive more traffic.
11. Post-event 🎉
👉Once the event is over, attendees can go back to Brella any time and review the content the organizer has enabled to show.
🚨Please notice, Brella shuts for new attendees as soon as the event is over; therefore, they cannot access the platform anymore but attendees who managed to join the event can still access the event content and see previous meetings.
Usually, the on-demand content can be found on the Schedule page or Streams page depending on where you place it.
When it comes to the 1:1 connections made during the event, the virtual meeting rooms will close a couple of days after the event is over. But attendees can chat for follow-ups without limits.
🎯 Take away
Be aware of what participants can do post-event. If you plan to have on-demand content available, ensure you enable the tabs and add the recorded videos to the respective sessions. At last, inform your audience what their options are post-event.
Last updated on December 2021.
Written by Stephanie Campano Valenzuela.

If you didn’t find an answer to your questions, please contact the Support Team here.
👇